

Fortunately, repairing a peeling tub is a manageable DIY project that can save you money while restoring the tub’s appearance.
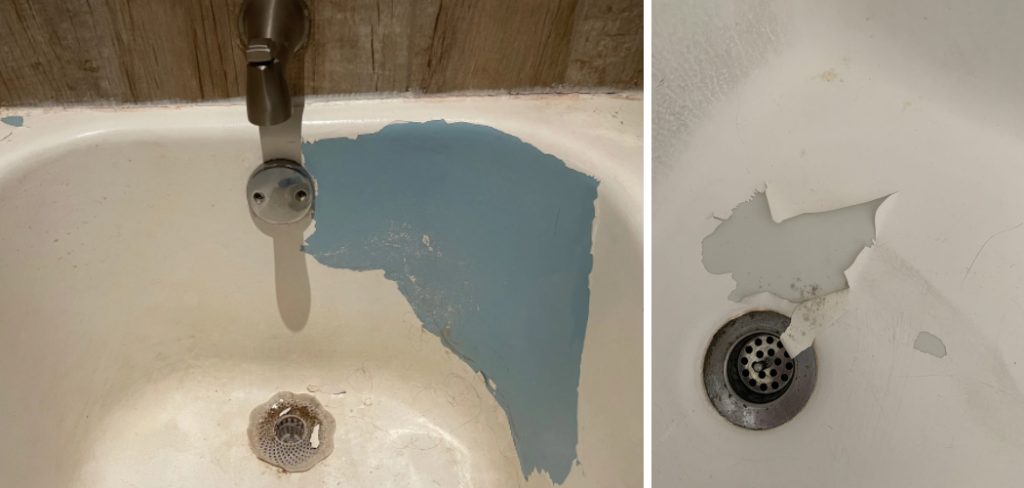
A bathtub that is peeling can be both unsightly and uncomfortable, detracting from the overall aesthetic of your bathroom. Peeling often occurs due to wear and tear, improper cleaning agents, or substandard refinishing.
In this guide on how to repair peeling tub, we will walk you through the essential steps and materials needed to effectively repair your peeling tub, ensuring a smooth and long-lasting finish.
What is a Peeling Tub?
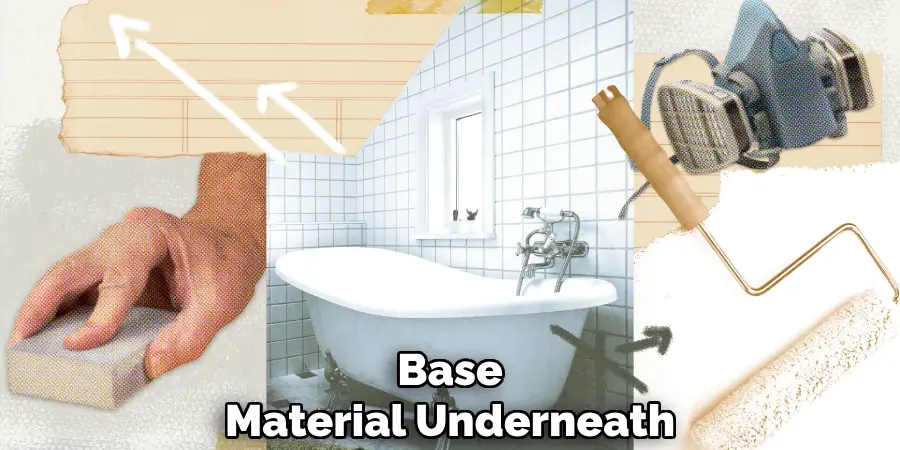
A peeling tub is a bathtub where the surface finish has started to degrade and separate from the base material. This issue typically manifests as small flakes or larger patches of the surface coating coming off, revealing the material underneath, which is often fiberglass or an older enamel finish. Peeling can occur due to frequent use over time, harsh chemical cleaners that wear down the protective coating, or previous refinishing jobs that were poorly executed.
If left unaddressed, a peeling tub can not only become an eyesore but may also develop into more significant problems like leaks or further damage, ultimately compromising the integrity of the bathtub.
Why Repair a Peeling Tub?
Knowing how to repair a peeling tub is crucial because it not only improves the appearance of your bathroom but also helps maintain the functionality and longevity of your bathtub. Other reasons why you should consider repairing a peeling tub include:
Cost Savings:
Instead of replacing the entire tub, repairing the peeling areas can save you money. The cost of refinishing a tub is significantly lower than purchasing and installing a brand-new one.
Convenience:
Refinishing a peeling tub is a relatively quick process, typically taking only a day or two to complete. In contrast, replacing the bathtub can take several days or even weeks, causing significant disruption to your daily routine.
Environmental Impact:
Repairing the peeling areas instead of replacing the entire tub also has positive environmental benefits. By avoiding unnecessary waste and using eco-friendly refinishing materials, you are reducing your carbon footprint.
Now that we have established the importance of repairing a peeling tub, let’s dive into the steps and materials needed to get the job done.
Materials Needed
Safety Equipment:
Before starting any DIY project, it is essential to prioritize safety. In this case, you will need safety glasses, gloves, and a respirator mask to protect yourself from any harmful chemicals.
Cleaning Supplies:
You will need a non-abrasive cleaner and a scrub brush to thoroughly clean the peeling areas and remove any dirt or debris. It is important to use a non-abrasive cleaner to avoid further damaging the tub’s surface.

Sandpaper:
To smooth out any rough edges or uneven surfaces, you will need sandpaper with a grit between 220-400. Sandpaper is also necessary if you plan on refinishing the bathtub yourself.
Tub Refinishing Kit:
A tub refinishing kit typically includes an epoxy primer, bonding agent, topcoat, and other materials needed for the refinishing process. Be sure to choose a kit that matches your tub’s material for optimal results.
9 Steps on How to Repair Peeling Tub
Step 1: Prep the Area
Begin by ensuring the bathroom space is adequately ventilated, as some of the substances used in tub refinishing can emit strong fumes. Open windows or use an exhaust fan if available. Next, remove any items around the tub area, such as shower curtains, mats, or toiletries, to prevent them from getting damaged or obstructing your work. Clean the peeling areas thoroughly with a non-abrasive cleaner and a scrub brush to eliminate soap scum, oils, or dirt.
Once clean, rinse the tub and dry it completely using a towel or cloth. Mask off surrounding surfaces such as tiles, faucets, and drains with painter’s tape to protect them from chemicals and sanding debris that may be part of the refinishing process. Finally, lay down a drop cloth to shield the floor from any spills or drips as you work. Completing these preparatory steps ensures a safer and more effective repair process.
Step 2: Remove Loose Coating
Using a razor blade or scraper, gently remove any loose or peeling coating from the tub’s surface. Be careful not to scratch or damage the base material underneath. After removing all the loose bits, clean the area again with a non-abrasive cleaner and rinse thoroughly.
The key to a successful repair is ensuring that the peeling area is free of any old coating or debris, providing a clean and smooth surface for the new finish to adhere to.
Step 3: Sand Down Rough Edges
Once all loose coating has been removed, take sandpaper with a grit of 220-400 and gently sand down the rough edges around the peeling area. This process helps to smoothen any uneven surfaces and create a more uniform transition between the intact and stripped sections of the tub. Sanding not only improves the aesthetic of the repaired area but also ensures better adhesion for the new finish.
While sanding, follow the contour of the tub’s shape to maintain its original design, and ensure you keep the surface free of dust by occasionally wiping it with a damp cloth. Proper sanding is essential for achieving a professional and long-lasting result.
Step 4: Apply Bonding Agent
With the surface now smooth and clean, it’s time to apply the bonding agent to ensure the new finish adheres properly to the tub’s surface. Begin by reading the manufacturer’s instructions on your refinishing kit, as application methods can vary. Generally, you’ll want to evenly apply the bonding agent to the sanded area using a small brush or sponge applicator, taking care to cover the entire surface. Work in a well-ventilated space and follow safety precautions, such as wearing gloves and a respirator mask, to protect yourself from fumes.
Allow the bonding agent to dry according to the instructions provided; this typically takes about 15-30 minutes. The bonding agent creates a necessary intermediary layer that promotes a strong connection between the tub’s surface and the upcoming coat of epoxy primer, setting the stage for a durable and aesthetically pleasing finish.
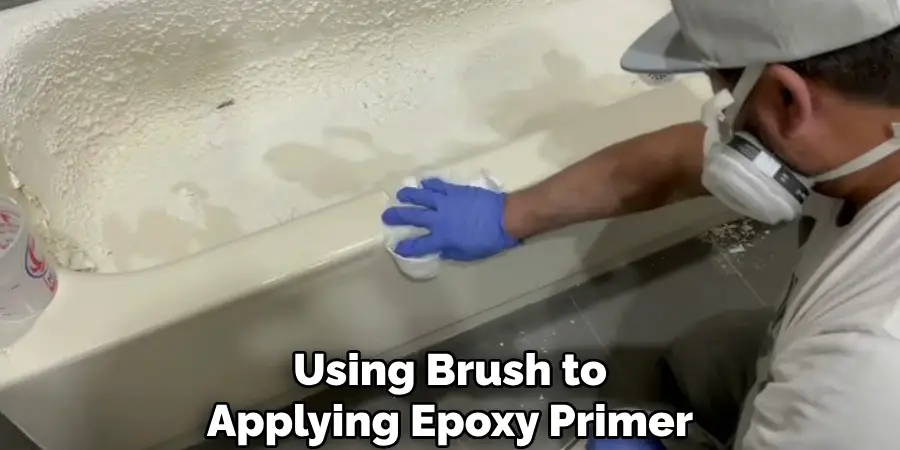
Step 5: Mix and Apply Epoxy Primer
Once the bonding agent is fully dry, prepare the epoxy primer according to the instructions provided. In most cases, you’ll need to mix two substances together to activate the primer before application. Ensure you mix thoroughly for optimal results.
Using a brush or roller, start applying the epoxy primer evenly over the repaired area. It’s important to work quickly but carefully so that it doesn’t dry out before you finish. If needed, apply multiple coats until you achieve a smooth and consistent finish.
Allow each coat of primer to dry completely before adding another layer; this can take up to 30 minutes, depending on your refinishing kit. Applying an epoxy primer provides a strong foundation for the topcoat and enhances the overall durability of your repair.
Step 6: Apply Topcoat
With the epoxy primer fully dried, it’s time to apply the topcoat. Similar to the bonding agent and primer, read through the manufacturer’s instructions before mixing and applying the topcoat. As with previous coats, ensure you work quickly but carefully to avoid drips or uneven coverage.
Using a brush or roller, apply an even layer of topcoat over the repaired area, following any specific instructions provided by your kit. Allow this coat to dry completely before adding another layer; typically, this takes about an hour. Once all desired layers have been applied and dried, remove any masking tape and drop cloths around the tub.
Step 7: Wait for Cure Time
After completing all refinishing steps, resist the temptation to use or clean the tub right away. Instead, wait at least 24 hours for the epoxy primer and topcoat to fully cure. Any contact with water or cleaning agents before this time can compromise the repair’s quality and longevity.
The cure time may vary depending on the products used, so make sure to read and follow the manufacturer’s recommended waiting period.
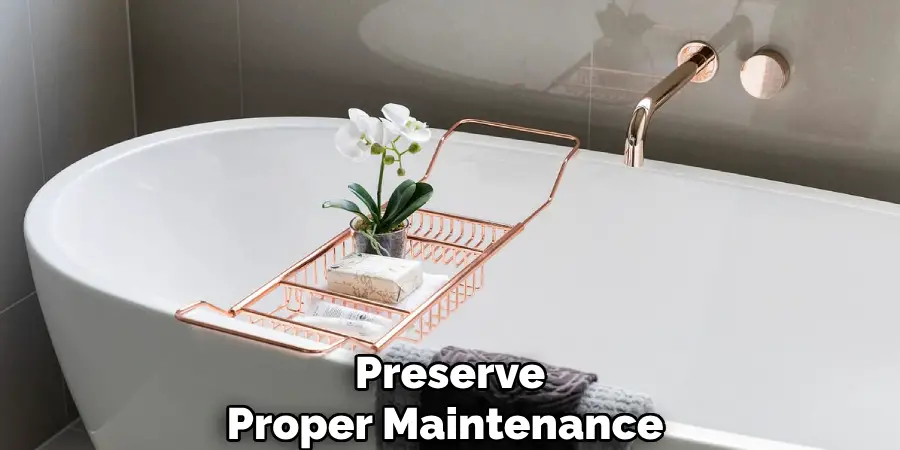
Step 8: Clean and Maintain
Once the tub has fully cured, it’s ready for use! However, keep in mind that proper maintenance is crucial for preserving your repair. Avoid using abrasive cleaners or scrubbing too hard on the repaired area; instead, opt for non-abrasive cleansers and a soft cloth.
Additionally, avoid placing heavy objects on the repaired area as they can cause chipping or cracking. With proper care, your tub should retain its newly refinished look for years to come.
Step 9: Seek Professional Help if Needed
While refinishing a tub can be a DIY project, it’s essential to assess your skills and comfort level before starting. If you feel uncomfortable with any of the steps or encounter unexpected issues during the process, consider seeking professional help from a bathtub refinishing specialist.
Professionals have the necessary experience and tools to ensure a high-quality and long-lasting repair, saving you time and effort in the long run. Don’t hesitate to reach out for assistance if needed; it’s always better to have a well-done job rather than risk damaging your tub even further.
Following these steps on how to repair peeling tub and taking proper precautions can help you successfully refinish a peeling bathtub. With the right tools, materials, and techniques, your tub will look as good as new in no time! Remember to always take care of your tub with regular cleaning and maintenance to keep it looking its best for years to come. Happy refinishing!
Additional Tips for Tub Refinishing
- Always read and follow the manufacturer’s instructions for your specific refinishing kit.
- Use protective gear, such as gloves and a respirator mask, to avoid exposure to fumes.
- Work in a well-ventilated area.
- Take your time and work carefully to achieve a professional finish.
- Avoid using the tub or cleaning it before the recommended cure time to ensure long-lasting results.
- Seek professional help if needed. Remember to always take care of your tub with regular cleaning and maintenance to keep it looking its best for years to come. Happy refinishing!
Conclusion
Refinishing a peeling bathtub may seem like a daunting task, but with the right tools and techniques, it can be done effectively at home. By following these steps on how to repair peeling tub and taking proper precautions, you can achieve a beautifully refinished tub that will last for years to come. If you encounter any difficulties or are unsure about any step in the process, don’t hesitate to seek professional help.
Remember to always maintain your tub properly after refinishing to prevent further peeling and damage. With these tips in mind, you’re ready to tackle your peeling tub and give it a fresh new look! So go ahead and enjoy a relaxing soak in your newly refinished bathtub! Happy refinishing!
About
Angela is the chief editor of Indoorense. She began her career as an interior designer before applying her strategic and creative passion to lifestyle and home.
She has close to 15 years of experience in creative writing and online content strategy for housekeeping and cleaning,home decorations as well as other efforts.
She loves her job and has the privilege of working with an extraordinary team. She lives with her husband, two sons, and daughter in Petersburg. When she’s not busy working she spent time with her family.