
Are you tired of looking at that old, worn-out window sill? Is it time to give your windows a fresh, new look? Removing a window sill may seem like a daunting task, but with the right tools and techniques, you can easily remove it yourself. In this guide, we’ll walk you through the steps on how to remove window sill.
Removing a window sill may seem daunting, but with the right tools and instructions, it can be a straightforward process. Whether you’re replacing an old, damaged sill or simply updating the look of your window, knowing how to properly remove the sill is essential. This guide will walk you through each step, ensuring that you can accomplish the job efficiently and without unnecessary complications.
By following these instructions, you’ll be able to remove your window sill safely and prepare your window for a fresh, new look.
Why Do You Need to Remove Window Sill?
Before we dive into the steps on how to remove window sill, let’s first understand why it’s necessary.
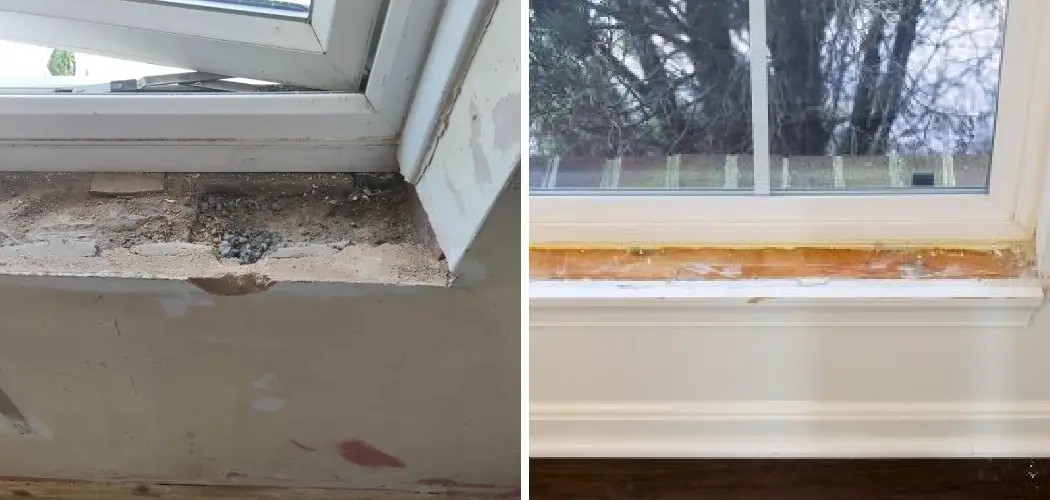
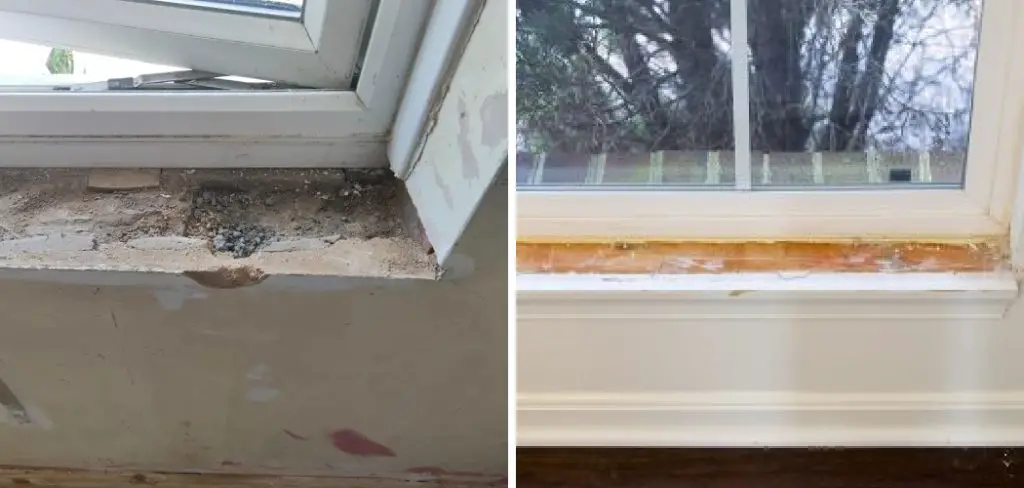
Over time, window sills can become damaged or worn out due to exposure to the elements, such as rain, sun, and wind. They can also get chipped or cracked from accidental bumps and scratches.
Additionally, if you’re looking to install new windows or change the style of your current ones, removing the old sill is a crucial step in the process.
What Will You Need?
Before you begin the process of removing your window sill, it’s essential to gather all the necessary tools and materials. Here’s a list of what you’ll need:
- Safety goggles
- Gloves
- Hammer
- Pry bar
- Chisel
- Screwdriver
- Putty knife
- Utility knife
Once you have all the necessary tools and materials, you’re ready to remove your window sill.
10 Easy Steps on How to Remove Window Sill:
Step 1: Wear Safety Gear

Before you start any work, it is vital to prioritize your safety. Equip yourself with safety goggles to protect your eyes from any flying debris and gloves to shield your hands from splinters or sharp edges. These simple precautions can prevent accidents and injuries, ensuring that you can complete the task comfortably and safely.
Step 2: Score the Caulk
Use a utility knife to score the caulk or paint along the edges of the window sill. This action helps to break the seal between the sill and the window trim or wall, making it easier to remove the sill without causing unnecessary damage to surrounding areas. Make sure to run the knife along the entire perimeter of the sill to fully loosen it.
Step 3: Remove the Window Trim
Using a putty knife, gently slide the blade under the window trim to loosen it. Once the trim is slightly lifted, switch to a pry bar to carefully pry the trim away from the wall or window frame. Work your way around the entire window perimeter, taking care not to damage the trim if you plan to reuse it. Removing the trim will give you better access to the window sill and make it easier to detach.
Step 4: Remove Fasteners
Once the trim is removed, you may find that the window sill is secured with screws, nails, or other fasteners. Use a screwdriver to remove screws or a hammer and chisel to carefully extract any nails. Ensure all fasteners are fully removed before lifting the sill out of place. This will prevent any unexpected resistance and potential damage to the window frame.
Step 5: Pry the Sill Loose
With all fasteners removed, it’s time to pry the sill loose. Insert the pry bar underneath the window sill and gently apply pressure to lift it. Work slowly and carefully, moving along the length of the sill to avoid cracking or breaking it. If the sill is particularly stubborn, you may need to use a hammer to tap the pry bar and help loosen it further.
Step 6: Cut Through any Remaining Adhesive
Occasionally, window sills are adhered to the frame with strong adhesives. If you encounter any resistance while prying, use your utility knife to cut through any remaining adhesive or sealant. This extra step ensures that the sill will come out cleanly without damaging the surrounding structures.

Step 7: Lift Out the Window Sill
Now that you’ve pried the window sill loose and cut through any remaining adhesive, you should be ready to lift it out. Grasp the window sill firmly with both hands and carefully lift it out of the frame. If the sill is large or heavy, consider having a helper assist you to avoid any strain or injury. Move slowly to ensure that you do not damage the window frame or surrounding walls as you remove the sill.
Step 8: Clean the Area
With the window sill removed, take the time to clean the area thoroughly. Use a putty knife to remove any remaining caulk, adhesive, or debris from the window frame. A vacuum can be helpful for sucking up dust and small particles. This step is crucial for preparing the surface for a new sill or any other replacement materials you plan to install.
Step 9: Inspect for Damage
Before proceeding with any installations, inspect the window frame for any signs of damage. Check for rot, mold, or structural issues that may need to be addressed before you can install a new window sill.
If you find any damage, make sure to fix it properly, either by replacing damaged sections of the frame or treating areas with appropriate solutions. Repairing any issues now will save you trouble in the future and ensure that your new sill will sit properly and securely.
Step 10: Prepare for Installation
Once the area is cleaned and inspected, lay out the new window sill to ensure it fits correctly in the space.

If adjustments are needed, measure and make precise cuts to trim the new sill for a perfect fit. Be sure to follow the manufacturer’s guidelines if you are using a pre-made sill, or consult woodworking best practices if you are custom-making your replacement. Once everything is ready, proceed with the installation instructions for the new window sill material and design you’ve chosen.
Removing a window sill is a step-by-step process that, when done correctly, can lead to a fresh and updated window area. By following this guide carefully and taking your time with each step, you can ensure a smooth and successful removal, setting the stage for a beautiful, brand-new window sill.
5 Additional Tips and Tricks
- Protect Your Floors and Surroundings: Before you begin, cover the surrounding area with drop cloths or old sheets to prevent damage from debris or tools.
- Use a Utility Knife for Precision: Score along the edges of the window sill with a utility knife. This will help to break the paint and caulk seal, making it easier to remove the sill without damaging the surrounding trim.
- Leverage with a Pry Bar: Insert a pry bar under the window sill and apply gentle pressure. Use a wood block as a fulcrum point to avoid denting or scratching the nearby walls or trim.
- Work in Sections: If the window sill is particularly stubborn or large, cut it into smaller sections with a handsaw or reciprocating saw. This can make it easier to remove each piece without causing excessive damage.
- Safety First: Always wear safety gloves and goggles to protect yourself from sharp edges and flying debris. Additionally, ensure that your working space is well-ventilated, especially if you are dealing with old paint that might contain lead.
With these additional tips and tricks, you can confidently tackle the task of removing a window sill without causing any unnecessary damage or injury.
5 Things You Should Avoid
- Using Excessive Force: Applying too much pressure can cause significant damage to the window frame and wall. Always use controlled and gradual force to avoid unnecessary repairs.
- Ignoring Safety Precautions: Failing to wear protective gear like gloves and goggles can result in injuries. Always prioritize safety to ensure a smooth and accident-free process.
- Skipping the Scoring Step: Not scoring the edges of the window sill can make removal difficult and may damage the surrounding trim or paint. Always take the time to score properly before prying.
- Using Incorrect Tools: Employing improper tools can lead to inefficient work and potential damage. For best results, stick to recommended tools such as a utility knife, pry bar, and handsaw.
- Rushing the Process: Hurrying through the removal can cause mistakes and damage. Take your time to carefully and methodically remove the window sill for a pristine finish.
By avoiding these common mistakes, you can ensure a successful window sill removal and achieve the best results possible.

Conclusion
How to remove window sill may seem like a daunting task, but with the right preparation and approach, it can be tackled efficiently and safely.
By protecting your floors and surroundings, carefully scoring the edges, and using the appropriate tools like a utility knife and pry bar, you can systematically dismantle the sill with minimal damage to the surrounding area.
It’s crucial to always prioritize safety by wearing protective gear and working in a well-ventilated space. Furthermore, taking a methodical and patient approach ensures that the process is smooth and prevents avoidable mishaps.
You can confidently achieve a successful window sill removal by following these guidelines and avoiding common mistakes such as using excessive force or skipping crucial steps.
About
Angela is the chief editor of Indoorense. She began her career as an interior designer before applying her strategic and creative passion to lifestyle and home.
She has close to 15 years of experience in creative writing and online content strategy for housekeeping and cleaning,home decorations as well as other efforts.
She loves her job and has the privilege of working with an extraordinary team. She lives with her husband, two sons, and daughter in Petersburg. When she’s not busy working she spent time with her family.