

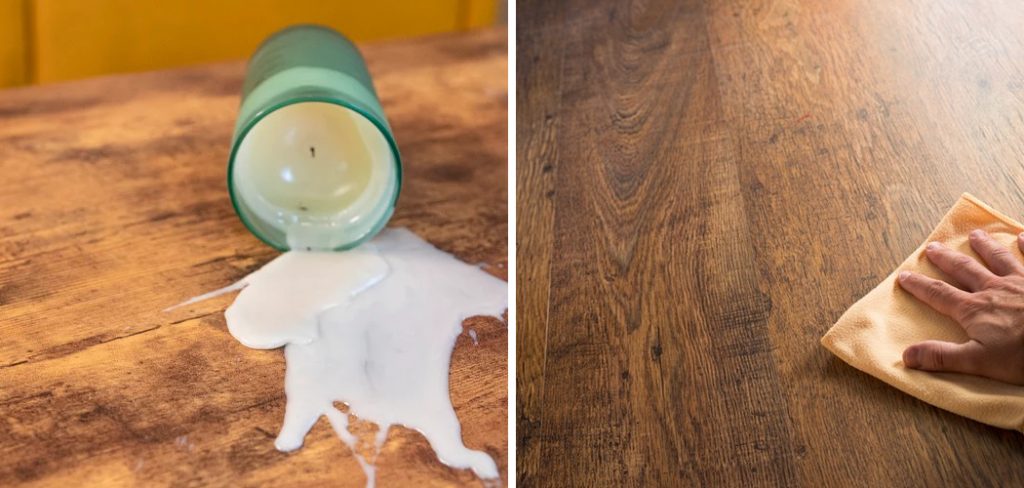
Wax spills on a wooden floor can be unsightly and challenging to remove if not addressed properly. Whether it’s a result of a candle mishap or spilled wax from polishing, it’s vital to know the correct method for effectively and safely removing wax without causing damage to the wood.
This guide on how to remove wax from a wooden floor will walk you through the step-by-step process of removing wax from a wooden floor, ensuring your floor remains pristine and well-maintained.
Why Is It Important to Remove Wax From a Wooden Floor?
Wax is a common substance used for polishing and protecting wooden floors. However, when wax spills or drips onto the floor, it can create a thick layer that’s challenging to remove. If left unattended, excess wax buildup on the floor can attract dirt and dust particles, making it look dull and dirty. Additionally, if not removed promptly, the wax can seep into the cracks between boards or penetrate into porous wood types, causing discoloration and damage over time.
You may be tempted to use harsh chemicals or abrasive methods for removing wax, but these can damage the wood’s surface and finish. Therefore, it’s essential to follow a gentle yet effective approach to remove wax from wooden floors.
Materials You’ll Need
A Plastic Scraper or Credit Card:
A plastic scraper or credit card can be used to gently scrape off excess wax from the floor’s surface without causing any damage.
Soft Cloths:
You’ll need soft, lint-free cloths to wipe off the melted wax and clean the floor.
Hot Water:
Hot water helps melt the wax and makes it easier to remove.
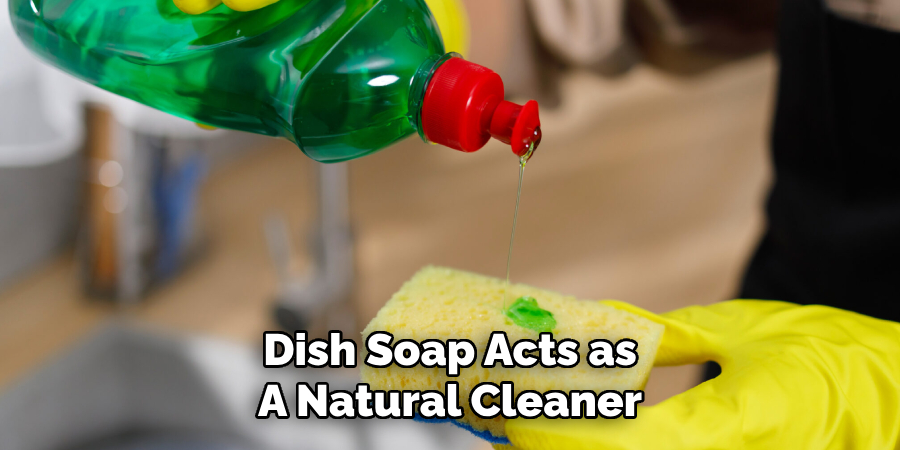
White Vinegar or Dish Soap:
White vinegar or dish soap acts as a natural cleaner and cuts through grease and grime on the floor, making it an effective solution for removing wax residue.
8 Step-by-step Guides on How to Remove Wax From a Wooden Floor
Step 1: Allow the Wax to Cool Completely
Before you start the removal process, it’s crucial to let the wax cool and harden. Attempting to remove hot wax can cause it to smear, making the cleanup more challenging. Allow the spill to sit undisturbed until it has completely solidified. This will make it easier to scrape off in the following steps without spreading it further or causing any additional damage to the wooden floor.

The cooling process may take up to an hour, depending on the amount of wax and room temperature. You can speed up the process by placing a bag of ice or a cold pack over the wax spill to harden it more quickly.
Step 2: Scrape off Excess Wax
Once the wax has completely cooled and solidified, use a plastic scraper or the edge of a credit card to gently scrape off the excess wax from the wooden floor. Hold the scraper at a slight angle to avoid scratching the wood surface. Carefully work your way around the edges of the wax spill, gradually lifting and removing the bulk of the wax.
Be patient and take your time to ensure that you do not damage the floor. If the wax proves difficult to remove, you can place a plastic bag filled with ice on the wax to harden it further, making it easier to scrape off. After removing the majority of the wax, proceed to the next step to address any remaining residue.
Step 3: Soften the Remaining Wax
After you’ve removed the bulk of the wax, you’ll often find some residue left behind. To soften this remaining wax, dampen a soft, lint-free cloth with hot water. Gently place the damp cloth over the wax residue and let it sit for a few minutes. The heat will soften the wax, making it easier to wipe away without causing damage to the wooden floor.
Be sure to check the cloth’s temperature to avoid any risk of burning yourself or damaging the floor’s finish. As the wax begins to soften, you can use the cloth to gently rub the area, loosening the remaining wax. Repeat this process until the wax is nearly gone before moving on to the next step to completely remove any traces of wax residue.
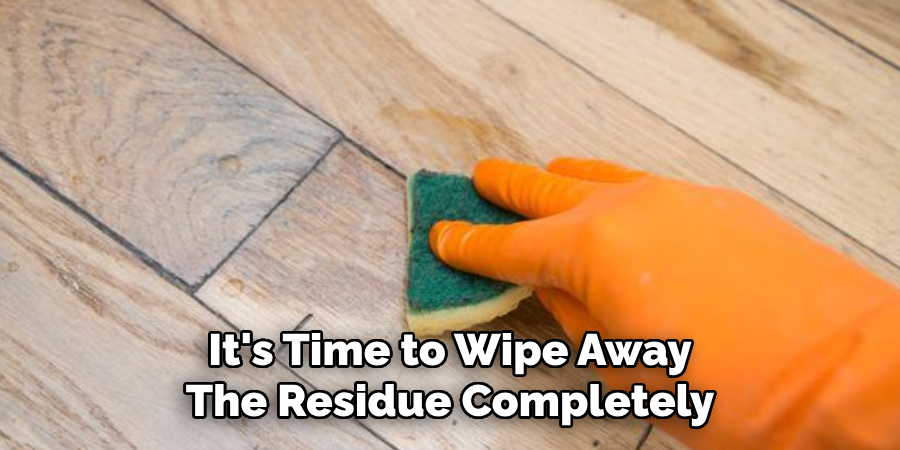
Step 4: Wipe Away the Residue
Once the remaining wax has softened, it’s time to wipe away the residue completely. Take another clean, soft cloth and dampen it with a mixture of hot water and white vinegar or a few drops of dish soap. The vinegar or dish soap will help break down any leftover wax and remove any greasy residue. Using gentle, circular motions, wipe the area thoroughly to ensure all traces of wax are removed from the wooden floor.
Be sure to rinse and wring out the cloth frequently to avoid spreading the wax residue around. After you’ve wiped the area clean, use a dry, lint-free cloth to buff the floor, absorbing any excess moisture and restoring the floor’s natural shine. By the end of this step, your wooden floor should be completely free of wax and ready for any further cleaning or polishing if needed.
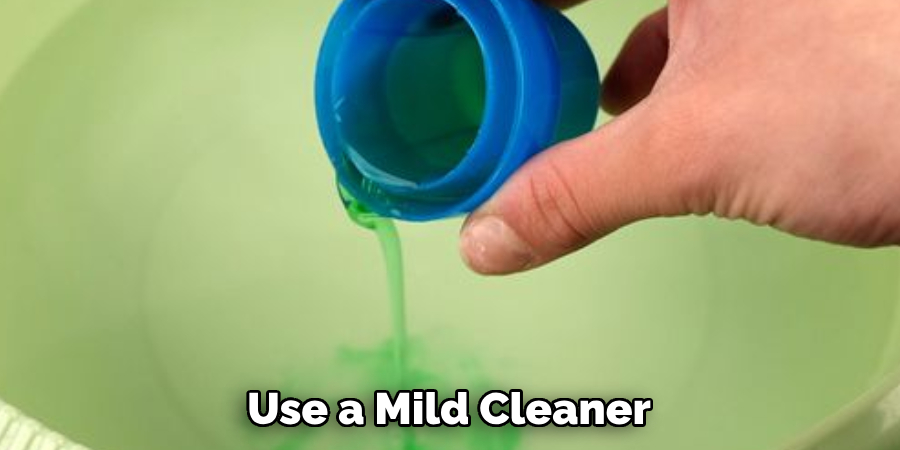
Step 5: Clean and Dry the Floor
To prevent any leftover residue from causing damage to your wooden floor, it’s essential to thoroughly clean and dry the area. Use a mild cleaner or a mixture of hot water and white vinegar or dish soap to clean the floor surface.
Be sure not to over-wet the floor as excess moisture can cause warping or staining on some types of wood. Once you’re satisfied that all traces of wax have been removed, use a dry cloth to buff the area until it’s completely dry.
Step 6: Assess for Any Remaining Residue
After cleaning and drying the floor, it’s important to inspect the area for any remaining wax residue. Examine the wooden surface closely under good lighting, looking for any dull spots or areas that might feel sticky to the touch. If you find any residual wax, repeat the previous steps of softening and wiping away the wax using hot water and vinegar or dish soap.
Make sure to be thorough in this final inspection, as leftover wax can attract dirt and eventually damage the wooden floor. Once you’re confident that all wax has been successfully removed, you can proceed with regular cleaning and maintenance to keep your wooden floor looking pristine.
Step 7: Sanding and Refinishing (If Necessary)
In some cases, wax spills may have caused damage to the wooden floor’s surface or finish. If you notice any scratches, stains, or discoloration after removing the wax, it may be necessary to sand and refinish the affected area. This process involves lightly sanding the damaged portion of the floor and applying a new coat of finish to restore its appearance.
Be sure to follow manufacturer instructions for the type of wood and finish you are working with to achieve optimal results without further damaging the floor.
Step 8: Prevent Future Wax Spills
Now that you’ve successfully removed the wax spill from your wooden floor, it’s important to take steps to prevent any future accidents. To avoid dealing with a similar situation in the future, consider placing rugs or mats in high-traffic areas to catch any spills or drops before they reach the floor. In addition, be cautious when using candles or other sources of hot wax near wooden floors and clean up any accidental spills immediately.
By following these step-by-step guides on how to remove wax from a wooden floor, you can effectively remove wax from your wooden floor without causing any damage or leaving behind any residue. Remember to always be patient and gentle during the removal process to ensure the best results.
Frequently Asked Questions
Q: Can I Use a Hairdryer to Speed Up the Cooling Process?
A: It is not recommended to use a hairdryer as it could potentially cause the wax to melt and spread further onto the wooden floor. The best method is to let the wax cool and solidify naturally before attempting to remove it.
Q: Can I Use a Metal Scraper to Remove the Wax?
A: It is not recommended to use a metal scraper as it can easily scratch and damage the wooden surface. A plastic scraper or the edge of a credit card are safer alternatives.
Q: How Often Should I Sand and Refinish My Wooden Floor?
A: The frequency of sanding and refinishing depends on several factors such as foot traffic, maintenance, and type of finish used. It is generally recommended to sand and refinish every 5-7 years for residential floors and more frequently for high-traffic areas.
Conclusion
Maintaining the elegance and integrity of your wooden floors requires careful attention and the right techniques, especially when dealing with spills like wax. By following the step-by-step guide on how to remove wax from a wooden floor provided, you can effectively remove wax without inflicting damage on your floors, leaving them pristine and shining.
Remember, patience and a gentle approach are key when handling such tasks. Preventative measures, such as using rugs and being cautious with items that can spill wax, will also help preserve the beauty of your wooden flooring. Regular maintenance and timely interventions can ensure that your wooden floors remain a timeless asset in your home.
About
Angela is the chief editor of Indoorense. She began her career as an interior designer before applying her strategic and creative passion to lifestyle and home.
She has close to 15 years of experience in creative writing and online content strategy for housekeeping and cleaning,home decorations as well as other efforts.
She loves her job and has the privilege of working with an extraordinary team. She lives with her husband, two sons, and daughter in Petersburg. When she’s not busy working she spent time with her family.