
Removing a chimney stack can be a daunting task, but with the right preparation and tools, it can be accomplished safely and efficiently. This guide on how to remove a chimney stack provides a comprehensive overview for homeowners or contractors who are considering taking down a chimney stack. Whether the structure is damaged, unused, or in need of modernization, understanding the proper procedures and precautions is crucial.
We’ll cover everything from initial assessments and necessary permissions to safety protocols and step-by-step instructions to ensure a successful project. Let’s get started on understanding what it takes to effectively remove a chimney stack.

Why Remove a Chimney Stack?
There are several reasons homeowners might consider removing a chimney stack. Firstly, a damaged or deteriorating chimney can pose safety risks, including structural instability or potential fire hazards. Additionally, unused chimneys occupy valuable space that could be repurposed for modern home designs, enhancing open-plan living spaces or additional rooms.
Many homeowners also seek to improve energy efficiency; chimneys can be a source of heat loss, and their removal can lead to better insulation and reduced heating costs. Lastly, removing an outdated chimney stack can contribute to a home’s aesthetic appeal, providing a cleaner, more contemporary look that aligns with modern architectural styles.
Needed Materials
Before embarking on a chimney removal project, gather the necessary materials and tools to ensure a smooth process. Here are some items you may need:
- Protective Gear Such as Gloves, Goggles, and Dust Masks
- Basic Hand Tools, Including a Hammer, Chisel, Crowbar, and Saw
- Scaffolding or Ladders for Reaching Higher Areas
- Heavy-duty Tarpaulin to Cover the Ground and Protect From Falling Debris
- Waste Disposal Bags or Bins for Easy Cleanup
8 Step-by-step Guidelines on How to Remove a Chimney Stack
Step 1: Assess the Chimney
Before beginning any work, thoroughly inspect the chimney to determine its condition. Look for signs of damage, such as cracks or leaning, and ensure there are no active fires or wildlife living inside.
It’s also important to check if the chimney is connected to any gas or electrical lines, and if so, consult a professional before beginning removal.
Step 2: Obtain Necessary Permissions
In most areas, removing a chimney stack requires obtaining permits from local authorities. Contact your city or town hall to inquire about the required paperwork and fees for chimney removal. Failure to obtain proper permission could result in fines or legal consequences.
You may also need to inform your insurance company and obtain a building permit before proceeding with the project.
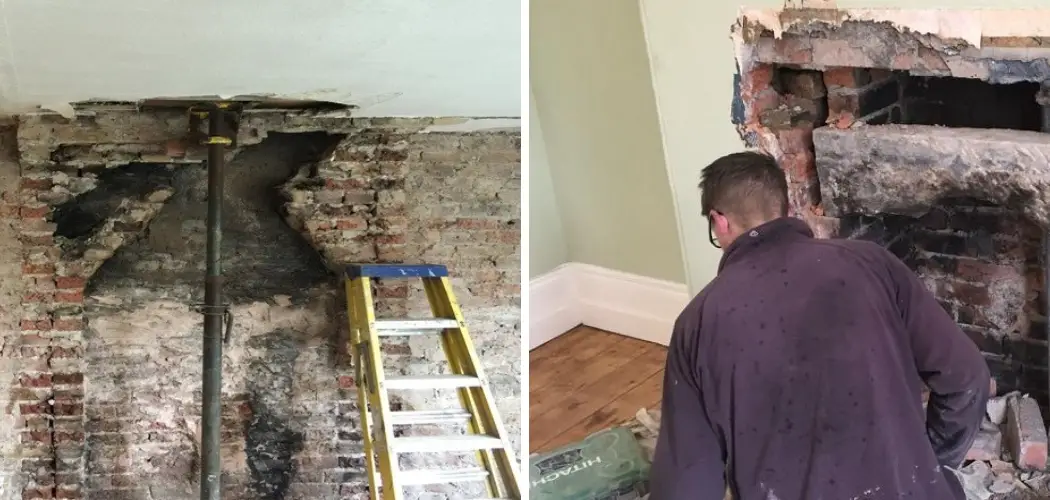
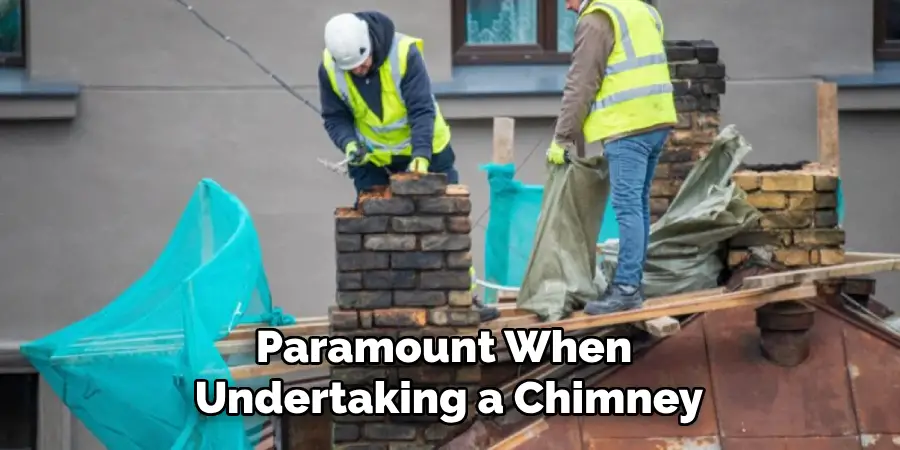
Step 3: Prepare the Work Area
Safety is paramount when undertaking a chimney stack removal project, so taking the time to properly prepare the work area is crucial. Begin by laying down heavy-duty tarpaulin on the ground around the chimney to protect surfaces from falling debris. Set up scaffolding or ladders securely to provide safe access to the higher sections of the chimney.
Ensure that all tools and materials are organized and within easy reach. It’s advisable to cordon off the work area to prevent unauthorized access and to inform family members or neighbors of the ongoing work to ensure everyone’s safety. Additionally, make sure you are wearing appropriate protective gear, such as gloves, goggles, and dust masks, to protect against dust and debris during the removal process.
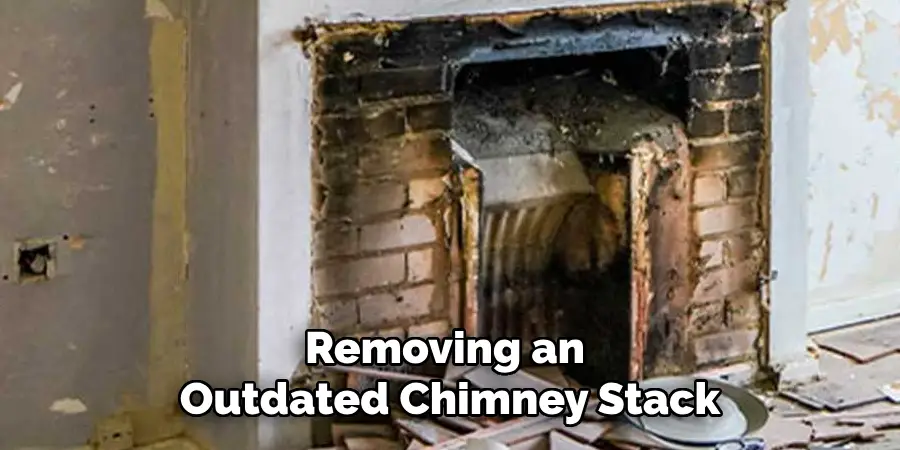
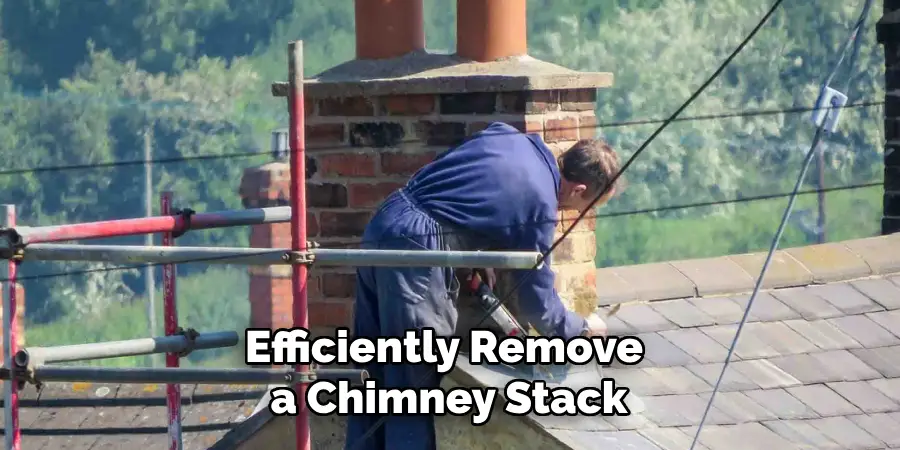
Step 4: Remove the Chimney Pot and Capping
Once the work area is securely prepared, begin the removal process by carefully taking off the chimney pot and capping it. This step requires precision to avoid unnecessary damage to the surrounding structure or roof tiles. Start by accessing the chimney’s top via the scaffolding or ladder, ensuring that your footing is stable.
Using a hammer and chisel, gently break the mortar joint holding the chimney pot in place, taking extra care to avoid dropping the pot and causing damage or injury. Once loosened, carefully lift the chimney pot away and set it aside in a safe location. Next, remove the chimney capping, which may involve loosening any securing fastenings or screws. As always, safety gear should be worn throughout the process to protect against falling debris or dust exposure.
Step 5: Remove the Chimney Bricks
With the chimney pot and capping removed, begin dismantling the chimney brick by brick. Use a hammer and chisel to break away at the mortar joint around each brick, carefully working your way from top to bottom. As you progress, be mindful of any electrical or gas lines that may be present inside the chimney and take necessary precautions when removing bricks in those areas.
Once all bricks have been removed, use a crowbar to pry off any remaining pieces of the base on the roofline.
Step 6: Dismantle Inside Walls
After taking down the exterior shell of the chimney, move inside to remove any remaining internal structure. Using the same tools and techniques as before, carefully remove any bricks or blocks from inside walls, taking care not to damage surrounding areas.
You may also need to remove any flue liners, which can usually be done by breaking them off with a hammer or chisel. Be sure to have a waste disposal bag or bin nearby for easy cleanup of debris.
Step 7: Patch up the Roof
Once the chimney has been removed, you will be left with an open hole in your roof. To ensure that no water or other elements enter your home through this opening, it’s essential to patch it up properly. Measure and cut a piece of plywood to fit the hole and secure it in place using roofing nails. Seal around the edges with silicone caulking for added protection against leaks.
It’s also recommended to have a professional roofer inspect and repair any remaining damage or potential issues with the roof.
Step 8: Clean up and Dispose of Debris
The final step in removing a chimney stack is to clean up the work area and properly dispose of all debris. Use waste disposal bags or bins to collect bricks, mortar, and other materials for easy removal. Be sure to sweep or vacuum any remaining dust or debris from the work area for a thorough cleanup.
It may be necessary to hire a professional cleaning service if there is extensive dust or debris throughout your home due to the removal process.
Following these step-by-step guidelines on how to remove a chimney stack can help you safely and efficiently remove a chimney stack from your home. It’s essential to always prioritize safety and consult professionals whenever necessary during this project. So, follow these guidelines and ensure a smooth and successful chimney removal process. Happy renovating!
Additional Tips for Cimney Removal
- Have a professional inspection done prior to removal to ensure there are no structural issues or hidden problems.
- Consider hiring a professional chimney removal service if the task seems too daunting or you lack experience with demolition work.
- Be mindful of any gas, electrical, or plumbing connections that may be attached to the chimney and consult professionals before removing them.
- Dispose of all debris and materials responsibly, following local regulations for waste disposal.
- After the chimney has been removed, consider adding additional insulation in the area where it used to be for better energy efficiency.
- Lastly, remember to check your homeowner’s insurance policy as sometimes removing a chimney can result in lower premiums due to decreased fire risk.
Frequently Asked Questions
Q: Do I Need a Permit to Remove a Chimney Stack?
A: Yes, it’s important to obtain the necessary permits and approvals from your local building authority before proceeding with the project. Failure to do so can result in fines or legal action.
Q: Can I Remove a Chimney Stack Myself?
A: While it is possible to remove a chimney stack yourself, it requires careful planning, proper tools and equipment, and extensive knowledge of demolition work. It’s always recommended to consult professionals for safe and efficient removal.
Q: How Much Does it Cost to Remove a Chimney Stack?
A: The cost of removing a chimney stack varies depending on the size of the chimney, location, and any additional repairs needed. On average, homeowners can expect to spend between $1,000 – $4,000 for complete chimney removal. It’s best to obtain quotes from multiple professionals for an accurate estimate.
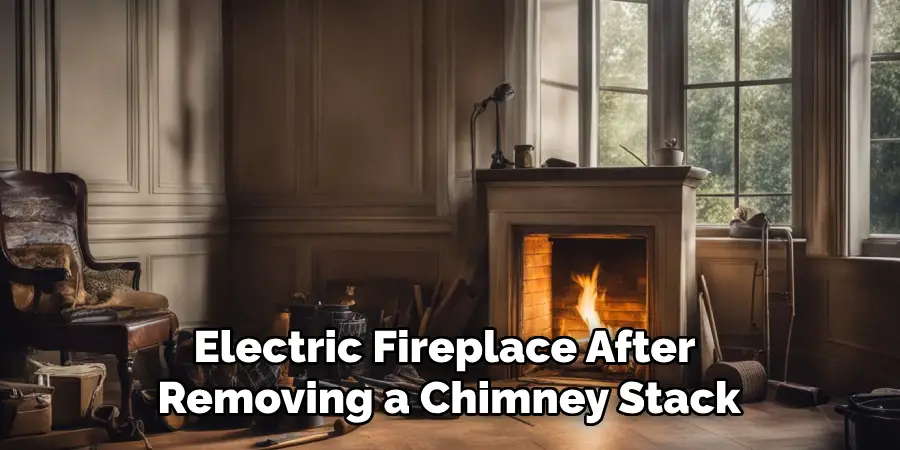
Q: Can I Install a Gas or Electric Fireplace After Removing a Chimney?
A: Yes, it is possible to install a gas or electric fireplace after removing a chimney stack. However, it’s essential to consult professionals and ensure that the remaining structure can support the weight and venting requirements of the new fireplace.
Conclusion
The process of removing a chimney stack is a complex and potentially hazardous task that requires careful planning, preparation, and execution. By following the outlined step-by-step guidelines on how to remove a chimney stack, individuals can successfully dismantle and remove a chimney from their property while ensuring the safety and integrity of their home.
It’s crucial to adhere to safety protocols, use appropriate tools, and seek professional assistance when needed, particularly for securing permits and managing structural repairs. Properly completing the removal and cleanup process not only enhances the aesthetic value of the home but also eliminates any potential hazards associated with a deteriorating chimney structure.
About
Angela is the chief editor of Indoorense. She began her career as an interior designer before applying her strategic and creative passion to lifestyle and home.
She has close to 15 years of experience in creative writing and online content strategy for housekeeping and cleaning,home decorations as well as other efforts.
She loves her job and has the privilege of working with an extraordinary team. She lives with her husband, two sons, and daughter in Petersburg. When she’s not busy working she spent time with her family.