
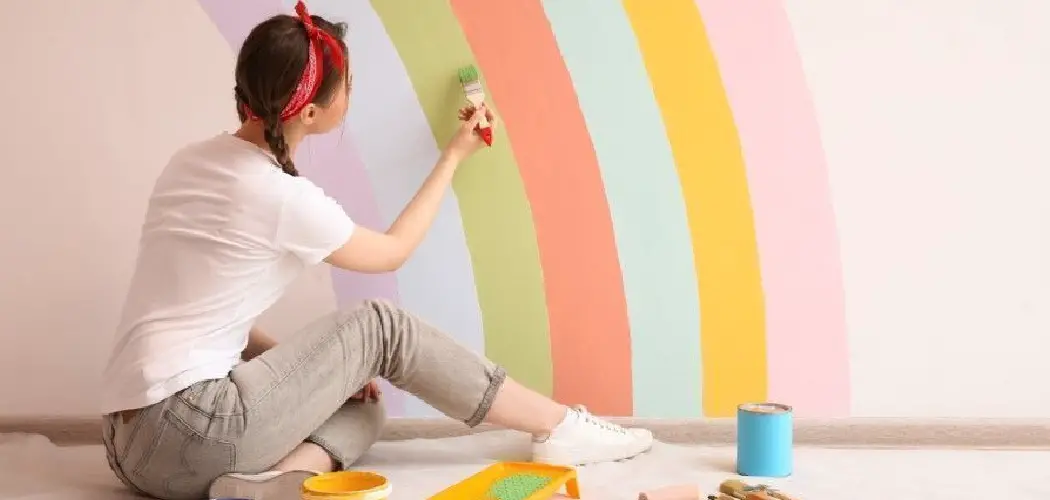
Are you tired of the plain, boring walls in your home? Why not add a pop of color by painting a rainbow on one of them?
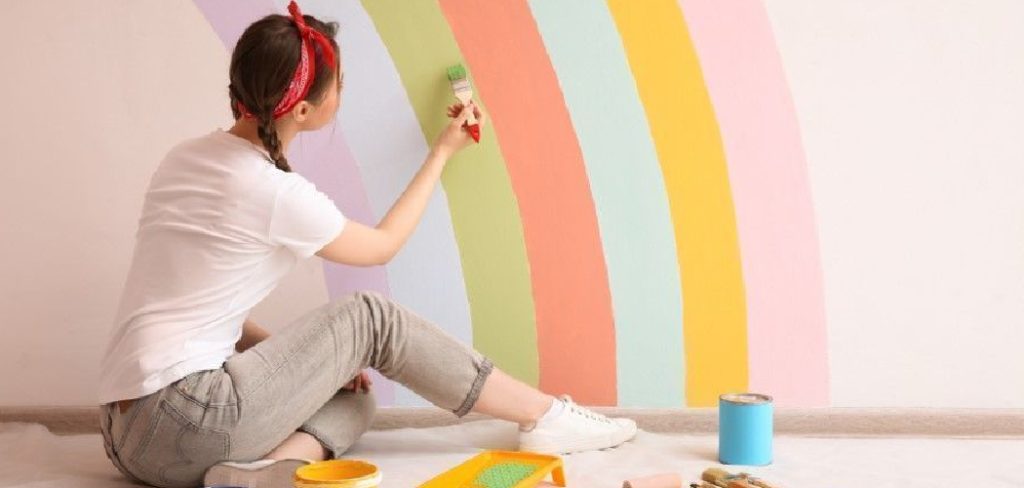
How to paint rainbow on wall can transform any room into a vibrant and joyful space. A rainbow mural can bring life and color into your home, whether you’re looking to brighten up a child’s bedroom, add an artistic touch to a playroom, or simply express your creativity.
This guide will walk you through the essential steps, from selecting the suitable paints to mastering the perfect arc, ensuring your rainbow is eye-catching and professionally finished. With some preparation and patience, you can create a stunning wall feature that will be admired for years.
What Will You Need?
Before you get started, here are the essential tools and materials that you will need to complete your rainbow wall:
- Paint in all the colors of the rainbow (red, orange, yellow, green, blue, indigo, violet)
- White paint
- Paintbrushes in various sizes
- Painter’s tape
- Drop cloth or old bedsheet to protect the floor
- Pencil or chalk for sketching out your design
- Measuring tape or ruler
- Ladder or step stool (if necessary)
Once you have gathered all your supplies, it’s time to start painting!
10 Easy Steps on How to Paint Rainbow on Wall
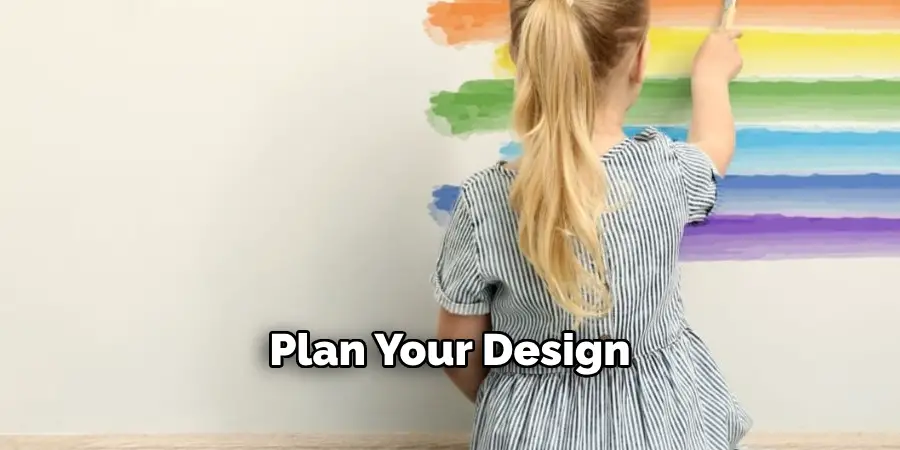
Step 1: Plan Your Design
Before diving into the painting process, it is crucial to carefully plan your design to ensure a successful outcome. Start by choosing the wall where you want to paint your rainbow. Consider natural lighting, wall size, and the room’s color scheme to decide which wall best complements your rainbow design. Once the wall is selected, use your pencil or chalk to sketch your rainbow’s outline lightly.
Consider deciding whether you want a traditional arc or something more abstract or modern. Don’t rush this step; a well-thought-out design will make the painting smoother and more enjoyable. Use a measuring tape or ruler to help you maintain consistent distances between the color bands, ensuring that each section of the rainbow is proportional. Considering these details early on will set a solid foundation for your mural and minimize any need for adjustments as you proceed.
Step 2: Prepare Your Wall
Now that your design is planned, it’s time to prepare the wall for painting. Begin by cleaning the surface thoroughly to remove any dust, dirt, or grease that could interfere with paint adhesion. Use a damp cloth or mild detergent to wipe the wall, and let it dry completely. Next, apply painter’s tape along baseboards, trim, or any areas you want to protect from paint. Lay the drop cloth or old bedsheet on the floor to catch any drips or spills. If the wall has any holes or uneven surfaces, use a filler to smooth them out, sanding lightly once dry to create a uniform base. This preparation will help ensure a flawless finish and allow your colors to shine.
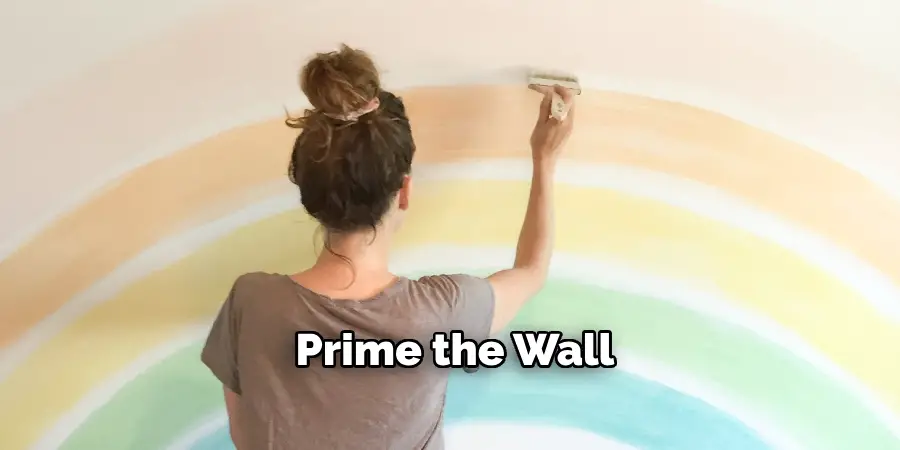
Step 3: Prime the Wall
Once your wall is clean and prepped, applying a layer of white primer is a good idea. This will provide a smooth base for your rainbow and help the colors appear more vibrant and accurate to life. Use a roller or a large brush to apply the primer evenly across the wall, allowing it to dry completely as per the manufacturer’s instructions. Priming is essential if you’re painting over a dark-colored wall, as it prevents the previous color from showing through your bright rainbow hues.
Step 4: Paint the Background
With the wall primed, you can begin painting the background color if desired. Some people prefer a white background to make the rainbow colors pop, while others might choose a sky-blue shade to emulate a clear day. Select a color that complements your room’s decor and personal style. Using a roller, apply the background color selected evenly across the surface, covering any visible primer. Allow the background to dry completely before moving on to the colorful details of your rainbow.
Step 5: Paint the Red Band
Once the background is completely dry, you can start painting the colorful bands of your rainbow, beginning with the outermost red band. Use painter’s tape to outline the section where the red paint will go, ensuring the line is as smooth and even as possible. Dip a medium-sized brush into the red paint and carefully fill in the area, starting from the top edge and working your way down to prevent drips.
Paint in even strokes, keeping an eye out for any uneven patches or brush marks. Remove the painter’s tape carefully while the paint is still slightly wet to avoid peeling. Allow the red band to dry before proceeding to the next color. This systematic approach will result in clean lines and a polished look for your rainbow mural.
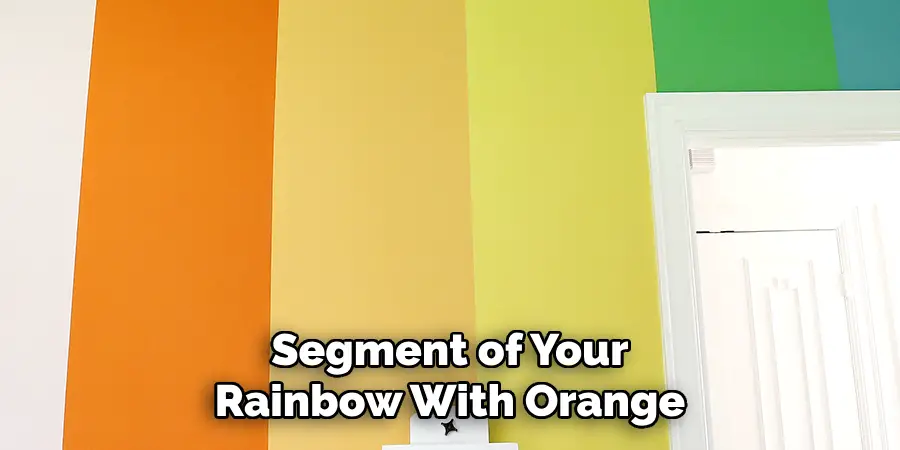
Step 6: Paint the Orange Band
After thoroughly drying the red band, paint the next segment of your rainbow with orange. Apply painter’s tape below the red edge to create a clean border for the orange paint. Again, ensure the tape is aligned perfectly to maintain smooth, uniform lines. Using a clean brush, apply the orange paint, working in long, steady strokes from one end to the other. As with the red band, watching for drips and ensuring the orange paint evenly covers its designated area is essential. Carefully remove the painter’s tape while the paint is still slightly wet to prevent tearing or jagged edges. Let the orange band dry thoroughly before moving on to the next color in your rainbow mural.
Step 7: Paint the Yellow Band
Once the orange band is completely dry, it’s time to add the next vibrant color to your rainbow: yellow. Place the painter’s tape precisely below the orange band to define the space for the yellow paint. Ensure that the tape is applied evenly to smoothly transition between colors. Using a clean brush, fill the yellow section with broad, consistent strokes, ensuring an even application that covers appropriately without any gaps. Remove the painter’s tape gently while the paint is still slightly wet to avoid paint chipping or uneven edges.
Allow the yellow band to dry thoroughly before continuing to the next hue. This careful layering technique ensures that the sequential bands of color are crisp and harmonious, contributing to a beautifully cohesive rainbow mural.
Step 8: Paint the Green Band
After the yellow band has dried completely, continue painting the green band. Apply painter’s tape directly below the yellow band, ensuring it is straight and evenly spaced. Use a clean brush to paint the green section, working with long, smooth strokes to achieve consistent coverage and color density. Keep an eye out for any paint drips or uneven areas, adjusting your technique to maintain a clean look.
Carefully remove the painter’s tape while the paint is still wet to avoid pulling off any paint. Allow the green band to dry thoroughly before moving on to the next color. Through precise attention to detail, each successive color will blend seamlessly into the next, maintaining the vibrancy and clarity of your rainbow mural.
Step 9: Paint the Blue Band
Once the green band has thoroughly dried, it’s time to add the cooling tones of blue to your rainbow mural—place the painter’s tape carefully below the green edge to secure a clean line for the blue paint. Ensure the tape is adequately aligned to maintain the integrity of the rainbow’s arches.
Using a clean brush for lighter hues, paint the blue section with steady, broad strokes, ensuring even coverage and minimizing streaks. Remove the painter’s tape while the paint is still slightly wet to prevent any unwanted jagged edges. Allow the blue band to dry completely before moving on to the next color.
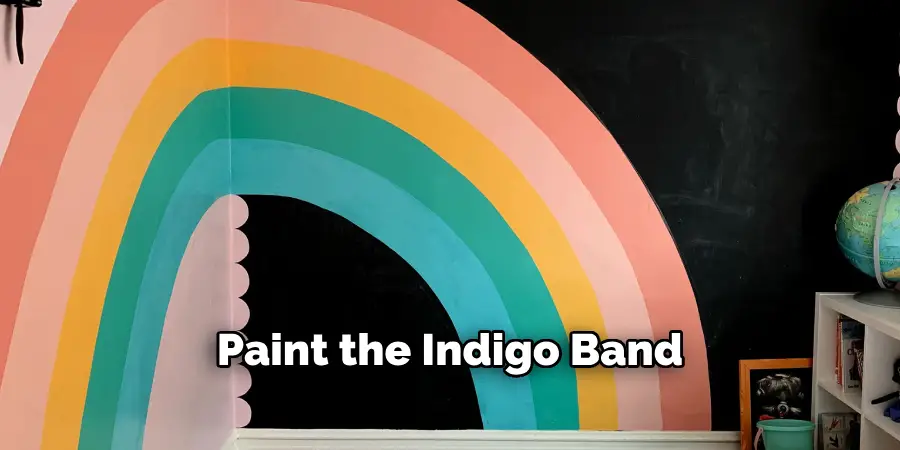
Step 10: Paint the Indigo Band
With the blue band dried thoroughly, add the rich indigo hue to your rainbow creation. Carefully align painter’s tape below the blue edge, ensuring accuracy to maintain the smooth curvature of the rainbow bands. Using a fresh brush, apply the indigo paint, working in steady, even strokes to provide full coverage and consistency. Pay attention to any drips or brush marks, smoothing them out as needed. Gently remove the painter’s tape while the indigo paint is still slightly wet to prevent peeling and to maintain clean, sharp edges. Allow the indigo band to dry entirely before progressing to the final color.
Following these simple steps, you can create a beautiful, vibrant rainbow mural that will brighten any room.
Conclusion
How to paint rainbow on wall involves a careful and precise approach that results in a vibrant and harmonious display of colors.
By methodically working through each color band, from red to violet, you ensure that each hue is distinct yet seamlessly integrated with the others. You are using painter’s tape to create clean edges and a systematic method of painting each band before moving to the following guarantees a polished finish. This step-by-step process takes patience and attention to detail, but the result—a stunning, multicolored arc that enlivens any space—is well worth the effort.
Whether used to brighten up a child’s room, add a pop of color to a living space, or simply serve as a joyful piece of art, a rainbow mural can transform your wall into a compelling, cheerful focal point.
About
Angela is the chief editor of Indoorense. She began her career as an interior designer before applying her strategic and creative passion to lifestyle and home.
She has close to 15 years of experience in creative writing and online content strategy for housekeeping and cleaning,home decorations as well as other efforts.
She loves her job and has the privilege of working with an extraordinary team. She lives with her husband, two sons, and daughter in Petersburg. When she’s not busy working she spent time with her family.