
Are you considering painting your bathroom ceiling? It is an easy and cost-effective way to freshen up the look of your bathroom.
How to paint a bathroom ceiling can be a rewarding home improvement project that refreshes the look of your space. Due to the high-humidity environment, choosing the right materials and following specific techniques is essential to ensure a durable and attractive finish. Whether you’re looking to replace peeling paint, cover stains, or simply update the color scheme, applying a fresh coat to your bathroom ceiling can dramatically enhance the room’s appearance.

This guide will provide step-by-step instructions and helpful tips to achieve professional results, giving your bathroom a cleaner and more inviting atmosphere.
What Will You Need?
Before starting the painting process, gather all the necessary materials and tools to ensure a smooth and efficient project. Here are some essential items you will need:
- Paint (choose an interior paint specifically designed for bathrooms)
- Primer
- Paintbrushes (angled brushes work well for cutting in edges and corners)
- Roller with an extension pole
- Drop cloths or plastic sheeting to protect your floors, fixtures, and walls.
- Painter’s tape
- Sandpaper or sanding block (if needed for surface preparation)
- Cleaning supplies (such as soap, water, and a sponge)
Once you have all the necessary supplies, you can begin to prepare your bathroom for painting.
10 Easy Steps on How to Paint a Bathroom Ceiling
Step 1: Prepare the Bathroom
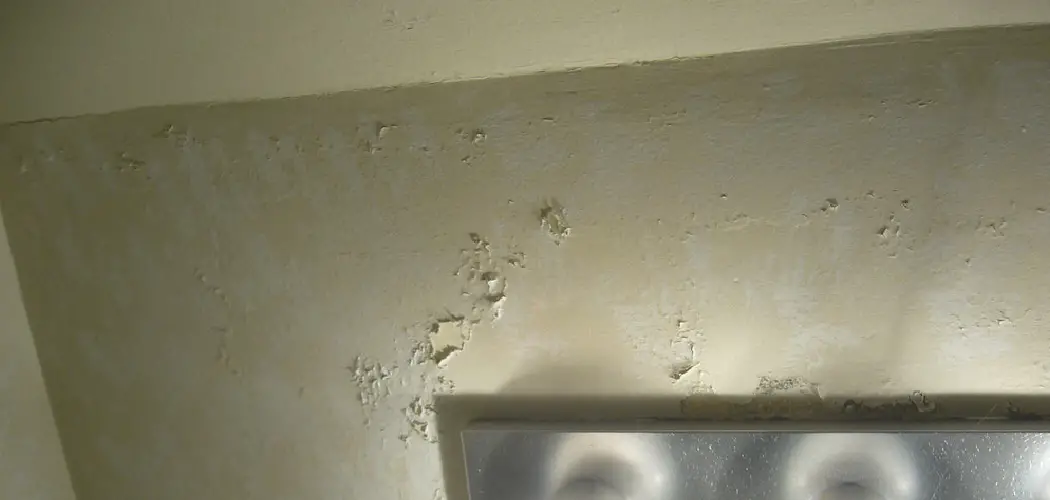
Start by ensuring the bathroom is ready for painting to avoid any mishaps. First, remove as many items as possible from the toilet, such as toiletries, shower curtains, and detachable fixtures or decorations. This step will prevent paint splatters and offer unrestricted access to the ceiling. Next, clean the ceiling thoroughly, using a sponge and a mild soap solution to eliminate any dust, mold, or mildew that may interfere with paint adhesion. Rinse with clean water and let the ceiling dry completely. If the ceiling surface is uneven or has peeling paint, gently sand it using sandpaper or a sanding block to create a smooth base for the new paint.
Additionally, painter’s tape should be applied along the edges where the ceiling meets the walls to protect them from accidental paint marks. Lay drop cloths, or plastic sheeting on floors and cover any fixtures and surfaces you don’t intend to paint.
Step 2: Apply Primer
Applying a primer to the bathroom ceiling is crucial, mainly if you’re covering up stains or darker paint colors. Primer helps the paint adhere better and provides a uniform base for the final paint color. Use a high-quality primer suitable for high-moisture areas, applying it with a roller for larger surface areas and an angled brush for corners and edges. Ensure you cover the entire ceiling surface evenly by working in small sections. Once the primer is applied, allow it to dry thoroughly according to the manufacturer’s instructions before proceeding with the paint application. Proper priming ensures that your paint will have a smooth and long-lasting finish.

Step 3: Paint the Ceiling
You’re ready to start painting the ceiling with the primer fully dry. Choose an interior paint designed for bathroom ceilings, as it will be formulated to resist humidity and mildew. Begin by cutting in the edges of the ceiling with an angled paintbrush. This technique involves painting a border around the ceiling’s perimeter where it meets the walls. Once the edges are complete, use a roller with an extension pole to apply the paint to the larger ceiling areas.
Roll the paint in even strokes, maintaining a wet edge to prevent lap marks and ensure a uniform finish. Work in small sections and overlap slightly with the previous section to achieve a seamless look. Depending on the paint and its coverage, you may need to apply a second coat after the first one dries.
Step 4: Finishing Touches
Once the paint has dried completely and you’re satisfied with the coverage and finish, it’s time to tidy up and add the final touches to your project. Start by carefully removing the painter’s tape from the edges where the ceiling meets the walls to reveal clean lines. Take your time to avoid chipping or peeling the fresh paint. Next, inspect the roof for any minor touch-ups that may be needed and address them accordingly. If you’ve installed new hardware or light fixtures after painting, ensure they are securely in place.
Finally, return any removed items such as toiletries or decorations, to their respective spots and enjoy the refreshed look of your bathroom. Admire your work and take pride in a well-done job—your newly painted bathroom ceiling should now contribute to a brighter and more inviting space.
Step 5: Clean-Up and Maintenance
After you’ve completed painting and reassembled your bathroom, it’s essential to clean up and consider ongoing maintenance to preserve the fresh look of your ceiling. Begin by properly washing and storing your painting tools, such as brushes and rollers, so they’re ready for future projects. Roll up and dispose of any used drop cloths or plastic sheeting carefully. Keep an eye on your newly painted surface over time, especially in high-humidity environments like bathrooms, where mold and mildew can develop. To prevent this, ensure your bathroom is well-ventilated by using an exhaust fan during showers and keeping windows open when possible.
Step 6: Enjoy Your New Space
With the painting process complete, take a moment to enjoy your freshly revamped bathroom. A newly painted ceiling can dramatically elevate the room’s overall appearance, making it look cleaner, brighter, and more modern. Consider how you might enhance the space with new decorative elements, such as artwork, a stylish mirror, or updated towels and accessories that complement the fresh paint job. Enjoy your bathroom’s enhanced atmosphere and functionality, and take pride in the effort you invested in transforming it.

Step 7: Regular Updates and Future Projects
After successfully transforming your bathroom ceiling, consider periodically updating other aspects of the bathroom to maintain a fresh and cohesive look. This could involve repainting walls, updating tiles, or replacing fixtures. Minor regular updates can ensure that your space remains inviting and prevents more extensive renovations in the future. Evaluate other bathroom characteristics such as lighting, storage solutions, and color schemes that need attention to enhance the overall aesthetic and functionality.
Plan your future projects based on budget and time frame, and tackle them one step at a time to manage the renovations sustainably. This approach will preserve your bathroom’s appearance and add value to your home.
Step 8: Assess Safety Features
While updating the aesthetics of your bathroom, it’s crucial to assess and enhance its safety features, ensuring a secure environment for all users. Start by checking the stability of handrails and grab bars if they are present, especially in showers and near bathtubs. Consider installing slip-resistant flooring or mats to prevent accidents, mainly when the floor is wet. Inspect electrical outlets for safety covers, ensuring they’re GFCI-protected to avoid electrical shocks in the humid environment of a bathroom.

Additionally, ensure the lighting is adequate to eliminate dark spots, reducing the risk of tripping or slipping. Regularly test smoke alarms and carbon monoxide detectors if installed nearby, as they play a vital role in early hazard detection. Prioritizing these safety measures not only protects your loved ones but also contributes to peace of mind and the long-term enjoyment of your bathroom space.
Step 9: Budget-Friendly Improvements
After ensuring safety and functionality, consider implementing budget-friendly improvements to enhance your bathroom’s appeal further. Some cost-effective ideas include adding a fresh set of bath linens, such as towels and bath mats, in coordinating colors. Introducing plants can bring a touch of nature, improving the atmosphere and air quality. Another easy upgrade is replacing worn or outdated hardware with more modern styles like cabinet pulls and faucet handles. If the budget allows, consider updating the bathroom’s lighting fixtures to enhance the room’s ambiance and functionality.
Step 10: Sustainable Practices
Incorporating sustainable practices in your bathroom updates can add long-term value and reduce environmental impact. Start by choosing eco-friendly paint options free of volatile organic compounds (VOCs) to protect indoor air quality. Consider installing water-saving fixtures like low-flow toilets and showerheads to conserve water and lower utility bills. Opt for LED or energy-efficient lighting to reduce energy consumption and cut costs. When selecting materials for future renovations, look for sustainable and durable options, like bamboo flooring or recycled glass tiles.

By following these steps and incorporating your style and preferences, you can transform your bathroom into a welcoming and functional space that suits your needs and budget.
Conclusion
How to paint a bathroom ceiling can significantly refresh the look of your space while adding value to your home.
This process, beginning with preparation and ending with cleanup, involves careful planning and execution to achieve professional results. Properly preparing surfaces, selecting the right tools and materials, and employing precise painting techniques ensures a durable finish. Regular maintenance and safety assessments will preserve your bathroom’s aesthetic appeal and functionality for years to come. Moreover, incorporating budget-friendly and sustainable upgrades can elevate the overall experience, making your bathroom more attractive and environmentally conscious.
By following this comprehensive guide, you can confidently undertake the project, transforming your bathroom into a more pleasant and inviting sanctuary.
About
Angela is the chief editor of Indoorense. She began her career as an interior designer before applying her strategic and creative passion to lifestyle and home.
She has close to 15 years of experience in creative writing and online content strategy for housekeeping and cleaning,home decorations as well as other efforts.
She loves her job and has the privilege of working with an extraordinary team. She lives with her husband, two sons, and daughter in Petersburg. When she’s not busy working she spent time with her family.