
Grout is an essential component in tiled surfaces, providing both functionality and aesthetics by filling the spaces between tiles. Over time, however, grout can become discolored and grimy due to exposure to moisture, dirt, and daily wear and tear.
This not only detracts from the overall appearance of the tiled area but can also lead to further deterioration if not properly maintained. Fortunately, there are simple and effective methods to rejuvenate your grout, ensuring it remains clean and vibrant.
In this guide on how to make grout look new, we will explore various techniques to help you restore the look of your grout and keep it looking new for years to come.
Why Does Grout Get Dirty?
Before we dive into the steps to make grout look new, it’s essential to understand why and how grout gets dirty in the first place. Grout is a porous material, meaning that it has tiny openings that can absorb liquids and particles. When exposed to moisture, such as water from mopping or steam from showers, these openings can trap dirt and bacteria.
Additionally, foot traffic and spills can cause stains on the surface of the grout. Over time, this buildup of dirt and bacteria can lead to discoloration and staining of the grout.
Needed Materials
- Grout Cleaner or Homemade Solution (E.g., Vinegar and Water)
- Toothbrush or Grout Brush
- Sponge
- Clean Cloth or Paper Towels
- Sealer (Optional)
- Protective Gear (Gloves, Mask)
8 Step-by-step Guidelines on How to Make Grout Look New
Step 1: Prepare the Area
Before you begin cleaning, it’s crucial to prepare the area to ensure both efficiency and safety. Start by removing any items from the tiled surface, such as rugs, furniture, or decorations, to provide unobstructed access to the grout lines. Next, sweep or vacuum the area to eliminate loose dirt and debris that could interfere with the cleaning process.
Finally, ensure the room is well-ventilated by opening windows or using fans, especially if you are using a commercial grout cleaner with strong chemicals. Wear protective gear, such as gloves and a mask, to safeguard your skin and respiratory system from potential irritants.

Step 2: Choose Your Cleaning Solution
Selecting the right cleaning solution is crucial for effective grout cleaning. You have two primary options: commercial grout cleaners or homemade solutions. Commercial grout cleaners are specifically formulated for cleaning grout and can be found in most hardware or home improvement stores. These are often more potent and can quickly remove stubborn stains and grime. Ensure you follow the manufacturer’s instructions for safe use.
Alternatively, you can create a homemade solution using equal parts vinegar and water or baking soda and water, which are great for tackling mild to moderate dirt. These natural solutions are not only cost-effective but also environmentally friendly. Depending on the condition of your grout, choose the solution that best fits your needs for restoring its original, pristine look.
Step 3: Test the Solution
Before applying the cleaning solution to the entire grout area, it’s essential to test it on a small, inconspicuous section first. This will help determine if the solution is safe and effective for your specific type of grout. If there are no adverse reactions, you can proceed with confidence.
The type of grout you have will also determine how harsh a cleaner you can use. For example, acidic solutions like vinegar may damage natural stone or unsealed grout and should be avoided. In such cases, opt for gentler cleaners or consult a professional.
Step 4: Apply the Solution to the Grout
Once you’ve tested your cleaning solution and ensured it’s suitable for your grout, it’s time to apply it. Using a toothbrush or a grout brush, dip it into your chosen solution and gently scrub the grout lines. Focus on small sections at a time, working in a circular motion to lift dirt and stains effectively.
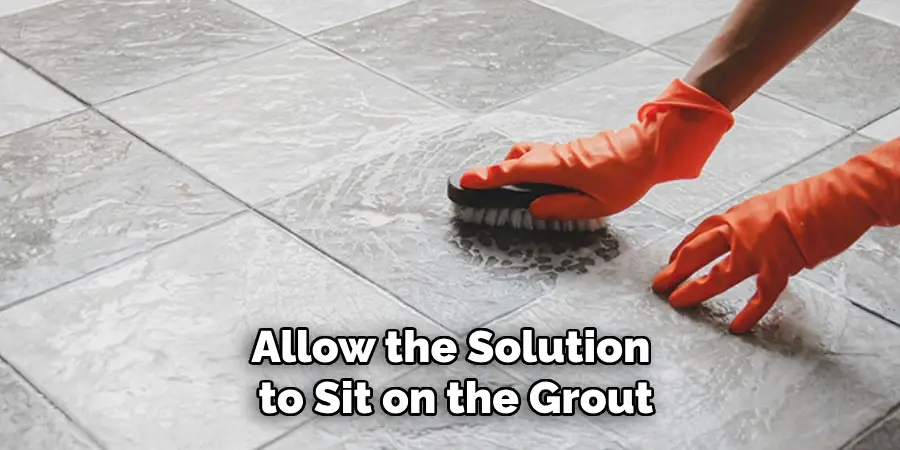
Be sure to apply enough pressure, but not so much that it damages the grout or the surrounding tiles. Allow the solution to sit on the grout for about 5 to 10 minutes to penetrate and break down the grime. This dwell time is crucial for maximum cleaning efficacy, especially when dealing with tough stains. As you progress, periodically rinse your brush to remove accumulated dirt, ensuring you’re not spreading it to other areas.
Step 5: Wipe and Rinse
Using a damp sponge or cloth, wipe away the cleaning solution from the grout lines. Rinse frequently to remove any residue and prevent it from drying on the surface, potentially causing streaks. After wiping, inspect the grout lines for remaining discoloration or stains. If needed, repeat the cleaning process until satisfied with the results.
The next step is crucial to prevent future staining and keep your grout looking new for longer. Rinse the entire area with clean water to remove any remaining cleaning solution, and then dry thoroughly with a cloth or paper towel.
Step 6: Dry Thoroughly
After rinsing the area, it is vital to dry the grout thoroughly to prevent any lingering moisture from seeping into the porous material and causing future dirt accumulation or mildew growth. Use a dry, clean cloth or absorbent paper towels to wipe away excess water, ensuring no trace of moisture is left behind.
For larger surfaces, consider using a fan or dehumidifier for a quicker drying process. A well-dried grout not only maintains its fresh appearance but also enhances the longevity of the cleaning effects, offering a pristine look you’re sure to appreciate.
Step 7: Apply a Sealer (Optional)
Sealing grout is an optional but effective step for making it look new and reducing future cleaning efforts. A sealer helps fill in the pores of the grout, creating an invisible barrier that repels dirt and stains from penetrating deep into the material. This protective layer also makes it easier to wipe away spills and reduces grime buildup over time.
To apply a sealer, ensure your grout is clean and completely dry. Then, using a small brush or cloth, carefully apply a thin coat of sealant along the grout lines. Allow it to dry for at least 24 hours before using the tiled surface again.
Step 8: Maintain Regular Cleaning
To keep your grout looking new, regular cleaning is crucial. A simple routine of sweeping or vacuuming away loose dirt and wiping down the surface with a damp cloth can go a long way in preserving its pristine appearance. Additionally, avoiding harsh chemicals and using natural solutions can also help maintain the integrity of your grout for longer.
By following these steps on how to make grout look new and implementing a regular cleaning routine, you can keep your grout looking like new for years to come. Remember to always prioritize safety and choose the right cleaning solution for your specific type of grout to achieve the best results. So, keep these tips in mind and enjoy a clean and sparkling tiled surface in your home or business. Happy cleaning!

Frequently Asked Questions
Q: Will Vinegar Damage My Grout?
A: It depends on the type of grout you have. Acetic acid, which is found in vinegar, can potentially damage natural stone or unsealed grout. It’s best to test a small area first before using vinegar as a cleaning solution. If your grout is sensitive, opt for milder cleaners.
Q: Can I Use Bleach to Clean Grout?
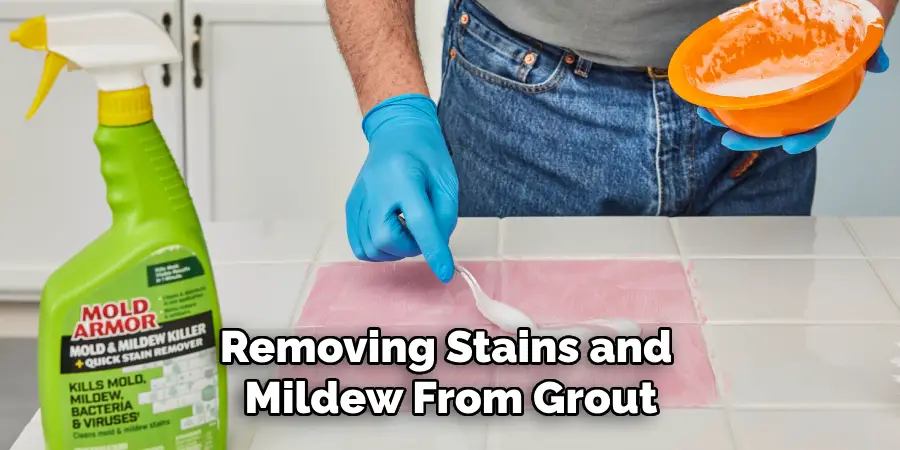
A: While bleach can be effective in removing stains and mildew from grout, it’s also highly corrosive and can potentially damage the surrounding tiles. It’s best to avoid using bleach on grout unless absolutely necessary and dilute it with plenty of water before use.
Q: How Often Should I Seal My Grout?
A: The frequency of sealing depends on the type of sealer used. Most sealers last for 1-3 years, so it’s recommended to reseal every two years for maximum protection. However, high-traffic areas or surfaces exposed to moisture may require more frequent sealing. Be sure to consult the manufacturer’s instructions for specific recommendations.
Conclusion
Keeping your grout looking fresh and clean not only enhances the appearance of your tiled surfaces but also helps maintain the overall hygiene of your space. By following the outlined steps on how to make grout look new—including testing cleaning solutions, applying them carefully, and optionally sealing the grout—you can effectively rejuvenate your grout and keep it protected against future damage.
Regular maintenance is key, and incorporating it into your cleaning routine will make the task much simpler and less time-consuming. Remember to consider the type of grout you have and choose appropriate cleaners to avoid any adverse effects. With these tips, your grout can continue to look like new, providing a neat and polished look to your home or business environment.
About
Angela is the chief editor of Indoorense. She began her career as an interior designer before applying her strategic and creative passion to lifestyle and home.
She has close to 15 years of experience in creative writing and online content strategy for housekeeping and cleaning,home decorations as well as other efforts.
She loves her job and has the privilege of working with an extraordinary team. She lives with her husband, two sons, and daughter in Petersburg. When she’s not busy working she spent time with her family.