

Are you tired of looking for window seat cushions in the store? Why not make a cushion that fits the exact dimensions of your window seat?
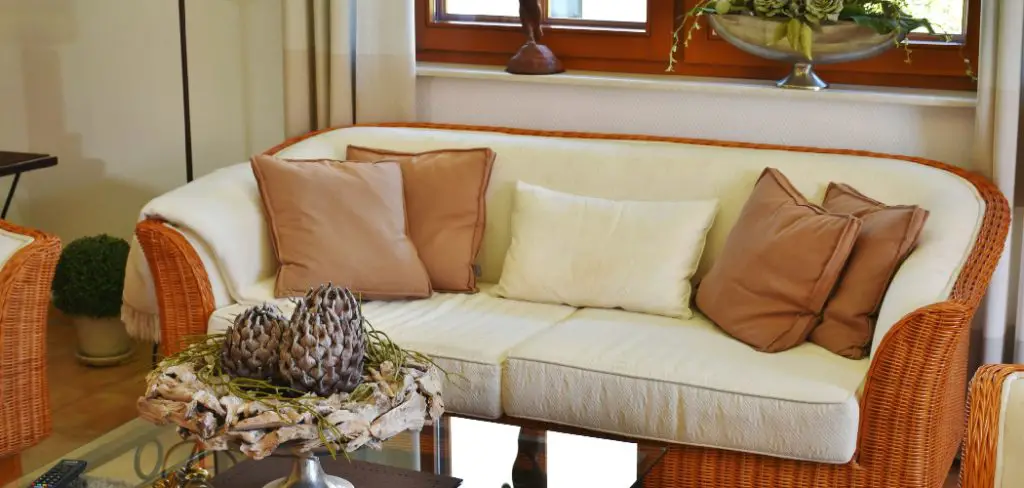
Creating a window seat cushion is a simple yet rewarding DIY project that can add comfort and style to your home. Whether you’re looking to transform a quiet reading nook, brighten up a kitchen bay window, or add coziness to a bedroom nook, a custom cushion can enhance the aesthetic appeal of your space. This guide will walk you through step-by-step instructions on how to make a window seat cushion, select the perfect fabric, and sew your own cushion while also providing tips on choosing the correct filling for maximum comfort.
With a bit of time and creativity, you can design a beautiful and functional window seat cushion that perfectly fits your style and space.
What Will You Need?
Before you begin, gather the following materials:
- Measuring tape
- Fabric of your choice
- A sewing machine or a needle and thread
- Scissors
- Zipper (optional)
- Foam cushion or filling of your choice (such as batting, foam inserts, or pillow forms)
You can start making your cushion once you have all the necessary materials.
10 Easy Steps on How to Make a Window Seat Cushion
Step 1. Measure the Window Seat:
Accurate measurements are crucial for creating a cushion that fits perfectly. Begin by measuring the length and width of the window seat where the cushion will be placed. Use a measuring tape and double-check your measurements for optimal precision to ensure they are exact. If the seat is not a perfect rectangle with specific contours or angles, take additional notes of these features and measure each section accordingly. It’s also beneficial to account for the thickness of the foam or filling you plan to use, as this will impact the overall dimensions of the finished cushion. Keep these measurements handy, as they form the foundation for cutting your fabric and sewing the cushion cover.

Step 2. Select and Cut the Fabric:
Once you have your measurements, it’s time to select the fabric for your cushion. Choose a durable fabric that complements the decor of the room. Using the measurements from Step 1, mark the dimensions on your fabric with a fabric pencil. Ensure to add an extra inch to each side for seam allowance. Carefully cut the fabric with scissors; if you have patterned fabric, ensure the patterns align correctly before cutting. You will need two pieces: one for the top and one for the bottom of the cushion.
Step 3. Prepare the Foam Cushion:
Next, prepare the foam cushion or filling that will provide the comfort and structure for your window seat cushion. Lay the foam on a flat surface and use the measurements from Step 1 to accurately mark the dimensions on the foam. If your foam is larger than the desired size, use a bread or electric carving knife to cut through it smoothly. For a softer feel, consider adding a layer of batting over the foam. Lay the batting flat and cut it to the exact dimensions as the foam, ensuring it fits neatly.
Step 4. Assemble the Cushion Cover:
With your fabric pieces cut and foam cushion prepared, it’s time to assemble the cushion cover. Lay your fabric pieces with the right sides facing each other, ensuring the edges line up neatly. Pin the fabric pieces together along the edges, leaving one side open. This open side will allow you to insert the foam cushion later. If you use a zipper, pin it along the open side now, ensuring it is evenly aligned. Using a sewing machine or needle and thread, sew along the pinned edges with a straight stitch, maintaining a consistent seam allowance.

Backstitch at both ends to secure the seams. Once sewn, remove the pins and trim any excess fabric at the corners for a neat finish. Turn the fabric cover right side out through the open side, gently pushing out the corners to create a crisp shape.
Step 5. Insert the Foam Cushion:
With the cushion cover now assembled, inserting the foam cushion into the cover is time. Carefully fold and compress the foam to fit it through the open side of the cushion cover. Once inside, adjust and smooth the foam to ensure it fills out the cover evenly and takes on the intended shape. If you opted to include a batting layer, ensure it remains evenly distributed around the foam for extra softness. If your cover has a zipper, simply zip it up to close the cushion.
For an open side with no zipper, hand stitch the opening closed using a slip stitch for an invisible seam. Ensure the stitches are tight and neat to keep the foam in place. Your custom window seat cushion is ready to add comfort and style to your favorite seating area.
Step 6. Adding Finishing Touches:
With your custom window seat cushion assembled, consider adding some finishing touches to enhance its durability and style. If the fabric allows, topstitch around the cushion’s edges to reinforce the seams and provide a tailored look. This helps the cushion maintain its shape and adds a decorative element. Additionally, embellishments like piping or decorative buttons should be considered to elevate the design further. Piping can be sewn into the seams before closing the cushion cover, providing a sophisticated accent.
Decorative buttons can be attached through the fabric into the foam, creating a tufted effect for an elegant touch. With these enhancements, your window seat cushion will be comfortable and functional and serve as a stylish statement piece in your home.
Step 7. Test the Fit and Comfort:
Once you have completed your window seat cushion, testing the fit and comfort is essential. Place the cushion on the window seat, ensuring it fits snugly within the dimensions of the space. Ensure the edges align well with the seat, and adjust as needed. Sit on the cushion to assess its comfort level, paying attention to the firmness of the foam and overall support. If the cushion feels too firm or soft, consider adjusting the thickness of the foam or adding more batting for additional padding.
Testing the cushion helps ensure it provides the desired comfort level and fits well in its designated spot, making your seating area inviting and enjoyable.
Step 8. Maintenance and Care:
Regular maintenance and care are essential to ensure your window seat cushion remains in top condition. Begin by referring to the fabric care instructions on the label or manufacturer’s guidelines to determine the best cleaning methods. For routine maintenance, vacuum the cushion periodically to remove dust and debris. In case of spills or stains, spot clean immediately using a mild detergent solution and a clean cloth, constantly testing the cleaner on a hidden area first to avoid discoloration.
If your cushion cover is removable and machine washable, follow the specific washing instructions to prevent shrinkage or fabric damage. Additionally, rotating the cushion regularly can help maintain its shape and distribute wear evenly.
Step 9. Personalize Your Cushion:
Personalizing your window seat cushion can transform it from a simple seat into a reflection of your unique style. Add monograms, appliqués, or embroidery to make the cushion yours. Choose a design theme or color palette that complements the existing decor in your room. You could embroider initials or a meaningful motif in a contrasting thread color for a special touch. Additionally, using fabric paint or stencils provides an opportunity to create custom patterns or images directly on the fabric. These personalized details enhance the aesthetic appeal and make your cushion a one-of-a-kind piece that stands out in your home.
Step 10. Enjoy Your Custom Creation:
With your personalized window seat cushion complete, it’s time to enjoy the fruits of your labor. The cushion adds a layer of comfort to your window seat and is a stylish and unique addition to your home decor. Spend time sitting or lounging on your cushion, whether reading a book, sipping your morning coffee, or simply relaxing while enjoying the view. This custom piece reflects your creativity and effort, making it a perfect spot for unwinding. Share your craft with friends and family, or consider creating more custom cushions for other areas of your home to extend this cozy, personalized touch throughout your living space.
By following these steps, you can create a custom window seat cushion that provides comfort and functionality and showcases your style and creativity.
Conclusion
How to make a window seat cushion is a rewarding project that combines both practicality and personal expression.
By carefully selecting materials, following a structured process, and incorporating personalized touches, you can craft a cushion that complements your home’s style and enhances any seating area. From initial design and fabric choices to assembly and finishing touches, each step offers an opportunity to tailor the cushion to your taste and needs. Regular care and maintenance will ensure its longevity, allowing you to enjoy the comfort and charm of your custom creation for years to come.
Whether you use the cushion for relaxation, reading, or simply as a decorative feature, it is a testament to your creativity and craftsmanship, providing a cozy spot to savor life’s quiet moments.
About
Angela is the chief editor of Indoorense. She began her career as an interior designer before applying her strategic and creative passion to lifestyle and home.
She has close to 15 years of experience in creative writing and online content strategy for housekeeping and cleaning,home decorations as well as other efforts.
She loves her job and has the privilege of working with an extraordinary team. She lives with her husband, two sons, and daughter in Petersburg. When she’s not busy working she spent time with her family.