

Repurposing old furniture not only breathes new life into cherished items but also offers a sustainable approach to home improvement. Transforming a headboard into a stylish and functional bench is an innovative project that combines creativity with practicality.
This guide on how to make a bench from a headboard will walk you through the process step-by-step, ensuring that even those with minimal DIY experience can successfully complete the transformation.
Whether you’re looking to add a unique piece to your home decor or simply enjoy the satisfaction of creating something with your own hands, making a bench from a headboard is a project that promises rewarding results.
What is a Headboard?
Before diving into the tutorial, let’s discuss what exactly a headboard is. A headboard is a piece of furniture that attaches to the head of a bed frame and serves as a decorative element in the bedroom. While traditionally used for aesthetic purposes, headboards have become increasingly popular for their functional benefits such as providing support for sitting up in bed while reading or watching TV.
The most common materials used for headboards include wood, metal, and upholstered fabrics. However, any sturdy material can be repurposed into a headboard, making it an ideal item for upcycling projects.
Materials You’ll Need
To make your own headboard bench, you’ll need the following materials:
- An old wooden headboard (either from an existing bed frame or purchased separately)
- Wooden boards (for seat and legs)
- Screws
- Nails
- Wood glue
- Drill
- Saw
- Sandpaper
- Paint or stain (optional)
8 Step-by-step Guides on How to Make a Bench From a Headboard
Step 1: Prepare the Headboard
Begin by thoroughly cleaning the headboard to remove any dust, dirt, or old paint residues. Use a damp cloth for wooden headboards, or mild soap and water for metal or fabric options. Once cleaned, inspect the headboard for any damage such as cracks or loose joints, and repair as necessary. Sand the surface with sandpaper to achieve a smooth finish, which will help paint or stain adhere better later.
If the headboard has built-in legs or any protruding elements that do not suit your bench design, consider removing them. Make sure to wear safety goggles and a mask during sanding to protect yourself from dust particles. This preparation ensures that your headboard is in the best possible condition for transformation into a stylish bench.

Step 2: Measure and Cut the Seat
Take measurements of your headboard to determine the size of the seat. The seat should be about two inches shorter in width than the headboard to create an overhang on each side. Using a saw, cut a piece of wood that matches these measurements.
If you prefer a cushioned seat, cut out a piece of foam or purchase a pre-cut foam block and attach it to the wooden base using spray adhesive. This will provide added comfort when sitting on your bench.
Step 3: Attach Legs to the Headboard
Using wood glue and screws, attach four legs to the bottom corners of the headboard at a 90-degree angle. The legs should be the same length, but you can adjust their height to suit your preferred bench height.
Tip: For added stability, consider using L-shaped brackets to attach the legs to the headboard.
Step 4: Attach Seat to Headboard
Place the cut wooden board or foam on top of the headboard so that it aligns with the backrest. Using screws and a drill, secure the seat to the headboard from underneath. Make sure to use enough screws for added support.
The seat should overhang on both sides of the headboard, creating armrests for your bench. If desired, you can also add additional decorative elements such as wooden trim or upholstery around the edges of the seat.

Step 5: Sand and Paint/Stain
With the bench assembled, it’s time to give it a polished finish. Start by sanding the entire surface of the bench, including the legs, seat, and backrest, to ensure there are no rough patches or splinters. Use fine-grit sandpaper to achieve a smooth surface. Once sanding is complete, wipe down the bench with a damp cloth to remove any dust particles.
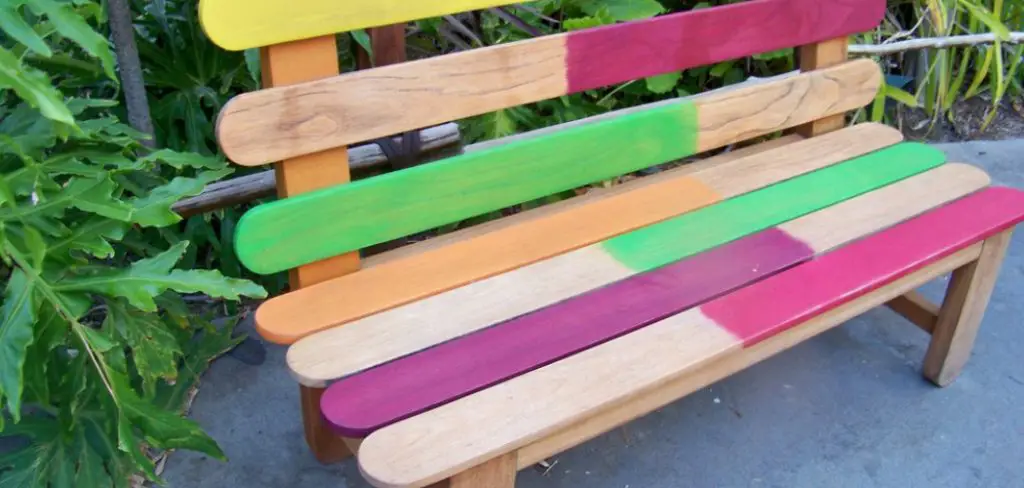
Decide whether you want to paint or stain your bench based on your desired aesthetic. If you prefer a classic look that showcases the wood grain, select a stain that complements your home’s decor. Apply the stain with a brush or cloth, following the manufacturer’s instructions, and allow it to dry thoroughly. For a more modern or colorful look, use paint in your preferred color and allow it to dry completely.
Step 6: Add Finishing Touches
Once your bench is dry, you can add any final decorative touches. Consider adding cushions or pillows to the seat for added comfort and style. You can also personalize your bench by adding stenciled designs or painting patterns on the backrest.
You can also consider adding hooks or shelves to the back of the bench for added functionality. These can be used for hanging coats bags or displaying decorative items.
Step 7: Place and Enjoy Your Bench
Now that your headboard has successfully been transformed into a bench, it’s time to find the perfect spot for it in your home. Consider placing the bench in an entryway, at the foot of your bed, or even on a porch or patio for charming and practical seating.
Wherever you decide to showcase your new bench, ensure it complements the surrounding decor and enhances the overall aesthetic of the space. Once positioned, take a moment to admire your handiwork and enjoy the personal touch it brings to your home. This creative upcycling project not only adds a unique furniture piece to your collection but also reflects your commitment to sustainability and clever design.

Step 8: Maintain and Reuse
With proper care, your headboard bench can last for years to come. Regularly dust and clean the surface as needed, and consider giving it a fresh coat of paint or stain if desired. If you ever decide to change up your home’s decor, don’t be afraid to repurpose your bench into a new piece of furniture or donate it to someone in need who will appreciate its charm. The possibilities are endless with this versatile and environmentally friendly DIY project! So go ahead and get creative with your old headboard – you never know what masterpiece you might create next. Happy crafting!
Following these steps on how to make a bench from a headboard, you can easily transform an old headboard into a beautiful and functional bench. This project not only helps minimize waste but also adds a personal touch to your home decor. Don’t be afraid to experiment with different designs and techniques, as each headboard may require slight variations in the building process.
Frequently Asked Questions
Q: Can I Use Any Headboard for This Project?
A: Yes, you can use almost any type of headboard as long as it is sturdy and in good condition. However, wooden or metal headboards tend to work best for this project. The headboard should also be wide enough to accommodate the size of the bench you want to create.
Q: Do I Need Special Tools for This Project?
A: While having some basic woodworking tools can make this project easier, they are not necessary. You can use a handsaw instead of a power saw and nails instead of screws, but it may take longer to complete the project. It’s always best to use safety equipment such as goggles and gloves when working with power tools.
Q: How Long Will It Take to Make a Headboard Bench?
A: The time it takes to complete this project will vary depending on your skill level and the complexity of your chosen design. However, on average, it should take around a day to make a headboard bench from start to finish.
Q: Can I Use My Headboard Bench Outdoors?
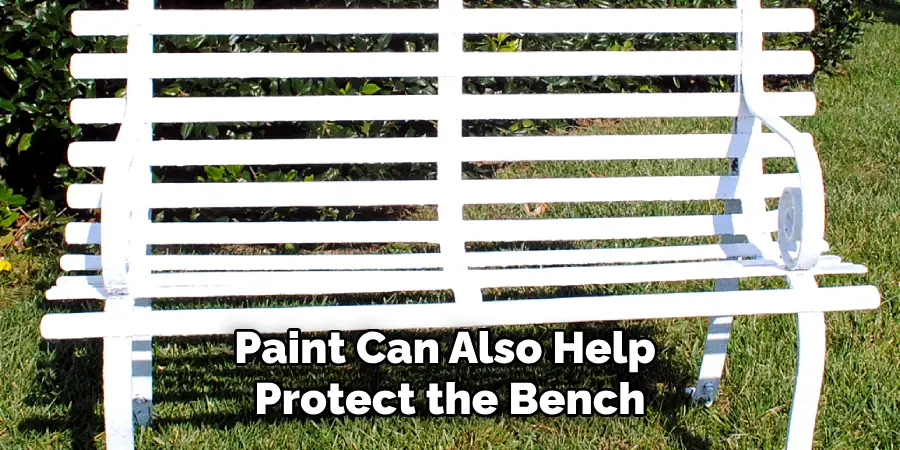
A: Yes, you can use your headboard bench outdoors as long as it is protected from harsh weather conditions such as direct sunlight or heavy rain. Applying a coat of outdoor sealant or paint can also help protect the bench from the elements. Consider using waterproof cushions and pillows for added protection and comfort.
Conclusion
Transforming a headboard into a bench is a rewarding project that combines creativity with functionality. By following the steps on how to make a bench from a headboard outlined above, you not only create a unique piece of furniture that adds style to your home but also contribute to environmental sustainability by repurposing materials.
Whether you’re an experienced DIY enthusiast or a beginner looking for a fun project, crafting a headboard bench is an accessible way to express your personal style and improve your living space. Remember, the key to a successful project is patience and a willingness to experiment with different designs and finishing techniques.
Enjoy the satisfaction of giving new life to old furniture and delight in a handmade piece that reflects your ingenuity and commitment to reducing waste.
About
Angela is the chief editor of Indoorense. She began her career as an interior designer before applying her strategic and creative passion to lifestyle and home.
She has close to 15 years of experience in creative writing and online content strategy for housekeeping and cleaning,home decorations as well as other efforts.
She loves her job and has the privilege of working with an extraordinary team. She lives with her husband, two sons, and daughter in Petersburg. When she’s not busy working she spent time with her family.