

Tiling a wall can transform the look of a space, but achieving a sleek and professional finish requires a properly leveled surface. Uneven walls can lead to misaligned tiles, unsightly gaps, and a less durable installation. By taking the time to level the wall before starting the tiling process, you ensure that your project will have the smooth foundation necessary for success. This guide will walk you through how to level a wall before tiling, providing you with the knowledge and confidence to tackle your tiling project with ease.

Why Leveling a Wall is Crucial Before Tiling
Leveling a wall before tiling is a vital step that ensures both the aesthetic and structural success of your tiling project. An uneven surface can lead to a myriad of issues, including the risk of tiles loosening over time due to insufficient adhesive contact. Misalignments can become glaringly apparent, disrupting the visual flow of the tiles and diminishing the overall look of the space. Furthermore, a level wall helps in saving time and effort during installation, as it allows for a more straightforward application process where each tile can be placed with precision.
Ultimately, taking the time to properly level the wall sets the foundation for a durable and visually pleasing finish, maximizing the longevity and quality of the tiling work.
Importance of a Smooth, Even Surface
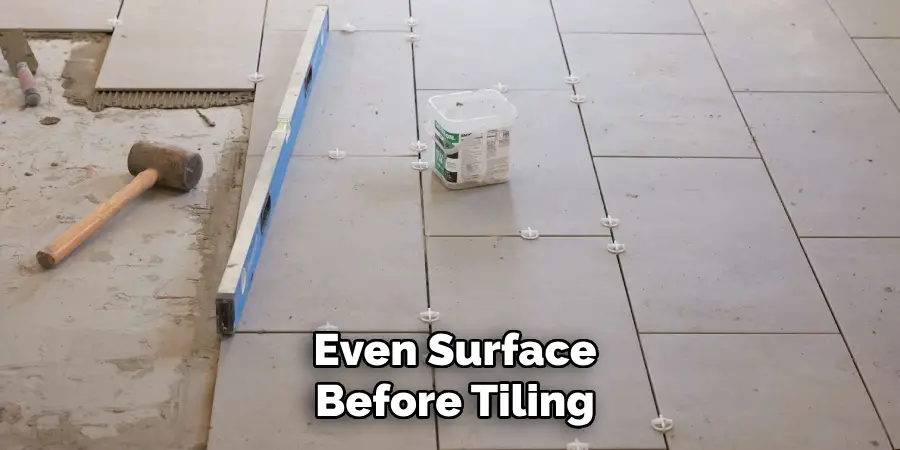
Achieving a smooth and even surface before tiling is essential for several reasons. First and foremost, it ensures that the tiles adhere properly to the wall, promoting long-term durability and resistance to sagging or shifting. An even surface minimizes the risk of water seeping behind the tiles, which can lead to damage or mold growth over time. Furthermore, a smooth wall simplifies the tiling process, reducing the likelihood of tiles needing excessive adjustments or trims to fit correctly.
This enhances the efficiency of the job and can result in a more professional-looking finish. Lastly, a well-prepared surface contributes to achieving the desired aesthetic result, as it allows the pattern and grout lines to appear uniform and crisp, ultimately elevating the overall look of the space.
10 Methods How to Level a Wall before Tiling
1. Assess the Wall’s Condition First
The first step in leveling a wall before tiling is to thoroughly assess its condition. Identify any cracks, bumps, holes, or other imperfections that may affect the tiling process. Take a level and place it against different sections of the wall to determine if there are high or low spots. Pay close attention to corners, as these areas are prone to irregularities. If the wall has extensive damage or unevenness, a more comprehensive leveling process will be necessary. By assessing the wall at the outset, you can determine which leveling techniques are most appropriate.
2. Clean and Prepare the Surface
Before applying any leveling materials, it’s important to clean and prepare the wall surface. Remove any dirt, dust, grease, or old adhesive that may interfere with the adhesion of leveling compounds. If the wall has wallpaper, paint, or previous tile residue, scrape these off with a putty knife or sandpaper. Use a sponge and mild detergent to wash away any residue, ensuring that the surface is completely dry before proceeding. A clean wall will help ensure that leveling compounds and tiles stick properly, preventing future issues with tile adhesion.
3. Patch Holes and Cracks
Small imperfections such as holes, cracks, or dents can be easily fixed before leveling the wall. Use a pre-mixed joint compound or filler to patch these areas. Apply the compound using a putty knife, spreading it evenly over the damaged spots. For deeper cracks or larger holes, you may need to apply the filler in layers, allowing each layer to dry before adding more. Once the compound is dry, sand the area to create a smooth, flush surface with the rest of the wall. Filling these imperfections ensures the wall is structurally sound and ready for tiling.

4. Apply a Self-Leveling Compound
For larger areas that are uneven, applying a self-leveling compound can help create a flat, even surface for tiling. Self-leveling compounds are easy to work with and are designed to flow into low areas, leveling the surface as they dry. Begin by mixing the compound according to the manufacturer’s instructions. Pour the compound onto the wall and use a trowel to spread it evenly across the surface. Be sure to work quickly, as the compound will begin to set within minutes. Allow the self-leveling compound to cure completely before proceeding with the tiling process.
5. Use a Plaster Skim Coat
If the wall has only minor imperfections or unevenness, applying a skim coat of plaster can be an effective leveling method. A skim coat is a thin layer of plaster that smooths out surface irregularities, creating a flat and even wall. Start by mixing the plaster and then apply it to the wall using a trowel or plastering knife. Work in sections, spreading the plaster in smooth, even strokes. Allow the plaster to dry and then lightly sand the surface to achieve a flawless finish. This method is particularly useful for drywall or plaster walls that need minor smoothing before tiling.
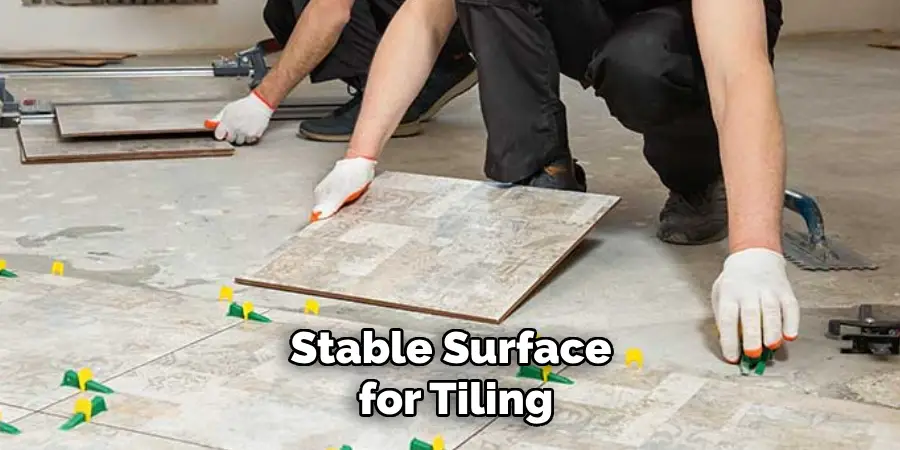
6. Use Tile Backer Boards for Uneven Walls
In cases where the wall is severely uneven or damaged, installing tile backer boards can provide a flat, stable surface for tiling. Tile backer boards are moisture-resistant and offer a solid foundation for tile adhesion. Begin by measuring and cutting the backer boards to fit the wall. Attach the boards to the wall using screws or adhesive, ensuring they are level and secure. This method not only levels the wall but also adds extra durability and moisture protection, making it ideal for areas like bathrooms and kitchens where tiles are commonly installed.
7. Sand High Spots on the Wall
If your wall has high spots or raised areas, sanding them down can help create a smooth surface for tiling. Use coarse-grit sandpaper or a sanding block to carefully sand down these uneven areas. For more substantial high spots, you may need to use an electric sander. Be cautious not to damage the wall structure, especially if it’s made from plaster or drywall. After sanding, run a level across the wall to check for any remaining irregularities. Sanding high spots is an easy and effective method for minor unevenness but may need to be combined with other techniques for larger areas.
8. Use a Straight Edge and Patch Uneven Sections
Another method to level a wall involves using a straight edge to identify and fill uneven sections. Start by placing a long straight edge or level against the wall, moving it across different sections to detect gaps or bumps. Mark the areas that need adjustment with a pencil. Apply a joint compound or filler to the low areas, using a trowel to smooth the material until it’s level with the rest of the wall. Use the straight edge again to check your progress as you go. This method is precise and ensures that only the areas requiring attention are leveled.
9. Install Furring Strips for Severe Unevenness
If the wall has significant unevenness or structural damage, installing furring strips may be necessary. Furring strips are thin strips of wood or metal that are attached to the wall, creating a new, flat surface to which drywall or tile backer boards can be affixed. Begin by marking the wall with a level to ensure the furring strips are installed straight. Attach the strips horizontally or vertically, depending on the area needing leveling. Once the strips are in place, secure drywall or backer boards to the strips, creating a smooth surface ready for tiling.
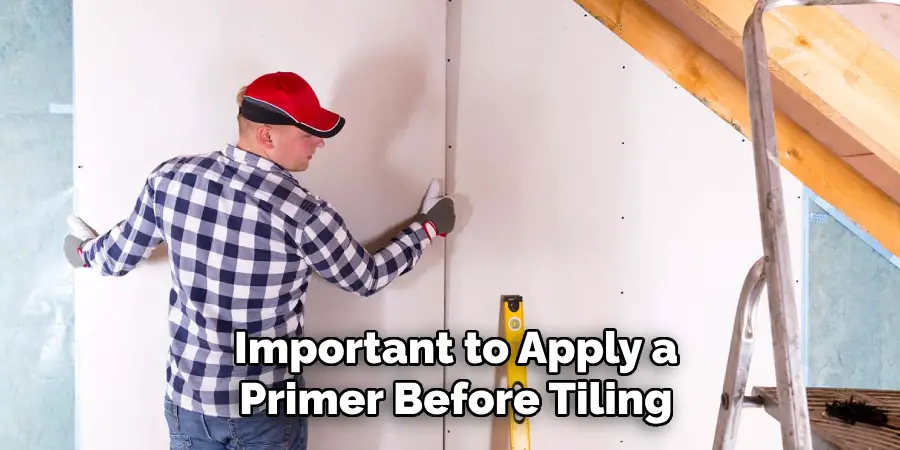
10. Prime the Wall for Better Adhesion
Once the wall is leveled, it’s important to apply a primer before tiling. A primer helps improve the adhesion of tile adhesive and ensures that the tiles will bond securely to the wall. Choose a primer specifically designed for use with tile adhesives, and apply it evenly using a roller or brush. Allow the primer to dry completely before proceeding with tile installation. This final step ensures that all your leveling work pays off by providing a strong bond between the wall and the tiles, leading to a durable, long-lasting result.
Conclusion
Leveling a wall before tiling is a crucial step that affects both the appearance and durability of your tiling project. Whether you’re dealing with minor imperfections or significant unevenness, these ten methods offer effective solutions to create a smooth, even surface ready for tiling. From applying a self-leveling compound or plaster skim coat to using tile backer boards and furring strips, each method provides a different approach to address a variety of wall conditions.
With careful preparation, attention to detail, and the right tools, you can achieve a flawless, professional-looking tiled wall that enhances the overall look of your space. Thanks for reading, and we hope this has given you some inspiration on how to level a wall before tiling!
About
Angela is the chief editor of Indoorense. She began her career as an interior designer before applying her strategic and creative passion to lifestyle and home.
She has close to 15 years of experience in creative writing and online content strategy for housekeeping and cleaning,home decorations as well as other efforts.
She loves her job and has the privilege of working with an extraordinary team. She lives with her husband, two sons, and daughter in Petersburg. When she’s not busy working she spent time with her family.