

Are you struggling to get your window treatments right? How to layer window treatments is a great way to add depth and dimension to any room while also providing functional benefits such as light control and privacy.

Layering window treatments is a creative way to add depth, texture, and functionality to any room. This practice not only enhances the aesthetic appeal of your space but also provides practical benefits such as improved light control, privacy, and insulation. By combining different types of window treatments, such as blinds, curtains, and shades, you can tailor the ambiance of your room to suit your style and needs. Whether aiming for a cozy, inviting atmosphere or a sleek, modern look, understanding layering basics is essential for achieving a harmonious and practical design.
In the following sections, we’ll explore key strategies and tips for mastering the art of layering window treatments.
What Will You Need?
Before you start layering your window treatments, there are a few essential items you’ll need to gather:
- Measuring Tape: Accurate measurements are crucial for ensuring a proper fit and practical function of your layered treatments.
- Curtain Rods or Tracks: These will hang your curtains or drapes. Choose the type that best suits your window and desired style.
- Window Blinds or Shades: These provide key functional benefits such as light control and privacy. Choose from options like roller, Roman, or Venetian blinds, depending on your preferences.
- Curtains or Drapes: These can add texture and visual interest to your layered treatment while providing additional insulation.
- Decorative Hardware: This includes items like finials, tiebacks, and rings that add a finishing touch to your layered window treatments.
Once you have these basic items, you can begin layering to create the perfect look for your space.
10 Easy Steps on How to Layer Window Treatments
Step 1: Measure Your Windows
Begin by measuring the dimensions of your windows accurately using a measuring tape. Measure the height and width, accounting for any trim or molding around the window frame. These measurements will guide you in choosing the appropriate sizes for blinds, shades, and curtain panels. Additionally, consider the length of the curtain rod needed to ensure that your curtains can fully cover the window or stack neatly to the sides when open. Precise measurements are essential for a clean, professional look and to avoid gaps or overcrowding with your window treatments.

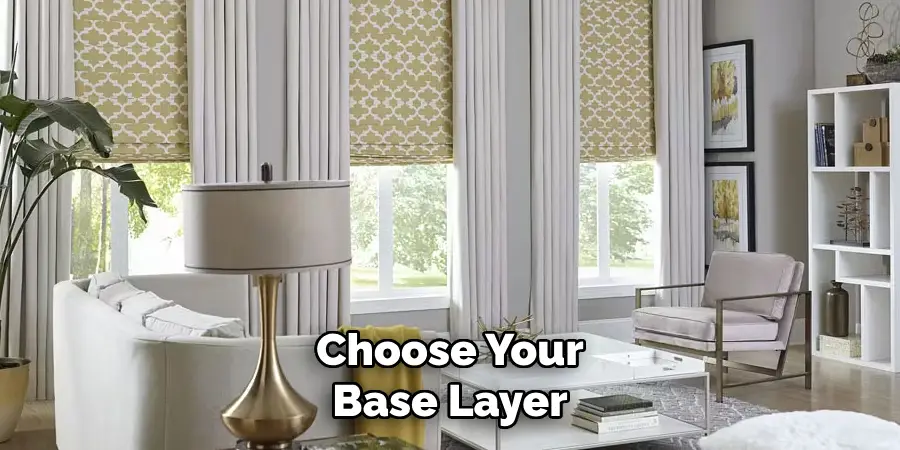
Step 2: Choose Your Base Layer
Select the base layer of window treatments, typically blinds or shades, based on your desired light control and privacy level. Options like roller shades provide a minimalistic and sleek look, Roman blinds offer a more sophisticated appearance, and Venetian blinds allow for flexible light adjustments. Install the chosen base layer inside the window frame for a neat and tailored look. This foundational layer is crucial for practical functionality, allowing you to adjust how much light enters the room while maintaining privacy.
Step 3: Select Your Outer Layer
Choose the outer layer for your window treatments, typically curtains or drapes. Consider the fabric, color, and pattern that will complement your room’s decor and the base layer. For instance, sheer curtains can soften the look and add elegance, while heavier drapes provide additional insulation and a sense of coziness. Install a curtain rod above the window frame, ensuring it extends beyond the window’s width to allow curtains to be fully drawn open without blocking any light. The outer layer enhances the aesthetic appeal while offering extra versatility in controlling light and privacy.
Step 4: Install the Base Layer
Begin by installing the base layer of your window treatments, blinds or shades. Follow the manufacturer’s instructions for installation, ensuring they fit snugly within the window frame. Use a level to ensure the base layer is straight and aligned correctly, which is essential for both aesthetic purposes and functionality. Secure the brackets tightly to prevent any sagging or tilt over time. Once installed, test the base layer’s mechanism, whether it’s rolling, folding, or tilting, to confirm that it operates smoothly and efficiently. This foundational step ensures that your window treatments perform as intended regarding light control and privacy.
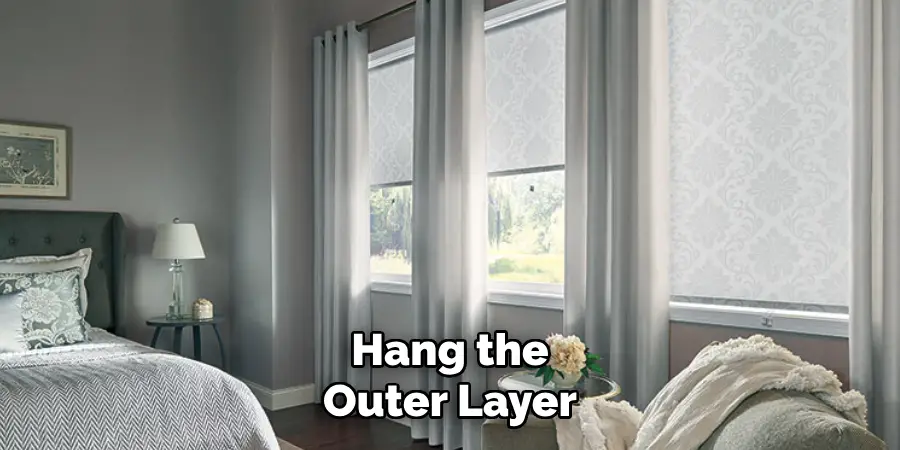
Step 5: Hang the Outer Layer
Once the base layer is securely in place, it’s time to hang the outer layer of your window treatments, such as curtains or drapes. Install the curtain rod brackets according to the manufacturer’s directions, ensuring they are positioned evenly on either side of the window frame. Use a level to make sure the rod is straight before tightening the screws ultimately. Slide the curtains onto the rod, placing any decorative hardware like finials to add a personalized touch. Hang the curtains and adjust the gather evenly along the rod for a balanced look.
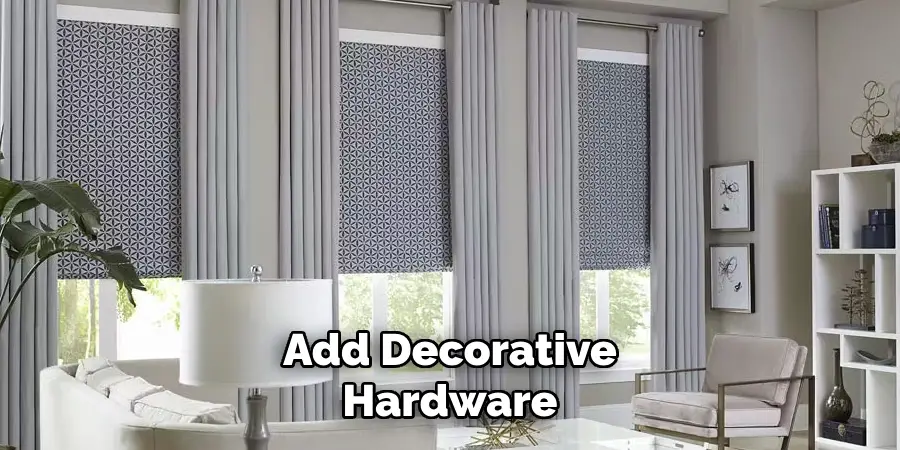
Step 6: Add Decorative Hardware
To enhance the visual appeal of your window treatments, incorporate decorative hardware elements such as finials, tiebacks, and curtain rings. Finials add a stylish finishing touch to the ends of your curtain rods and are available in various designs to match your decor theme. Tiebacks are functional, allowing you to elegantly sweep curtains to the side, framing your windows beautifully while letting in more light. Curtain rings contribute to the design aesthetic and facilitate smoother curtain movement along the rod. When selecting decorative hardware, consider the room’s overall design to ensure these accents complement the existing style.
Step 7: Layer Accessories for Depth
Incorporating accessories like valances or pelmets can add a layer of depth and sophistication to your window treatments. A valance, a short decorative drapery, is hung above the window and adds visual interest while concealing hardware like curtain rods or tracks. Pelmets are similar but typically cover the entire window width and can offer a more structured, tailored appearance. Choose a fabric or design that complements your existing layers, enhancing the room’s decor without overwhelming the space.
Step 8: Adjust and Layer Lighting
After arranging your window treatments, it’s essential to consider how they interact with the room’s lighting. Adjusting natural light with your window layers is one aspect, but integrating artificial lighting is equally crucial. Use table lamps, floor lamps, or sconces to complement the natural light and emphasize the textures and colors of your window treatments. Combining different light sources should highlight your window treatments, creating a cozy and inviting atmosphere. How light interacts with your layered window treatments can transform the room, offering various moods and dynamics throughout the day.
Step 9: Finalize and Evaluate
After installing and adjusting your window treatments, take a step back to evaluate the overall appearance and functionality. Ensure all elements are correctly aligned and secure and that the curtains or drapes hang evenly without dragging or bunching. Check that the base layer operates smoothly and that the outer layer complements it aesthetically in color, texture, and style. Test the combined effect of natural and artificial lighting on your window treatments to ensure a balanced and harmonious ambiance. Make any necessary adjustments or refinements, such as repositioning decorative hardware or tweaking the arrangement of accessories, to achieve a polished and cohesive look.
Step 10: Maintenance and Care
To ensure longevity and maintain the aesthetic appeal of your window treatments, it’s essential to establish a routine for maintenance and care. Regularly dust or vacuum your curtains and drapes to prevent the accumulation of dirt and allergens. Depending on the fabric and material, consider removing the curtains periodically for washing or dry cleaning, as the manufacturer recommends. For blinds and shades, gently wipe them with a damp cloth or use a vacuum with a brush attachment to remove dust and dirt. Inspect the hardware and mechanisms for any signs of wear or loose fittings, tightening screws, or replacing parts as needed.
By following these steps and incorporating proper maintenance, your layered window treatments will continue to enhance the beauty and functionality of your home.
5 Things You Should Avoid
- Ignoring Measurements: Before purchasing or installing your window treatments, take precise measurements of your windows. Poorly fitted treatments can look unkempt and affect functionality.
- Choosing Clashing Fabrics: When layering, the harmony of texture, color, and pattern is vital. Avoid selecting fabrics that clash with each other or the rest of the room’s decor.
- Overlooking Hardware Compatibility: Not all hardware works with every type of window treatment. Pay attention to the weight and style of your chosen layers to ensure that your rods, brackets, and tracks can support them without sagging or breaking.
- Neglecting Light Control Needs: Different window treatments offer varying light control and privacy degrees. Avoid installing layers that don’t align with your sunlight preferences. Consider the room’s purpose and adjust your selections to effectively meet functional needs.
- Failing to Maintain Proportions: The balance and proportion between layers are crucial to achieving an aesthetically pleasing look. Avoid using sizes that overwhelm the window or make the space feel cramped. Strive for scale that enhances both the window and the room’s architecture.
Conclusion
In conclusion, how to layer window treatments is an effective way to enhance the aesthetic appeal and functionality of any room in your home.
By thoughtfully combining fabrics, textures, and styles, you can achieve a harmonious look that reflects your taste while addressing practical needs such as light control and privacy. Planning carefully and paying attention to details like hardware and measurements is essential to ensure that each layer complements the others. With proper maintenance, your layered window treatments will remain a stylish and practical interior design element.
By avoiding common pitfalls and embracing this approach’s creative potential, you can transform your windows into true focal points that add depth and personality to your living space.
About
Angela is the chief editor of Indoorense. She began her career as an interior designer before applying her strategic and creative passion to lifestyle and home.
She has close to 15 years of experience in creative writing and online content strategy for housekeeping and cleaning,home decorations as well as other efforts.
She loves her job and has the privilege of working with an extraordinary team. She lives with her husband, two sons, and daughter in Petersburg. When she’s not busy working she spent time with her family.