
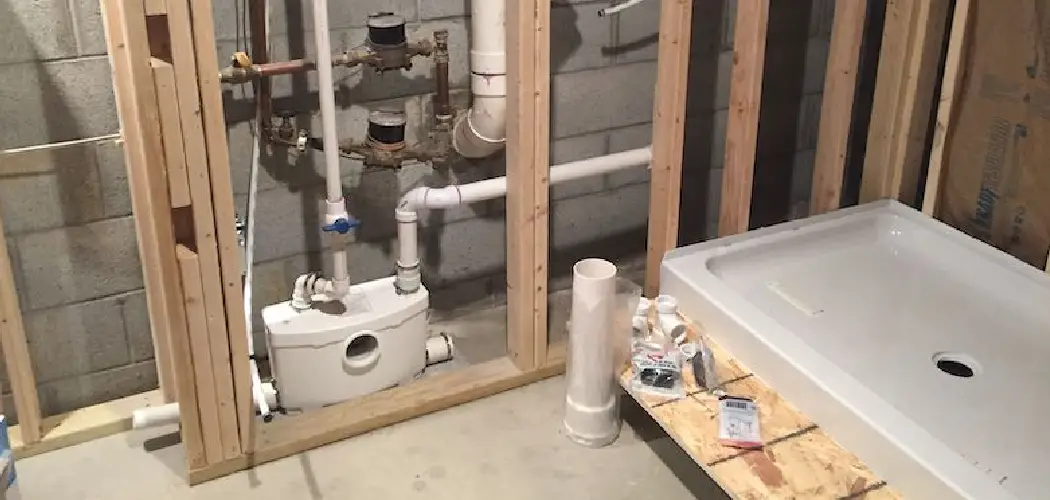
Installing a Saniflo toilet can be a practical solution for adding a bathroom in locations where traditional plumbing may not be feasible. Unlike conventional toilets, Saniflo systems use a macerator to break down waste and pump it away through small pipes, allowing for greater flexibility in placement.

This guide on how to install a saniflo toilet will take you through the steps necessary to successfully install a Saniflo toilet, ensuring that you can make informed decisions and complete the installation with confidence, even if you’re not an experienced plumber.
What is a Saniflo Toilet?
A Saniflo toilet is a type of toilet system that uses a macerating or grinding process to break down waste into a slurry before it is pumped into the drainage system. This innovative setup allows for flexible installation options, making it possible to add a bathroom in areas that lack traditional gravity-fed plumbing systems.
Saniflo toilets are particularly useful in basements, attics, or other spaces where installing conventional plumbing might be costly or impractical. The system operates quietly and efficiently, using a small diameter pipe instead of a standard waste pipe, which enhances its versatility and reduces installation discomfort. This makes Saniflo toilets an excellent choice for home renovations or space-saving solutions.
Needed Materials
Before you start the installation process, it is essential to gather all the necessary materials. These include:
Saniflo Toilet System:
The Saniflo toilet system comes with all the necessary components, including a macerator pump, tank, and toilet bowl. Make sure to check that you have all the parts before beginning installation.
Plumbing Tools:
Some tools you’ll need for installation include a hacksaw, screwdriver, adjustable wrench, pliers, and pipe cutter. These will help with cutting and connecting pipes during the installation process.
Additional Parts:
You may also need additional parts such as PVC piping, silicone sealant, and plumbing tape, depending on your specific installation requirements. It’s important to have these on hand to avoid any delays during the process.
8 Step-by-step Guidelines on How to Install a Saniflo Toilet
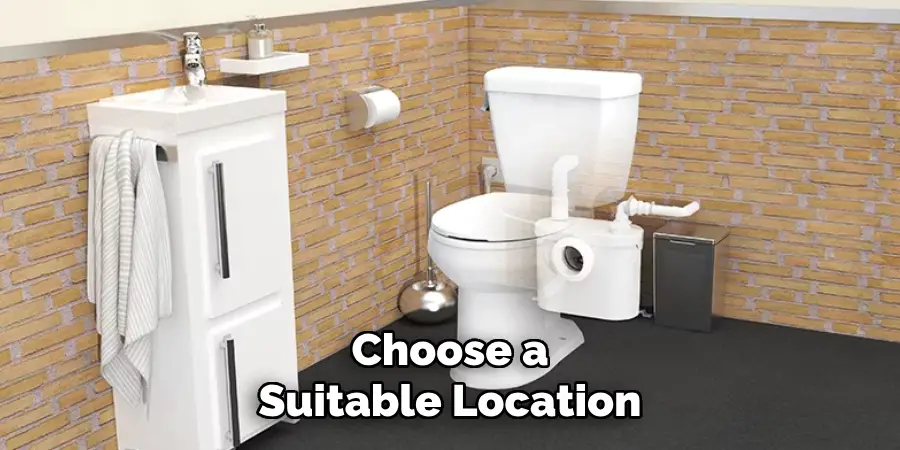
Step 1: Choose a Suitable Location
The first step in installing a Saniflo toilet is to select an appropriate location for your new bathroom fixture. Consider spaces that lack conventional plumbing options, such as a basement, attic, or garage, where adding a traditional toilet would be challenging. Ensure the chosen area has access to a power source, as the Saniflo system requires electricity to operate. It’s also important to measure the available space to accommodate the macerator, piping, and toilet bowl.
Additionally, assess the proximity to the main drain line to determine the best route for the discharge pipe, ensuring that the system can efficiently pump waste to the existing sewage line. By carefully choosing a suitable location, you set the groundwork for a smooth and successful installation.
Step 2: Prepare the Area
With the location selected, the next step is to prepare the area for installation. Begin by clearing the space of any obstructions and ensure the floor is clean and level. If necessary, make adjustments to the flooring to create a stable base for the toilet unit and macerator pump. Check for any existing pipes or electrical lines that may need to be rerouted to accommodate the new system.
It’s also essential to mark precise locations for the toilet and macerator to ensure proper alignment and allow for convenient maintenance access. This preparation will facilitate a smooth setup process and help avoid complications during installation.
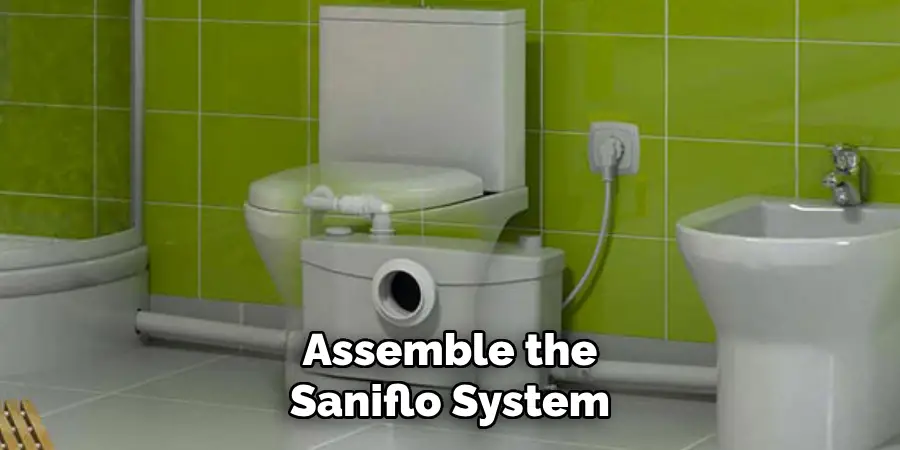
Step 3: Assemble the Saniflo System
Before you start assembling the Saniflo system, carefully read through the manufacturer’s instructions to familiarize yourself with all the components and their functions. Begin by connecting the macerator pump to the tank, making sure to secure all connections tightly. Then, attach the toilet bowl to the tank using bolts and a wax seal.
Once assembled, place the unit in its designated location and mark where it will connect to the discharge pipe. This step ensures that everything is correctly aligned before moving on to installation.
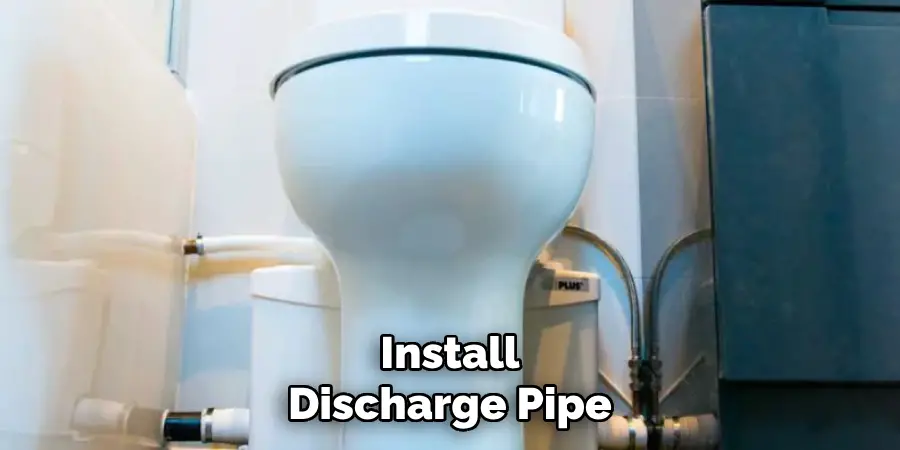
Step 4: Install Discharge Pipe
Using a pipe cutter or hacksaw, cut a piece of PVC piping to fit between the macerator and the main sewage line. Make sure to measure accurately and use plumbing tape to secure any connections between pipes.
Next, drill a hole in the wall or floor for the discharge pipe to pass through before connecting it to the macerator pump. Use silicone sealant around the opening to ensure a waterproof seal.
Step 5: Connect Water Supply
To ensure your Saniflo toilet operates effectively, properly connecting the water supply is crucial. Begin by identifying the nearest water supply line. You may need to install a new valve to branch off the existing line and provide dedicated water access for your toilet system. Use an adjustable wrench to attach a flexible hose from the valve to the water inlet on the Saniflo toilet tank.
Before tightening the connection, ensure that a rubber washer is in place to prevent leaks. Once securely attached, turn on the water supply and check for any leaks around the connection. This step guarantees a reliable water flow to your new toilet, maintaining its smooth and consistent operation.
Step 6: Install Ventilation System
Proper ventilation is essential for the efficient operation of a Saniflo toilet. It helps eliminate any unpleasant odors and ensures proper airflow, preventing the pump from overheating. Begin by installing a vent pipe that runs vertically upwards from the top of the macerator pump to an exterior wall or roof. Use PVC piping and secure all connections with plumbing tape.
If you are unable to install a vertical vent pipe due to space limitations, you can use an air admittance valve instead. This one-way vent allows air into the system but prevents gases from escaping, maintaining excellent odor control.
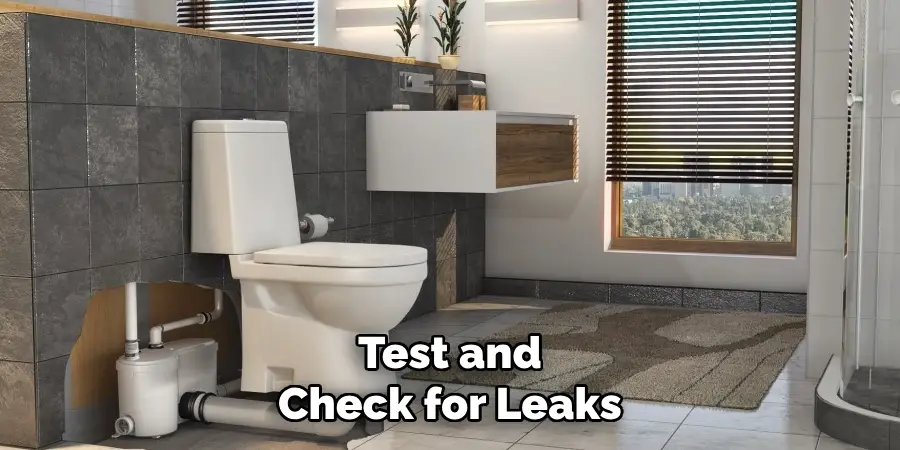
Step 7: Test and Check for Leaks
With the Saniflo system fully installed, it’s crucial to test for any leaks before using the toilet. Start by filling the tank with water and flushing it multiple times while checking for any leaks around connections or joints. If you notice any leaks, tighten connections or add additional plumbing tape as needed.
Once satisfied that there are no leaks, pour a bucket of water into the toilet bowl to ensure proper suction and drainage through the macerator pump. Test this several times to guarantee that the system is functioning correctly.
Step 8: Finish Up
After successfully installing and testing your Saniflo toilet, it’s time to finish up by securing all parts in place. Use silicone sealant around the base of the toilet to create a watertight seal, making sure to smooth out any excess. Then, caulk around the edges of the tank and along any exposed pipes for a clean and finished look.
Finally, the power source is connected to the macerator pump, and the system is turned on. Your new Saniflo toilet is now ready for use!
Following these steps on how to install a saniflo toilet will ensure a successful installation of your Saniflo toilet, providing convenience and functionality to any space. If you encounter any difficulties or are unsure of any step, do not hesitate to seek professional assistance for a smooth and stress-free installation process. With proper care and maintenance, your Saniflo toilet will provide reliable service for years to come.
Do You Need to Get Support From Professionals?
While installing a Saniflo toilet can be a manageable DIY project for those with some plumbing experience, enlisting the help of a professional might be a wise decision for many homeowners. If you’re unfamiliar with plumbing systems or have concerns about handling tasks such as cutting pipes, creating seal-tight connections, or accurate alignment of components, a professional plumber can ensure everything is executed correctly.
Additionally, hiring a professional can save time and prevent potential mistakes that could lead to costly repairs later on. Professionals can also provide valuable insights and recommendations based on your specific space and needs, ensuring that your Saniflo toilet system operates efficiently and effectively. Ultimately, while self-installation is possible, professional support can offer peace of mind and guarantee a smoother installation process.
Frequently Asked Questions
Q: Can I Install a Saniflo Toilet Myself, or Do I Need to Hire a Professional?
A: While it is possible to install a Saniflo toilet yourself, it is recommended that you hire a professional to do the proper installation and ensure all connections are secure. This will also help avoid any potential issues or complications in the future.
Q: Can I Install a Saniflo Toilet in Any Room?
A: Yes, a Saniflo toilet can be installed in any room as long as there is access to plumbing and electricity. However, it is essential to consult building codes and regulations for your area before installing.
Q: Do I Need to Clean the Macerator Pump Regularly?
A: It is recommended to clean the macerator pump every six months by pouring a mixture of hot water and vinegar into the toilet bowl. This will help prevent build-up and maintain efficient operation of the system.
Q: How Does a Saniflo Toilet Work?
A: A Saniflo toilet works by using an electrically powered macerator pump to grind waste and toilet paper into a fine slurry. This mixture is then pumped out through a small-diameter pipe to the main sewer or septic line. The system also includes a venting system to ensure proper airflow and reduce odors.
Q: Are There Any Special Requirements for Installing a Saniflo Toilet?
A: Yes, there are some special requirements for installing a Saniflo toilet. In addition to having access to plumbing and electricity, the toilet must also have proper ventilation and a dedicated water supply. It is crucial to follow all installation instructions carefully for the system’s optimal performance.
Conclusion
Installing a Saniflo toilet may seem like a daunting task at first, but with proper planning and following these step-by-step guidelines on how to install a saniflo toilet, it can be done efficiently and effectively. By choosing a suitable location, preparing the area, properly assembling and connecting all components, and thoroughly testing for functionality, you can have a functional and convenient bathroom fixture in no time.
Remember to always refer to the manufacturer’s instructions and consult with professionals if needed for a successful installation. Enjoy your new Saniflo toilet!
About
Angela is the chief editor of Indoorense. She began her career as an interior designer before applying her strategic and creative passion to lifestyle and home.
She has close to 15 years of experience in creative writing and online content strategy for housekeeping and cleaning,home decorations as well as other efforts.
She loves her job and has the privilege of working with an extraordinary team. She lives with her husband, two sons, and daughter in Petersburg. When she’s not busy working she spent time with her family.