
Having to lug your bulky laundry around the house in order to get clean clothes is an arduous process and one you don’t have time for. If you feel overwhelmed at how to get a dryer vent hose hidden out of sight from guests or yourself when not in use, then this blog post is perfect for you.

We will show you step-by-step instructions on how to hide a dryer vent hose quickly and easily – all without breaking the bank! Keep reading if modernizing the look of your space with minimal effort is something that interests you.
Why Do You Need to Hide Your Dryer Vent Hose?
Hiding the dryer vent hose is important for several reasons. The first and most obvious reason is aesthetic – an exposed dryer vent hose can be an eyesore and ruin the overall look of a room. It’s also more prone to being damaged or dirty, which not only affects the appearance but also the efficiency of your dryer. Furthermore, a visible dryer vent hose can be a safety hazard as it can easily get caught in the moving parts of the machine.
11 Step-by-step Guidelines on How to Hide a Dryer Vent Hose
Step 1: Measure and Buy the Right Materials
Before you start hiding your dryer vent hose, you need to measure the distance between your dryer and where you want to hide the hose. It’s best to add a few extra inches to account for any curves or turns you may need to make.
Once you have the measurements, head to your local hardware store and purchase the necessary materials such as ductwork, elbows, clamps, and tape. It’s important to choose materials that are durable and heat resistant.
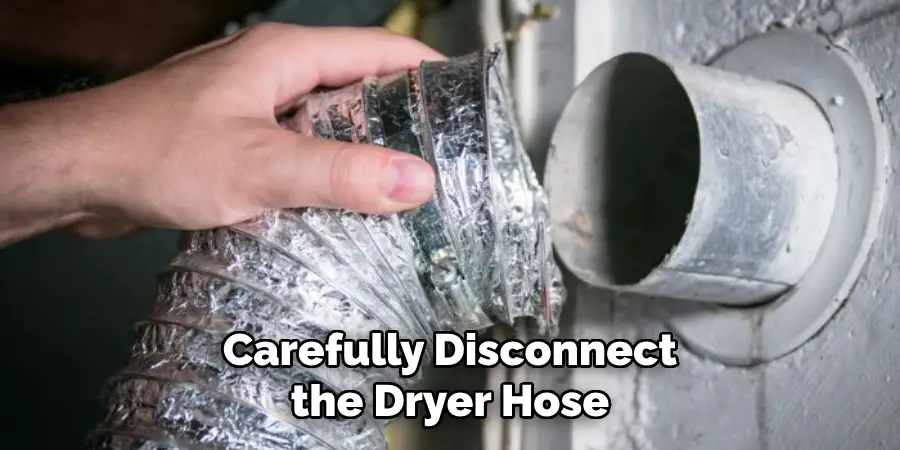
Step 2: Disconnect the Dryer Hose
Carefully disconnect the dryer hose from both the back of your machine and the wall vent. If your hose is held in place by clamps, unscrew them using a screwdriver. Be sure to also remove any lint or debris from inside the hose. But be careful not to damage or bend the hose – you will need it for the next step. This is also a good time to clean the dryer vent and remove any lint build-up.
Step 3: Clean the Hose
Before hiding your dryer vent hose, it’s important to clean it thoroughly. Use a vacuum cleaner or a long-handled brush to remove any lint or debris stuck inside. A clean hose will help improve the efficiency of your dryer and prevent any potential fire hazards. You can also use a damp cloth to wipe the outside of the hose. It’s important to let the hose dry completely before moving on to the next step.
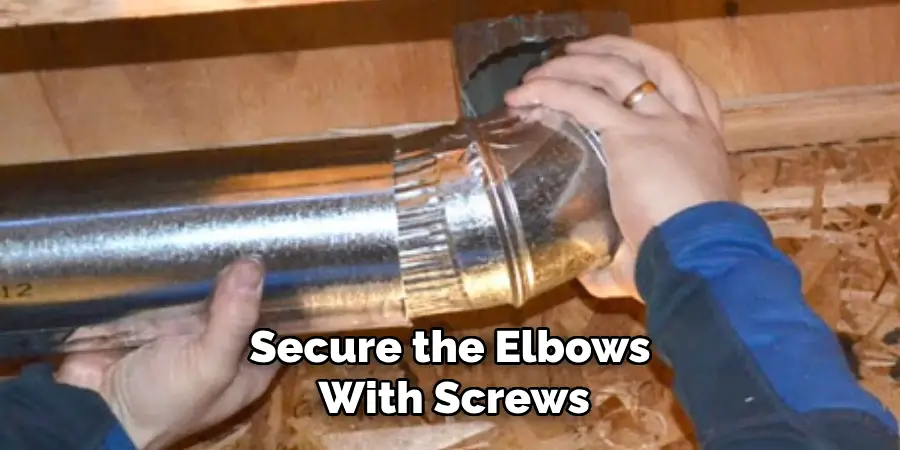
Step 4: Install the Elbows
Using a pair of tin snips, cut an opening in the wall where you want to hide the hose. This will be for the elbows that will connect to the ductwork. Make sure to measure and cut the opening carefully to ensure a snug fit. But by using elbows, you will be able to angle the hose downwards and create a more discreet route for it. It’s important to secure the elbows with screws or tape to avoid any movement.
Step 5: Install the Ductwork
Next, insert the ductwork into the elbows and secure them using clamps. Make sure that everything is tight and secure to avoid any air leaks. You can also use metal tape for extra reinforcement. The ductwork should extend towards the dryer, leaving enough room for any turns or curves you may need to make. If you need to cut the ductwork, make sure to use tin snips and wear protective gloves.
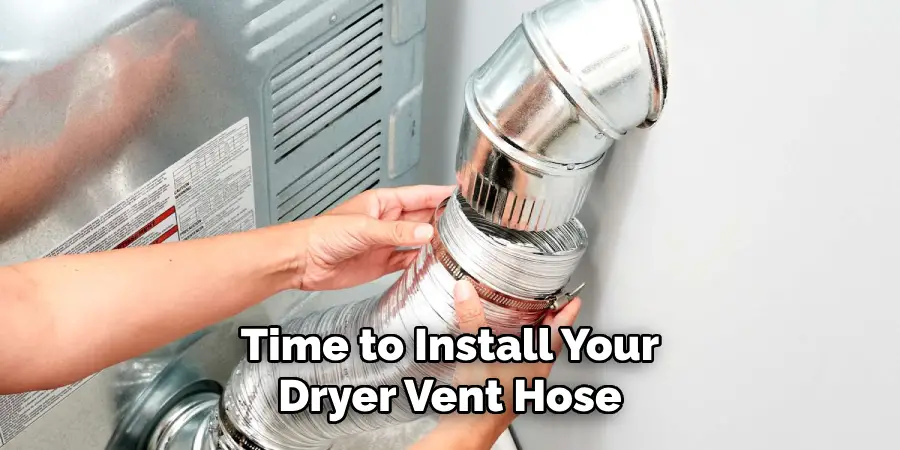
Step 6: Install the Hose
Now it’s time to install your dryer vent hose. Slide one end of the hose onto the elbow connected to your dryer and the other end onto the elbow attached to the wall. Use clamps to secure both ends of the hose in place. But be sure not to overtighten the clamps as it could damage the hose or restrict airflow. It’s also important to ensure that the hose is not twisted or bent.
Step 7: Secure the Hose
Using duct tape, wrap around any joints or connections on your dryer vent system. This will ensure that everything stays in place and no air is leaking out. It’s important to use heat-resistant tape and to cover the entire connection for maximum effectiveness. You can also use metal tape for added durability. But be careful not to tape over any screws or openings that may need future access.
Step 8: Cover the Hose with a Box
To further hide your dryer vent hose, you can cover it with a decorative box. Simply cut a hole in the back of the box for the hose to fit through and then place it over the hose. If you want to, you can paint or decorate the box to match your room’s decor. This is a great way to hide the hose while also adding a decorative element to your space. It’s also easily removable for future access.
Step 9: Paint or Decorate the Box
If you want to add an extra touch to your hidden dryer vent hose, you can paint or decorate the box to match your room’s decor. This will make it blend in seamlessly and not stand out as an eyesore. But be sure to use non-flammable materials and let the paint dry completely before placing the box over the hose. It’s also important to avoid painting over any openings or screws that may need future access.
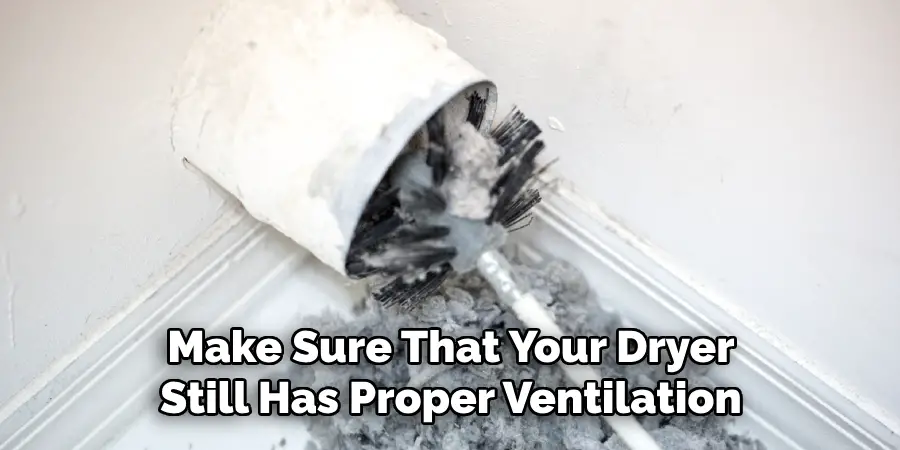
Step 10: Make Sure There is Proper Ventilation
It’s important to make sure that your dryer still has proper ventilation even with the hose hidden. Check that there are no obstructions blocking the airflow and that there is enough space around the hose for air to circulate. However, be sure not to leave any gaps that could allow lint or debris to escape and cause a potential fire hazard. It’s also important to regularly clean the dryer vent and hose to maintain proper ventilation.
Step 11: Reconnect the Dryer Hose
Finally, reconnect your dryer hose to the back of your machine and the wall vent. Use clamps to secure it in place and make sure that everything is tight and secure. Always double-check the connections to avoid any potential air leaks. But be sure not to overtighten the clamp as it could damage the hose or restrict airflow. Once everything is reconnected, turn on your dryer to test that everything is working properly.
Following these step-by-step guidelines on how to hide a dryer vent hose, you can easily hide your dryer vent hose and improve the overall aesthetic of your space. Not only will it look better, but it will also help keep your home safe and efficient. Say goodbye to unsightly hoses and hello to a more modern and organized laundry area! So go ahead and start hiding that pesky dryer vent hose today!
Conclusion
All in all, hiding a dryer vent hose does not need to be difficult. With the right tools, materials, and detailed instructions, anyone can easily hide their dryer vent hose. It may take some time and effort but the end result of a nice-looking, out-of-sight dryer vent hose will be worth it!
Additionally, do not neglect regular maintenance of your dryer vent system as blockages and malfunctions can cause serious safety hazards. Now that you know the basics of how to hide a dryer vent hose, why not give it a try yourself? Not only will you get the satisfaction of doing something yourself but all those in your home are sure to appreciate having an out-of-sight dryer vent hose too!
About
Angela is the chief editor of Indoorense. She began her career as an interior designer before applying her strategic and creative passion to lifestyle and home.
She has close to 15 years of experience in creative writing and online content strategy for housekeeping and cleaning,home decorations as well as other efforts.
She loves her job and has the privilege of working with an extraordinary team. She lives with her husband, two sons, and daughter in Petersburg. When she’s not busy working she spent time with her family.