

Are you tired of the constant sound of running water coming from your toilet? It is annoying, wastes a significant amount of water, and increases your utility bills.
Fortunately, fixing this common issue is often simple and can usually be tackled without professional help. This guide provides a step-by-step approach to diagnosing and repairing the problem, ensuring your toilet functions efficiently. Whether the issue lies with the flapper, fill valve, or overflow tube, a few essential tools and some troubleshooting know-how can help you resolve it.

In this guide on how to fix toilet that won’t stop running, we will cover all the essential steps you need to take. We will also discuss some common causes of running toilets and how to prevent them from recurring.
What are the Causes of a Running Toilet?
Before diving into the steps to fix a running toilet, it is essential to understand what could be causing the issue. A constantly running toilet can be caused by various factors, including:
- Worn-Out Flapper: The flapper is a rubber valve that controls water flow from the tank to the bowl. Over time, it can become brittle or warped, preventing it from sealing correctly and resulting in constant water flow.
- Faulty Fill Valve: The fill valve refills the tank after each flush. If worn or damaged, it may not shut off completely, leading to continuous water flow.
- Loose Chain: The chain connecting the flapper to the flush handle may become too long or tangled, preventing the flapper from closing properly and causing a running toilet.
- Leaky Overflow Tube: The overflow tube is designed to prevent the tank from overflowing. If it becomes cracked or damaged, water can continuously flow into it, resulting in a running toilet.
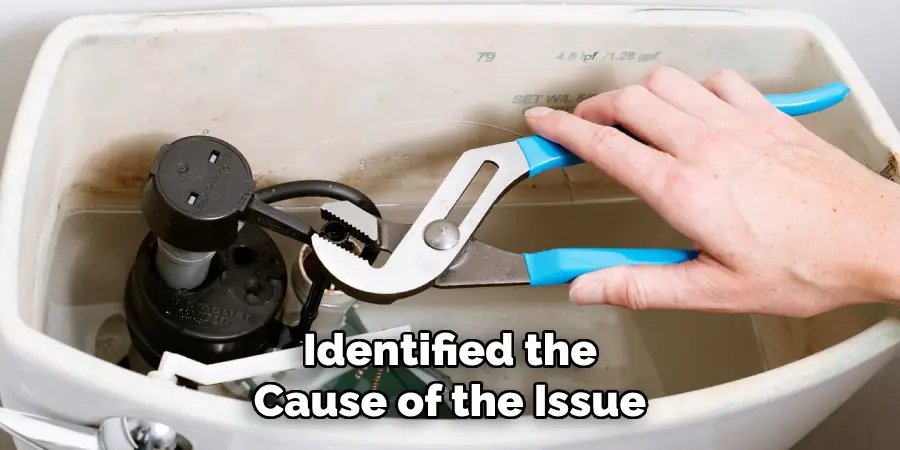
Once you have identified the cause of the issue, it will be easier to fix your running toilet. Let’s move on to the steps you can take to resolve this common problem.
What Will You Need?
Before you start working on your toilet, make sure you have the following tools and materials on hand:
- Adjustable wrench
- Screwdriver
- Replacement flapper or fill valve (if needed)
Once you have these items ready, you can start troubleshooting the issue and working towards fixing your running toilet.
8 Easy Steps on How to Fix Toilet That Won’t Stop Running
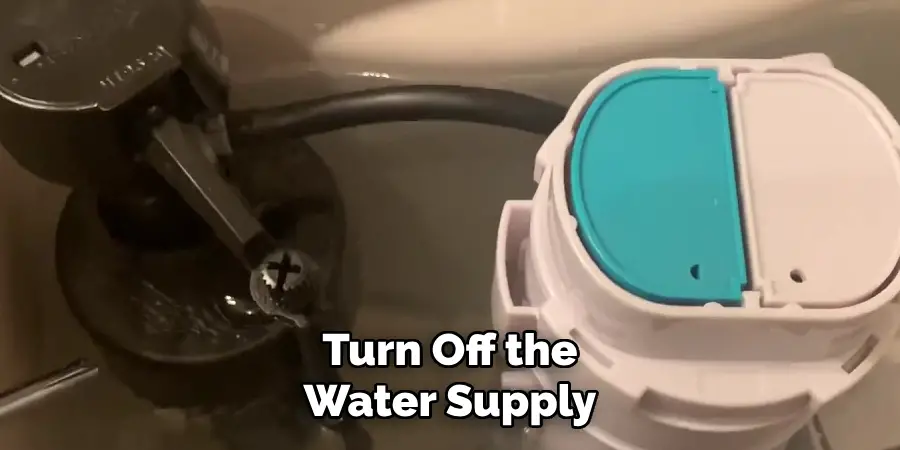
Step 1: Turn Off the Water Supply
Before you begin any repair work on your toilet, it is crucial to ensure that the water supply is turned off. This step prevents potential flooding or water wastage and allows you to safely work on the toilet components. Locate the shutoff valve behind or beneath the toilet to turn off the water supply. It is usually a tiny, round handle mounted on the wall or floor. Turn this valve clockwise until it can no longer move, effectively stopping the water flow to the toilet.
After turning off the water, flush the toilet to drain the tank and bowl of any remaining water. You may need to hold the flush handle down for a few seconds to ensure all the water is flushed out completely. This action will also help pinpoint whether the flapper or fill valve is the problem, providing a clearer view of the components needing fixing or replacement.
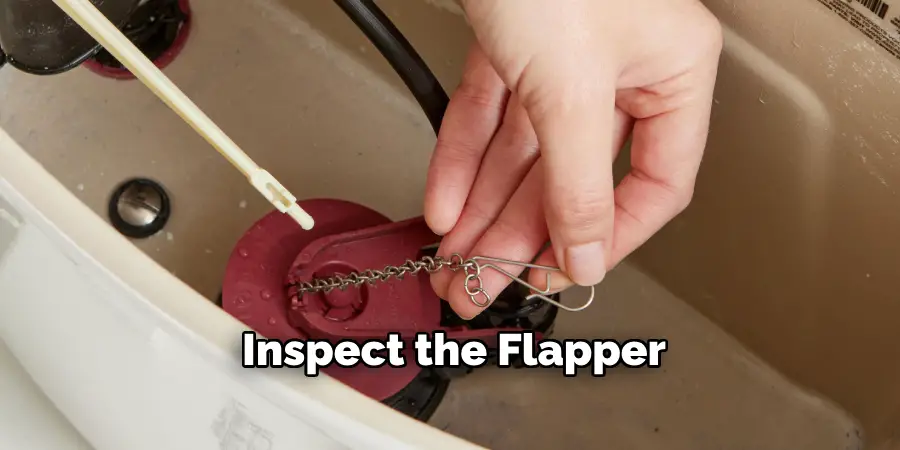
Step 2: Inspect the Flapper
Once the water supply is turned off and the tank is drained, remove the lid from the toilet tank for a clearer view of its internal components. Begin by inspecting the flapper, the rubber part sitting at the base of the tank. Gently lift it up and check for any signs of wear and tear, such as cracking, warping, or mineral build-up, that could prevent it from sealing correctly after a flush. If the flapper appears damaged, replacing it with a new one is essential.
To replace the flapper, detach it from the flush chain and the hinges at the base of the tank. Attach the new flapper using the same connections, ensuring it sits securely against the flush valve. Ensure that the chain connecting the flapper to the flush handle has the proper length, with some slack but not so much that it becomes tangled or prevents the flapper from sealing. Adjust the chain length if necessary, as this might also cause the running toilet.
Step 3: Check the Fill Valve
After inspecting and, if necessary, replacing the flapper, the next step is to examine the fill valve, which is located on the left side of the tank. The fill valve controls the water level in the tank. Lift the float arm to see if the water stops filling. If the water continues to flow, the fill valve might be faulty.
Remove the top of the fill valve by turning it counterclockwise to further inspect. Look for any debris or mineral deposits that may be obstructing its function. If cleaning the valve does not solve the issue, you might need to replace the entire fill valve. Replacement fill valves are available at most hardware stores and come with instructions for installation. Ensure that the new valve is adjusted to the recommended water level, typically indicated by a mark inside the tank.
Step 4: Adjust the Water Level
Inspect the water level in your tank and ensure it sits at the recommended mark, usually about an inch below the top of the overflow tube. Adjust the float arm attached to the fill valve if the water level is too high or low. For a float cup system, pinch the clip and slide the float up or down along the rod; for a ball float, gently bend the arm to raise or lower the ball. Fine-tuning the water level helps prevent overflow and ensures the flapper operates correctly. This simple adjustment can often resolve any persistent issues with a running toilet.
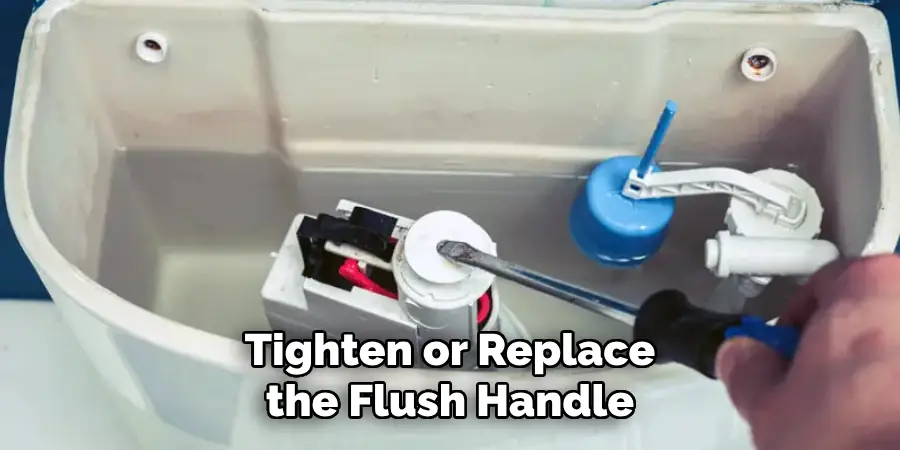
Step 5: Tighten or Replace the Flush Handle
To address a malfunctioning flush handle, examine it for looseness or damage. A loose handle may not lift the flush lever adequately, preventing the flapper from sealing correctly after a flush. Use a screwdriver or an adjustable wrench to tighten the mounting nut inside the tank, ensuring the flush lever and handle operate smoothly. If tightening does not remedy the issue, consider replacing the flush handle to improve the efficiency of the toilet mechanism. With these corrections, test the toilet by flushing it several times to confirm the fix is successful.
Step 6: Examine the Overflow Tube
The final component to check in the effort to fix a running toilet is the overflow tube, which is located in the center of the tank. Its job is to prevent water overflowing the tank by directing excess water into the bowl. If the water level is consistently too high, it may flow into the overflow tube, causing the toilet to run.
First, ensure that the overflow tube is not cracked or damaged. If it is faulty, it will need to be replaced to stop water from continuously running into the toilet bowl. If it is intact, verify that the water level is about an inch below the rim of the overflow tube.
Step 7: Inspect the Flush Valve Seal
In addition to the flapper and other components, the flush valve seal is crucial to ensure your toilet functions properly. A compromised seal can lead to a continuously running toilet due to water leakage from the tank to the bowl. Begin by turning off the water supply and draining the tank as described earlier. With the tank empty, check the flush valve seal at the bottom for any cracks, mineral buildup, or distortion. If the seal is damaged or worn out, it must be replaced.
Step 8: Final Testing and Adjustments
Once you have completed all the individual component checks and replacements, it’s time for final testing and adjustments to resolve the running toilet issue. Begin by turning the water supply back on and filling the tank. Observe the toilet closely as it fills to make sure no water is escaping into the overflow tube and that the water shuts off at the correct level. Perform several flushes to ensure that all the components are functioning smoothly and there are no signs of leaks or a running toilet.
During this testing phase, pay particular attention to how the toilet handle, fill valve, and flapper respond. If any of these components still exhibit instability, adjust them as necessary. It may involve slightly bending the float arm or re-tightening connections. Continue testing until the toilet operates efficiently without any continuous water flow.
Following these simple troubleshooting steps, you can quickly and efficiently resolve a running toilet problem without any prior plumbing knowledge or experience.
Conclusion
How to fix toilet that won’t stop running is a manageable task if approached methodically.
By systematically inspecting and addressing each key component—such as the flapper, fill valve, water level, flush handle, overflow tube, and flush valve seal—you can effectively identify the root of the problem and implement the necessary repairs. With careful adjustments and replacements, most running toilet issues can be resolved without needing professional intervention. Regular maintenance and timely inspections of these components can also prevent future issues, ensuring your toilet operates efficiently and conserves water in the long term.
With patience and attention to detail, you can maintain a smoothly functioning toilet, contributing to overall household efficiency and minimizing unnecessary water wastage.
About
Angela is the chief editor of Indoorense. She began her career as an interior designer before applying her strategic and creative passion to lifestyle and home.
She has close to 15 years of experience in creative writing and online content strategy for housekeeping and cleaning,home decorations as well as other efforts.
She loves her job and has the privilege of working with an extraordinary team. She lives with her husband, two sons, and daughter in Petersburg. When she’s not busy working she spent time with her family.