
Wallpaper has been around for centuries and is often used to give an interior space a unique look. Whether you’re looking to add a pop of color, make a statement with bold prints, or simply freshen up a room in your home, wallpaper can do the trick.
But sometimes after being installed, small bubbles may appear on the surface of the paper – not exactly what you had in mind! Don’t worry – fixing these bubbles doesn’t have to be difficult. In this blog post we’ll explain everything you need to know about how to fix bubbles in wallpaper so that your interior design project turns out just as perfect as it should be!
Recognizing the Common Issue of Bubbles Forming in Wallpaper
Wallpaper is often used in homes and businesses to add a decorative touch or create a more visually interesting space. Unfortunately, bubbles can sometimes form under the wallpaper after it’s been hung, leading to an unsightly appearance.
This common issue arises due to adhesive application or air bubbles getting trapped during installation. Fortunately, fixing this issue doesn’t have to be difficult. With the right approach, you can make your wallpaper look as good as new.
Understanding the Importance of Addressing Bubbles to Maintain the Appearance and Longevity of the Wallpaper
Maintaining the appearance and longevity of wallpaper is important in keeping a room looking great. Wallpaper can last for many years if it is properly taken care of, but over time, it may develop bubbles or wrinkles that detract from its original beauty. Addressing these issues promptly is key to preserving the look of wallpaper.
If left unchecked, air bubbles can lead to the wallpaper peeling away from the wall, and wrinkles can cause tears or rips in the paper. Taking steps to identify and address bubbles quickly is essential in preserving your wallpaper.
Identifying air bubbles can often be done with a visual inspection. Air bubbles appear as raised, puffy areas that distort the pattern of wallpaper. They are usually caused by trapped pockets of air or water underneath the paper, and are often related to improper installation. If bubbles appear in multiple spots on your wallpaper, it could indicate that the entire wall is not properly adhered. In this case, an experienced professional should be consulted for assistance in addressing the problem.
Once the source of bubbling has been identified, you can begin to work on a solution. Often, small bubbles can be repaired using a wallpaper smoothing tool or even the back of a spoon. You should apply pressure to the bubble from the center outward to help release any trapped air, instead of pushing it further into the wall.
10 Methods How to Fix Bubbles in Wallpaper
Method 1: Using a Small Needle or Pin
One of the easiest and quickest methods to fix small bubbles in wallpaper is by using a small needle or pin. Start by locating the bubble and gently insert the needle or pin at its edge. Be careful not to puncture the wallpaper excessively.
Once inserted, press the bubble down and squeeze out any trapped air. Smooth the wallpaper over the puncture with a clean cloth, and the bubble should disappear. This method works well for minor bubbles that haven’t spread extensively.
Method 2: Utilizing a Wallpaper Smoothing Tool
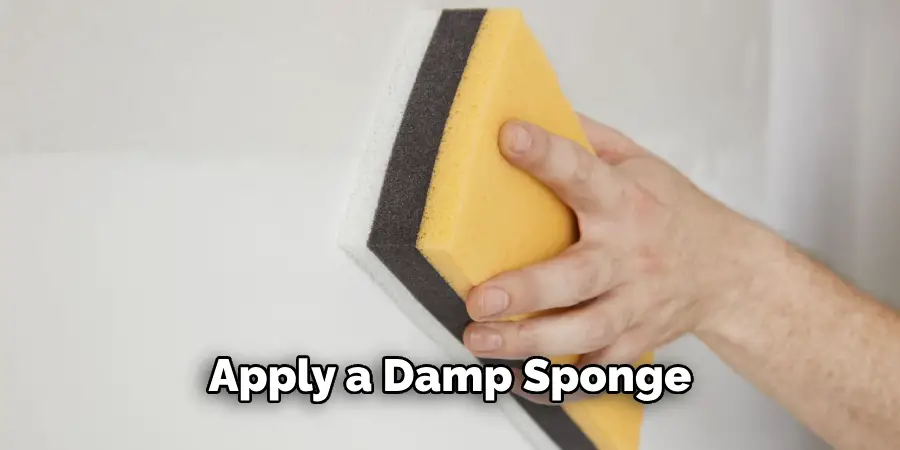
A wallpaper smoothing tool can be an effective solution for fixing bubbles that are slightly larger or more stubborn. Begin by dampening a clean cloth or sponge with warm water and apply it to the bubble. This will soften the adhesive behind the wallpaper.
Next, use the wallpaper smoothing tool to gently press the bubble down, starting from the center and working your way to the edges. Gradually smooth out the wallpaper, ensuring that all air bubbles are eliminated. Wipe away any excess moisture with a dry cloth and allow the wallpaper to dry completely.
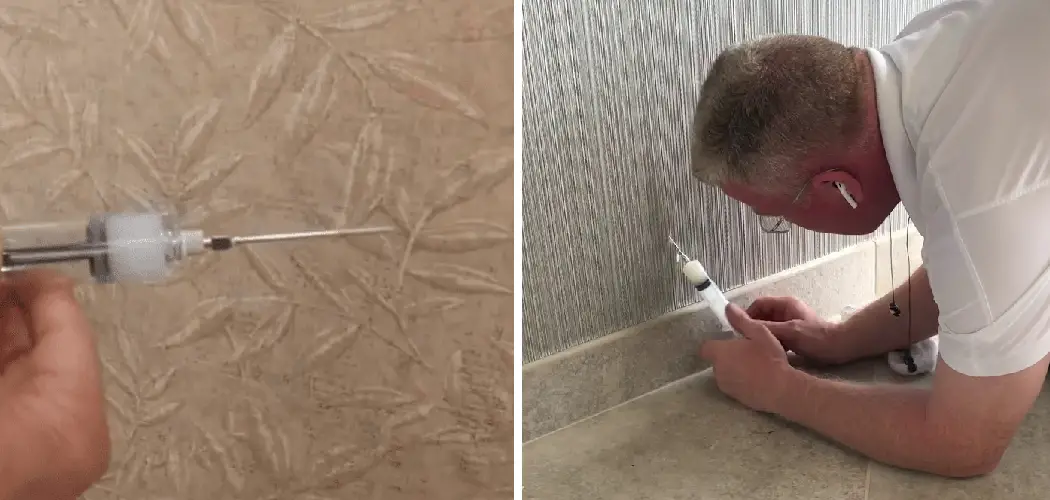
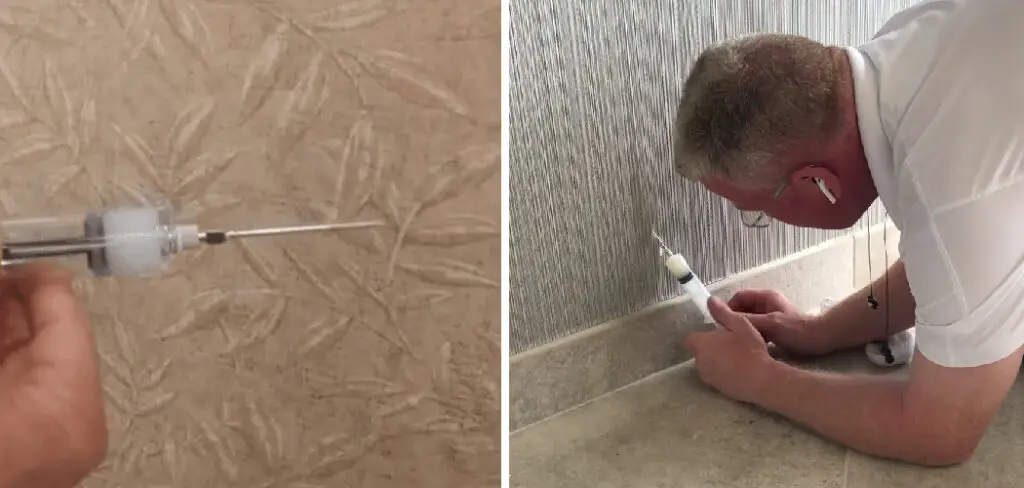
Method 3: Injecting Wallpaper Adhesive
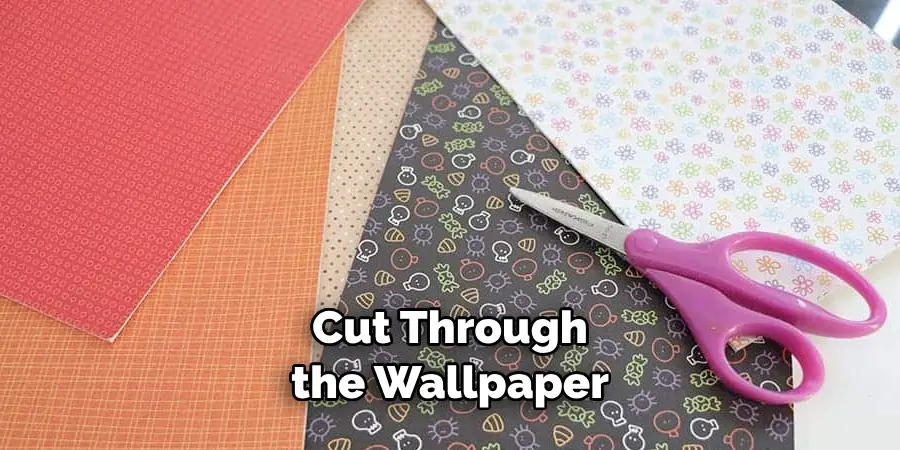
For persistent bubbles or bubbles that keep reappearing, injecting wallpaper adhesive can provide a long-lasting fix. Firstly, identify the bubble and use a small craft knife to make a tiny incision at its edge.
Be cautious not to cut through the wallpaper. Then, use a syringe to inject a small amount of wallpaper adhesive into the incision. Press the bubble down firmly, smoothing out the adhesive as you go. Wipe away any excess adhesive with a damp cloth and allow the repaired area to dry thoroughly.
Method 4: Applying Heat with a Hairdryer
In some cases, heat can help resolve wallpaper bubbles, especially if they are caused by trapped air or adhesive issues. Set your hairdryer to a low or medium heat setting and hold it approximately 6-8 inches away from the bubble. Gently warm the area by moving the hairdryer in a circular motion.
As the adhesive softens, press the bubble down with a clean cloth or wallpaper smoothing tool. Continue applying heat and pressure until the bubble is flattened. Be cautious not to overheat the wallpaper, as excessive heat may cause damage.
Method 5: Using a Wallpaper Perforator
If you are dealing with numerous bubbles across a large area of wallpaper, a wallpaper perforator can be a valuable tool. A wallpaper perforator creates tiny holes in the wallpaper, allowing air and moisture to escape and preventing new bubbles from forming.
Start by running the perforator across the bubbled area, ensuring even coverage. Once perforated, apply a damp sponge or cloth to the wallpaper, allowing moisture to penetrate. Use a wallpaper smoothing tool to press down and smooth out the bubbles. Wipe away any excess moisture and allow the wallpaper to dry thoroughly.
Method 6: Removing and Reapplying Wallpaper
In cases where the bubbles are extensive or persistent, removing and reapplying the wallpaper may be the most effective solution. Begin by carefully peeling back the wallpaper, starting from a corner or seam. Take your time to avoid tearing or damaging the wallpaper further.
Once removed, inspect the wall surface for any imperfections or residue. Repair any damage and ensure the surface is smooth and clean before applying new wallpaper. Follow the manufacturer’s instructions for applying the new wallpaper, making sure to eliminate air bubbles during the installation process.
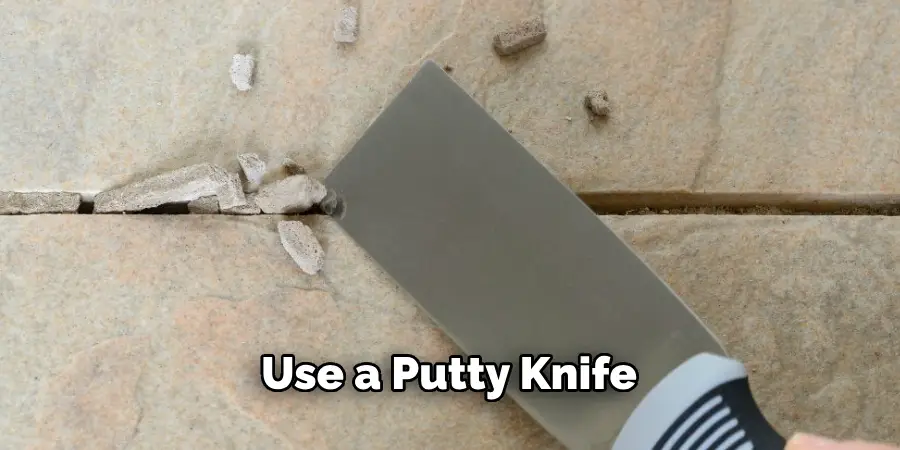
Method 7: Using a Wallpaper Steamer
A wallpaper steamer is a powerful tool for removing and fixing bubbles in wallpaper, particularly when dealing with older or stubbornly adhered wallpaper. Fill the steamer with water according to the manufacturer’s instructions and allow it to heat up.
Hold the steamer against the bubbled area for a few seconds, allowing the steam to penetrate the wallpaper. Use a putty knife or wallpaper scraper to gently lift the wallpaper and remove any adhesive residue. Smooth out the wallpaper with a wallpaper smoothing tool, pressing down to eliminate bubbles. Clean the wall surface and allow it to dry before reapplying or replacing the wallpaper.
Method 8: Applying Wallpaper Seam Repair Adhesive
When bubbles occur at wallpaper seams, a specialized seam repair adhesive can provide an effective fix. Begin by locating the seam bubble and carefully lift the loose wallpaper. Apply a small amount of seam repair adhesive to a clean brush or sponge and spread it evenly along the seam.
Press the wallpaper down firmly, ensuring a secure bond. Wipe away any excess adhesive with a damp cloth and allow the repaired area to dry thoroughly. This method is particularly useful for bubbles that occur at joints, edges, or corners of wallpaper.
Method 9: Seeking Professional Help
If you’ve tried various DIY methods without success or if you’re dealing with particularly delicate or expensive wallpaper, it may be best to seek professional assistance. Professional wallpaper installers have the expertise, tools, and experience to tackle stubborn bubbles effectively.
They can assess the situation, determine the cause of the bubbles, and provide appropriate solutions to ensure a flawless wallpaper finish. Hiring professionals can save you time, effort, and potential damage to the wallpaper or underlying wall surface.
Method 10: Preventive Measures for Future Bubbles
Once you have all the existing bubbles removed, it is important to take preventative measures to avoid future bubbling. Be sure that the wall surface is clean and free from any dust, dirt, or grease before applying wallpaper adhesive. You can also consider using a primer over the wall surfaceto ensure that your wallpaper adheres properly.
It’s best to use a high-quality adhesive that is designed specifically for wallpaper to ensure the best results. Make sure you are using the right amount of paste when gluing your wallpaper to the wall. If there isn’t enough adhesive, it won’t bond correctly and may cause bubbling in the future.
Conclusion
To recap, fixing bubbles in wallpaper can seem like a daunting task. However, with the right tools and knowledge, it doesn’t need to be so rough. Make sure to have all of the necessary materials handy before you start and take your time when you’re handling the paper. If you’re really still stumped about how to deal with stubborn bubbles, hiring an expert might be your best bet.
After all, they will be able to provide professional guidance on what to do. In any case, don’t let unsightly bubbles ruin your beautiful walls; take action now by following these simple steps to get rid of those pesky bumps. With that being said, now that you know how to fix bubbles in wallpaper confidently tackle repairs around your home and enjoy having smoother walls in no time!
Rick is a handyman who grew up helping his dad with his business. He learned a lot from him about how to fix things, and also about how to work hard and take care of business. These days, Rick is still into fixing things- only now, he’s doing it for a living.
Rick is always looking for new ways to help people grow and develop. That’s why he started contributing to this blog: to share all his experience and knowledge so that he can help people who are interested in DIY repair.