
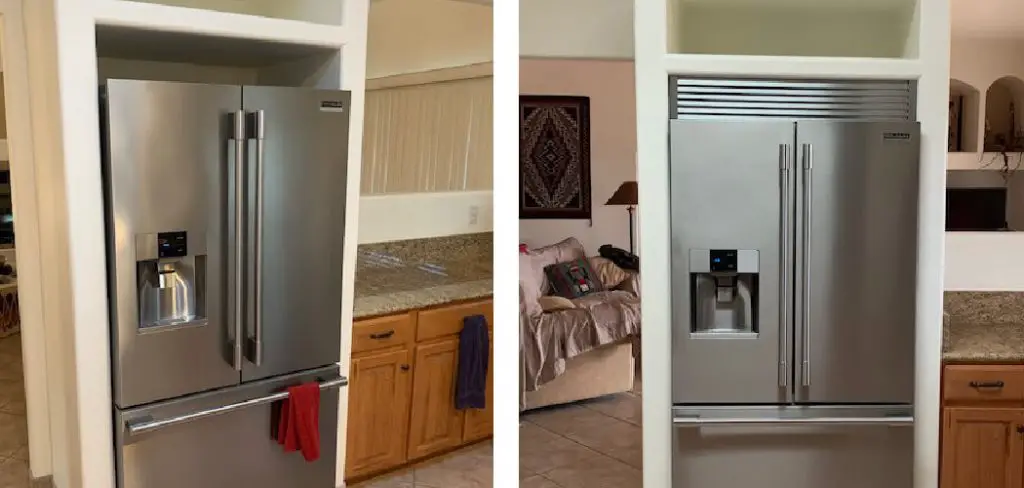
Gaps between a fridge and the wall are a common issue in many households and can lead to many problems if not properly addressed. These spaces not only detract from the overall aesthetic of your kitchen but also provide an unwanted area for dust and debris to accumulate, potentially affecting air quality. In addition, these gaps may result in reduced energy efficiency, as cool air can escape, causing the refrigerator to work harder and increase electricity bills.
Addressing these issues is crucial for maintaining a clean and efficient kitchen environment. There are various methods available on how to fill gap between fridge and wall, ranging from using gap fillers and adjustable panels to utilizing DIY solutions like foam tubing or creative shelving. Each method offers a unique solution to effectively seal the gap and enhance your kitchen space’s functionality and appearance.
Assessing the Gap Size and Type
Before you can effectively fill the gap between your fridge and the wall, you must accurately assess the size and type of gap you are dealing with. Proper measurement and understanding of the gap will ensure that you choose the most suitable method to address the issue.
Measuring the Gap
First, grab a tape measure and measure the gap’s width and depth. Start by measuring the widest part of the gap at the front, and then work your way to the back to see if the gap tapers off or remains consistent. Note any variations in width, as this might influence the type of filler you use.
Measuring the depth will determine how far behind the fridge the gap extends, which is particularly important if you are considering using a physical barrier to fill the space. Knowing these dimensions will help you choose the right materials and avoid further complications during installation.

Additionally, assess whether the gap is uniform along the length of the fridge or if it varies at different points. A uniform gap may suggest an issue related to appliance size or installation, while a variable gap could indicate settlement or shifts in the structure of your house. Use a spirit level to check if the floor or wall is level, as uneven surfaces can contribute to varying gap sizes. Getting a clear picture of the gap’s dimensions will greatly aid in selecting a method to appropriately fill it.
Determining the Gap’s Cause
Understanding why the gap exists in the first place is equally important. There are several potential causes to consider, including the size of the fridge itself. A fridge that is too small for the designated space is a common reason for noticeable gaps. Similarly, errors during installation, such as failing to align the appliance properly or not accounting for surround cabinetry, can create gaps. Furthermore, the gradual settling of the house over time may also be responsible. Structural shifts can lead to spaces developing between fixed points as homes age.
In some cases, the gap could combine these factors, necessitating a thorough investigation. Knowing the cause will guide you in choosing the best remedy. For instance, adjusting the fridge’s position or alignments may suffice if the gap results from installation errors. Conversely, if the house’s settling is the culprit, a more permanent barrier solution may be necessary. A comprehensive understanding of the gap’s nature will empower you to select the optimal method for sealing the gap effectively, thus ensuring that your kitchen remains efficient and aesthetically pleasing.
How to Fill Gap Between Fridge and Wall: Using Filler Strips or Trim
Filling the gap between your fridge and the wall with filler strips or trim is an effective way to maintain a seamless kitchen appearance while improving practicality. This section focuses on selecting the appropriate materials and guides you through installation.
Selecting the Right Filler Strips
When choosing filler strips, consider materials like wood, plastic, or foam. Wood strips offer a sturdy and traditional look and can be stained or painted to match the rest of your cabinetry. However, they require more maintenance compared to other materials. Plastic strips are durable and moisture-resistant and come in diverse finishes and colors, making them an excellent match for different kitchen styles. Though less durable, foam strips provide an easy-to-handle option and can be an excellent choice for irregular gaps due to their flexibility.

The choice of color and finish for your filler strips should complement your kitchen decor. If your kitchen furniture has a particular shade or finish, try to match or coordinate with it when selecting your strips. Stainable wood can be customized to fit a variety of tones, while plastic options might offer limited color choices, making it advisable to focus on neutral shades that do not clash with the existing decor.
Installation Process
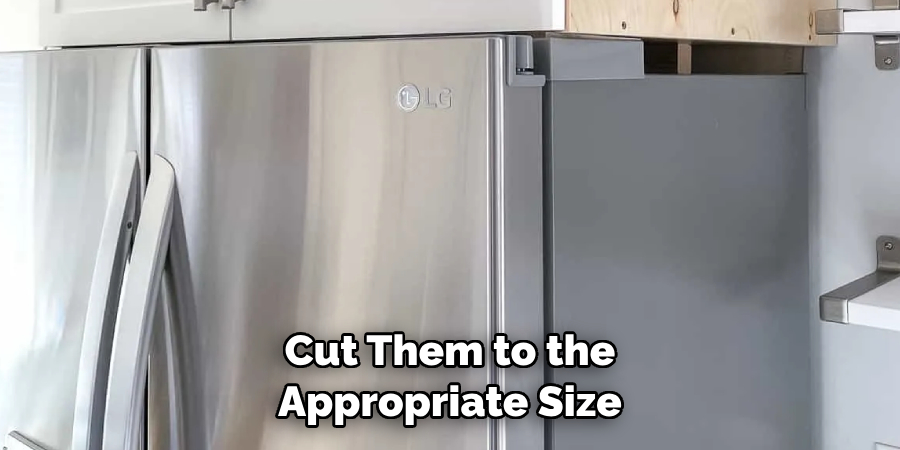
Once you have selected your filler strips, you must cut them to the appropriate size. Begin by measuring the dimensions of the gap once again to ensure precision. Then, cut the strips to the required length and width using a miter saw or hand saw. Take care to make straight and clean cuts, as this will affect the final appearance and fit.
After cutting, attach the strips to either the wall or the fridge. If you are affixing the strips to the wall, you might wish to use construction adhesive for a clean look without visible hardware. Alternatively, screws provide a more secure attachment if the strip spans a larger gap. When attaching directly to the fridge, consider using adhesive strips to avoid possible damage to the refrigerator’s surface.
To enhance the installation’s appearance and longevity, finish by caulking the edges. Caulking seals any remaining minor gaps and provides a polished, seamless look. Opt for a caulk that matches the color of the filler strips or the surrounding wall for improved aesthetics. Ensure you apply a smooth bead of caulk along the edges and smooth it with a caulk finishing tool or your finger for a clean finish. Allow the caulk to dry completely according to the manufacturer’s instructions to ensure optimal durability and appearance.
By following these steps, you can effectively fill the gap between your fridge and the wall, contributing to your kitchen’s beauty and functionality.
How to Fill Gap Between Fridge and Wall: Employing Foam Gap Fillers
Using foam gap fillers can be a convenient and effective solution for addressing the space between your fridge and the wall. Foam fillers come in various types, including pre-cut adhesive foam strips and expandable foam options. Pre-cut adhesive foam strips are often available in standard sizes, making them an easy choice for quick installations.
Meanwhile, expandable foam fillers can be tailored to fit irregular or larger gaps, offering versatility for a range of scenarios. Both types of foam fillers provide notable benefits, such as improved energy efficiency and enhanced soundproofing. By reducing drafts and minimizing air exchange, foam fillers help maintain a consistent temperature, thereby potentially reducing energy costs. Additionally, they can absorb sound, contributing to a quieter kitchen environment.
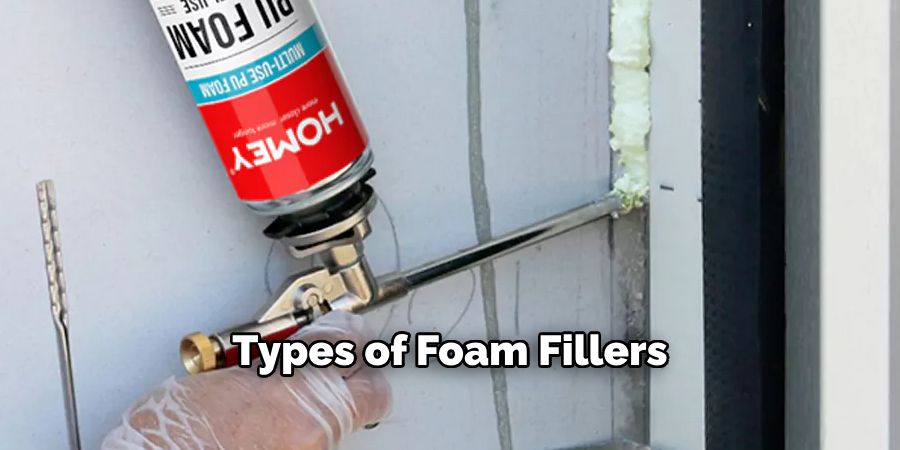
Types of Foam Fillers
- Pre-cut Adhesive Foam Strips: These strips are designed for straightforward application and are typically available in various thicknesses and densities. Their adhesive backing simplifies installation, making them an excellent option for users seeking a user-friendly solution.
- Expandable Foam: Often sold in spray cans, this type of foam expands after application to fill larger or irregularly shaped gaps. It requires more precise handling but offers superior adaptability for unique spacing scenarios.
Benefits of Foam Fillers
Using foam fillers isn’t just about filling gaps; it also promotes energy efficiency by limiting air leaks, thereby maintaining indoor temperature. This attribute can help lower heating and cooling bills, highlighting their economic advantage. Furthermore, foam fillers can act as soundproofing agents, absorbing ambient noise, which adds to a more serene kitchen space.
Installation Steps
- Cleaning the Area: Before applying any foam filler, it is crucial to thoroughly clean the area around the gap. Remove any dust, grease, or debris to ensure maximum adhesion. Use a mild detergent and water solution to wipe the surfaces, and allow them to dry completely before proceeding.
- Cutting the Foam: Measure the gap carefully to determine the needed length and width of the foam. If using pre-cut strips, trim them as necessary with sharp scissors or a utility knife for a precise fit. For expandable foam, use the applicator to guide the foam into the gap, expanding it as needed.
- Applying the Foam: For pre-cut strips, peel off the adhesive backing and press firmly onto the surface, ensuring it fits snugly. Be mindful of alignment to maintain a neat finish. If using expandable foam, apply it gradually, filling the gap uniformly. Allow it to expand and settle, cutting away any excess after it has fully cured.
By following these steps, you can successfully employ foam gap fillers to address gaps around your fridge, benefiting both the aesthetic and practical aspects of your kitchen space. Whether improving energy efficiency or enhancing sound insulation, foam fillers offer a simple yet effective solution to common household challenges.
Using Cabinetry or Furniture Solutions
Exploring cabinetry or furniture solutions can provide an elegant and functional approach to filling the gap between your fridge and the wall. One option is to build or install cabinetry or shelving units that not only bridge the gap but also add extra storage capability to your kitchen. These solutions can be custom-built to match existing kitchen cabinetry, ensuring a seamless appearance that complements your kitchen’s decor.
Building or Installing Cabinetry
When considering this option, it’s important to plan how you can integrate new cabinetry with your existing setup. Start by measuring the gap dimensions and the available space, ensuring the new element fits perfectly without disrupting kitchen flow. You might choose to work with a professional cabinet maker to build a custom unit tailored to your preferences and kitchen design, including selecting materials and finishes that harmonize with your existing cabinetry.

If you opt to take on this project as a DIY, obtain the basics in cabinetry construction, such as selecting the right wood, hardware, and tools. Consider features such as pull-out shelves or vertical dividers for storing baking sheets and cutting boards. Remember to secure the cabinetry adequately to prevent tipping or shifting, especially if heavy items are stored.
Using a Decorative Panel or Plinth
Alternatively, a decorative panel or plinth can enhance the kitchen’s aesthetics while eliminating the gap. A decorative panel can be custom-designed from a range of materials, such as wood, metal, or laminated panels, to match or accent existing kitchen features. It should be lightweight for easy installation and removal and essential for cleaning or adjustments.
Install a plinth or kickboard in a material that coordinates with your lower cabinetry or floor design. The plinth fills the gap and provides a neat, finished look to the base of your cabinetry, defining the space clearly.
Project success hinges on precision during installation—ensure each panel is aligned accurately with adjacent units. Properly finished edges and a solid fit will make the gap filler look like an integral part of your kitchen design, rather than an afterthought. Whatever solution you choose, by integrating cabinetry or furniture options, you not only resolve the gap issue but enhance both the beauty and functionality of your kitchen space.

Conclusion
Addressing the issue of how to fill gap between fridge and wall is crucial for maintaining both the functionality and aesthetic appeal of a kitchen. Filling these gaps can significantly enhance energy efficiency by preventing drafts and reducing energy costs. Whether enhancing soundproofing or improving cleanliness by preventing debris accumulation, each method offers distinct advantages. Choosing a solution that fits your preferences, budget, and kitchen design is essential.
Options such as foam fillers provide a swift, cost-effective solution, while custom cabinetry offers a more integrated, elegant approach. Ultimately, finding the right method for bridging this gap not only resolves practical concerns but also contributes to the overall harmony and utility of your kitchen space, creating a more pleasant environment for daily activities. You can enjoy a more cohesive and efficient kitchen setup by thoughtfully considering the best approach.
About
Angela is the chief editor of Indoorense. She began her career as an interior designer before applying her strategic and creative passion to lifestyle and home.
She has close to 15 years of experience in creative writing and online content strategy for housekeeping and cleaning,home decorations as well as other efforts.
She loves her job and has the privilege of working with an extraordinary team. She lives with her husband, two sons, and daughter in Petersburg. When she’s not busy working she spent time with her family.