
Are you tired of the same old scent from your Scentsy warmer? Do you want to change it up and try something new? Changing Scentsy wax is simple and easy – follow these steps to get started.
Changing your Scentsy wax regularly helps maintain a fresh and inviting atmosphere in your home. Scentsy warmers use specially formulated wax that releases fragrance without the need for an open flame, making them a safe and convenient alternative to traditional candles.
In this guide on, we’ll walk you through the simple steps on how to change Scentsy wax, ensuring you can continue to enjoy your favorite scents without interruption. Whether you’re a seasoned Scentsy user or new to the experience, these tips will help you easily refresh your space.
What Will You Need?
To successfully change your Scentsy wax, you will need the following materials:
- A new bar of Scentsy wax in your desired scent
- A clean and dry cloth or paper towel
- An empty Scentsy warmer
Make sure to have these items on hand before beginning the process. This will save you time and allow for a smooth transition to your new scent.
8 Easy Steps on How to Change Scentsy Wax
Step 1: Turn Off and Unplug Your Scentsy Warmer
The first step to changing your Scentsy wax is to turn off your Scentsy warmer and unplug it from the electrical outlet. This is crucial for safety reasons, as dealing with a hot device or wax can lead to burns or injury. Ensure the warmer has completely cooled down before you proceed to the next step. The device might take a few minutes to cool, so be patient and avoid touching the warmer until it’s safe.
Step 2: Remove the Old Wax
Once your Scentsy warmer has cooled down, it’s time to remove the old wax. There are a couple of methods to do this:
- Cotton Ball Method: Place a few cotton balls into the melted wax. The cotton balls will quickly absorb the wax, making it easy to remove without any mess.
- Freezer Method: Alternatively, you can place the warmer dish in the freezer for about 10 to 15 minutes. The wax will harden and shrink, allowing you to easily pop it out in one solid piece.
Choose the method that works best for you and proceed to remove the old wax completely.
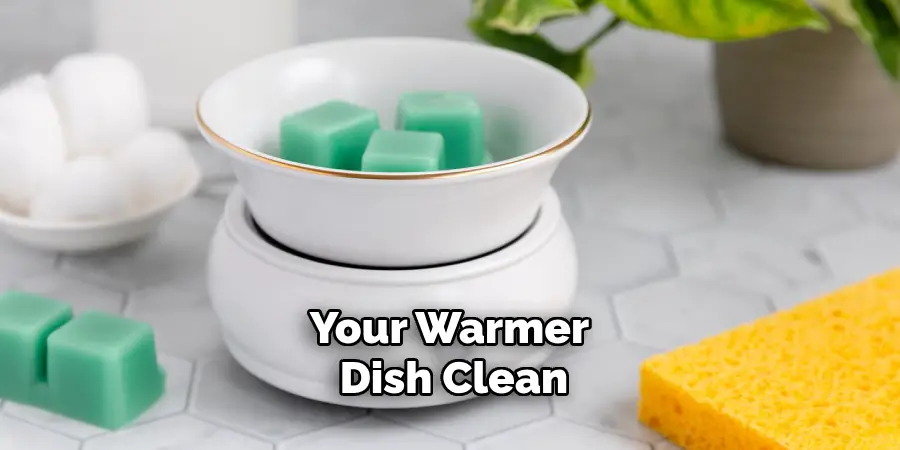
Step 3: Clean the Warmer Dish
After removing the old wax, cleaning the warmer dish is essential to ensure no residue is left behind. Any leftover wax or residue can mix with your new scent, potentially altering the fragrance. Here’s how you can clean your warmer dish effectively:

- Wipe with a Cloth or Paper Towel: Use a clean and dry cloth or paper towel to thoroughly wipe the inside of the warmer dish. This will remove any leftover wax and ensure the dish is ready for the new wax. For stubborn residue, dip the cloth in warm, soapy water, gently clean the dish, and then dry it completely before use.
- Use Dish Soap: If you prefer a more thorough cleaning, you can wash the warmer dish with mild dish soap and warm water. Be sure to rinse it well to remove any soap residue and dry it completely before placing it back on the warmer.
Ensuring the dish is clean and dry before adding new wax will help maintain the integrity of the new scent and keep your Scentsy warmer in optimal condition.
Step 4: Break Off a Cube of New Scentsy Wax
With your warmer dish clean and ready, it’s time to prepare your new Scentsy wax. Scentsy bars are divided into individual cubes, making it easy to portion out the wax. To do this:
- Open the Package: Remove the packaging from your new Scentsy bar.
- Snap Off a Cube: Gently snap off one or two cubes of wax, depending on the size of your warmer and your scent preference. One cube is usually enough for smaller warmers, while larger warmers may require two cubes for a more intense fragrance.
Don’t mix different scents in the same dish for the best results, as this can create an unpredictable fragrance.
Step 5: Add the New Wax to the Warmer Dish
Once your wax cubes are ready, place them into the clean, warmer dish. Depending on the formulation, the wax might take a few minutes to melt and release its fragrance.
- Place in the Warmer Dish: Carefully place the wax cubes into the center of the warmer dish.
- Avoid Overfilling: Make sure not to overfill the dish, as too much wax can spill over the sides once it melts.
Now you’re ready to enjoy your new scent!
Step 6: Turn On the Warmer and Plug It In
With the new wax cubes in place, it’s time to turn on your Scentsy warmer and enjoy the refreshed fragrance in your space.
- Plug It In Connect the warmer to an electrical outlet.
- Turn On the Warmer: Switch on the warmer using the power button or switch.
The warmer will begin to heat up gradually, melting the wax and releasing the fragrance throughout your room. Allow a few minutes for the scent to fully disperse and enjoy!
Continuing through the remaining steps will ensure you are properly maintaining your Scentsy warmer and enjoying an inviting atmosphere in your home.
Step 7: Monitor the Fragrance

As your Scentsy wax melts and releases its fragrance, it’s important to periodically monitor the intensity of the scent in your space. Some fragrances may become more pronounced over time, while others might fade. If you find the scent too strong, you can try reducing the wax used next time. Conversely, if the fragrance is too subtle, add an extra wax cube or switch to a more potent scent.
- Adjust Wax Quantity: You can adjust the number of wax cubes you use based on your preference. For a lighter fragrance, use one cube; for a stronger aroma, try adding a second cube.
- Consider Ventilation: The level of ventilation in your room can affect the fragrance. Proper airflow can help distribute the scent more evenly.
Regularly checking on the fragrance strength ensures that your home remains pleasantly scented and matches your desired ambiance.
Step 8: Maintain Your Warmer
To ensure your Scentsy warmer continues to function effectively and safely, it’s essential to perform regular maintenance. Over time, dust and residue can accumulate on the warmer, potentially affecting its performance and the quality of the fragrance. Here’s how to maintain your warmer:
- Regular Cleaning: Periodically wipe down the exterior of your warmer with a soft, damp cloth to remove any dust or buildup. Make sure the warmer is unplugged and cooled down before cleaning.
- Check the Bulb: If your warmer uses a bulb, ensure it is still in good working condition. A dim or non-functioning bulb may need to be replaced to maintain the warmer’s efficiency.
- Inspect the Cord: Look over the power cord for any signs of wear or damage. If you notice any fraying or exposed wires, discontinue use and replace the cord immediately to avoid any safety hazards.
By keeping your warmer clean and in good repair, you can enjoy optimal performance and safety while extending the life of your Scentsy products.
With these steps, you can confidently maintain your Scentsy warmer and enjoy continuous fragrance in your space.
5 Things You Should Avoid

- Avoid Using Sharp Objects: Never use knives, screwdrivers, or other sharp tools to remove the wax, which can damage the warmer dish or cause injury.
- Avoid Mixing Scents: Mixing different wax scents can be unpleasant. Always clean out the previous wax completely before adding a new scent.
- Avoid Letting Wax Overflow: Overfilling the dish with too much wax can cause it to spill over when it melts, creating a mess that is difficult to clean.
- Avoid Leaving Wax Residue: Make sure to thoroughly clean the dish of any leftover wax residue before adding new wax to ensure the best fragrance throw.
- Avoid Direct Heat Sources: Do not place the warmer near direct heat sources like stoves or radiators, as it can cause the wax to melt unevenly or pose a fire hazard.
Avoiding these common mistakes can ensure a safe and enjoyable experience with your wax warmer.
What are the Benefits of Using Scentsy Wax?
- Safe and Flameless: Unlike traditional candles, Scentsy wax is heated using a low-watt light bulb or heating element, making it a safer alternative to open flames.
- Long-lasting Fragrance: Scentsy wax can last for hours, providing consistent and long-lasting fragrance throughout your space.
- Variety of Scents: With a wide range of scents available, you can choose from seasonal, classic, or unique fragrances to suit your mood and ambiance.
- Easy to Use: Warming Scentsy wax is straightforward and can be done quickly without any special tools or skills.
- Customizable Fragrance Levels: You can adjust the amount of wax used to control the intensity of the fragrance in your space.
- Eco-friendly: Scentsy wax is made from food-grade paraffin wax, making it a more environmentally friendly option than traditional candles from petroleum-based wax.
All these benefits make using Scentsy wax an attractive and practical choice for adding fragrance to your home. Give it a try and see the difference for yourself!
Conclusion
How to change scentsy wax is a straightforward process that, when done correctly, can enhance your experience and prolong the life of your warmer.
Begin by turning off and unplugging the warmer to allow the wax to cool slightly, then use the edge of the dish to remove the hardened wax disc. If any residue remains, clean the dish with warm, soapy water and dry it thoroughly before adding a new scent. Keeping the warmer dish clean and avoiding common pitfalls ensures optimal fragrance distribution and safety.
Enjoy experimenting with different scents, knowing you follow the best practices for a lasting and pleasant aromatherapy experience.
About
Angela is the chief editor of Indoorense. She began her career as an interior designer before applying her strategic and creative passion to lifestyle and home.
She has close to 15 years of experience in creative writing and online content strategy for housekeeping and cleaning,home decorations as well as other efforts.
She loves her job and has the privilege of working with an extraordinary team. She lives with her husband, two sons, and daughter in Petersburg. When she’s not busy working she spent time with her family.