

If you’re tired of water and dirt infiltrating the crevice between your tile flooring and baseboards, it may be time to learn how to caulk the gap. Not only can caulking provide occupants with a more attractive interior space, but it also keeps dampness from seeping in which can cause permanent damage down the road.
And although caulking seems like a daunting task that requires specialized tools, many materials are available to make this job even easier for homeowners who are willing to get their hands dirty!
In this blog post about how to caulk baseboards to tile floor, we’ll discuss why and how caulking works – what supplies you need so you won’t have any surprises mid-job – plus tips on achieving professional results each time.
Read on to find out everything you need to know about successfully completing your own tile-to-baseboard junction caulking project!
Importance of Caulking Baseboards to Tile Floors
Caulking baseboards to tile floors is an important step in finishing the installation of a new floor. Properly caulked joints around the perimeter of the floor will prevent water from seeping underneath the baseboard trim and damaging subflooring, as well as help reduce air infiltration that can lead to drafts.
In addition, a properly caulked joint will help protect against dirt and dust buildup along the edge of the tile and provide a more polished look for your finished floor. Finally, it helps ensure that your tile floor is soundly secured to its substrate so it doesn’t shift or move under foot traffic. For all these reasons, it’s important to caulk your baseboards correctly when installing any type of tile flooring.
When caulking baseboards to tile floors, it’s important to use the right type of caulk. Latex and silicone-based caulk are both suitable for this application; however, latex caulk is generally easier to work with and can be painted over if needed. Additionally, make sure that you use a high-quality caulk designed specifically for tiles. Using the wrong kind of caulk can lead to cracks or gaps forming around the edge of your tile floor, which will not only look unsightly but may also lead to serious water damage down the road.
Overview of the Caulk Application Process
Caulking is an important step in protecting your tile floors from water damage. It seals the gap between the baseboard and tile floor, preventing moisture from seeping into the wall or structure behind it. To apply caulk correctly, you’ll need to prepare the surface, choose a type of caulk that’s suitable for the type of material you’re working with, make sure all necessary tools are on hand, and complete several key steps during application.

Before starting any work on the baseboards, make sure they are clean and dry so that the caulk adheres properly. Use a damp cloth to remove dirt or dust particles that may have settled on them; this will help ensure maximum effectiveness of the sealant. You should also remove any old caulk that may have been used before.
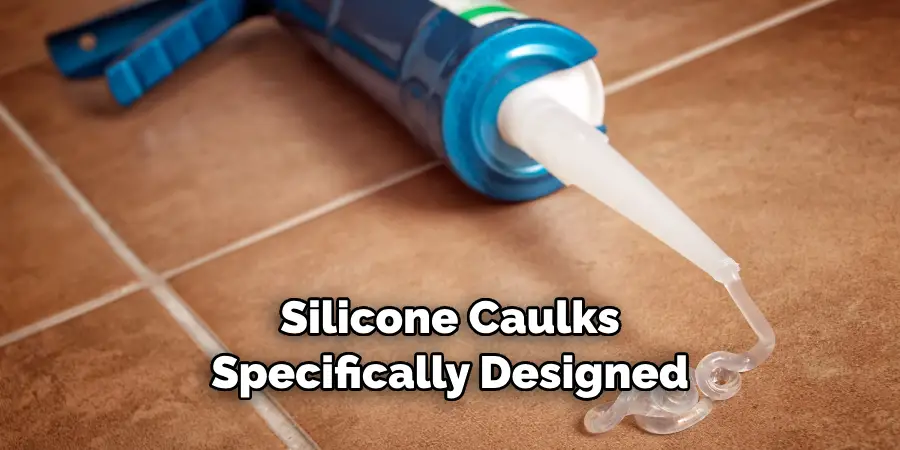
When choosing a type of caulk, make sure to select one specifically designed for use on baseboards and tile floors. Silicone or latex-based caulks are generally recommended; be aware that silicone forms a more watertight seal but is more difficult to work with than latex caulk.
Gather the necessary tools for completing the task: a utility knife, paint scraper, foam brush, cleaning rags, and caulk gun. You’ll likely need other items depending on how you plan to apply the caulk — such as painter’s tape, masking tape, or plastic sheeting — so make sure those are accessible as well.
Types of Caulk Suitable for Baseboards and Tile Floors
Caulking is a great way to seal the gap between baseboards and tile floors, providing both an aesthetic and functional finish. There are several different types of caulk available for this purpose, each offering its own unique benefits.
Siliconized Acrylic Latex Caulk is one popular choice for baseboard caulking. It is easy to use, applies smoothly, and can be painted over once it has cured. It’s also relatively inexpensive compared to other options.
Another good option is Polyurethane Caulk (also known as “urethane” or “elastomeric”). This type of caulk offers superior flexibility when compared with siliconized acrylic latex caulk, so it is ideal for use in areas that may experience expansion and contraction due to temperature changes. It is also highly water-resistant, making it suitable for rooms or outdoor areas with high humidity levels.
Finally, there are Silicone Caulks specifically designed for use around tile floors and baseboards. These caulk types offer superior flexibility and durability compared to other options, making them a popular choice when sealing gaps between tiles and baseboards. However, they can be difficult to apply due to their thick consistency, so it’s best left to the professionals if you’re not confident with your DIY skills.
10 Methods How to Caulk Baseboards to Tile Floor
Method 1: Gather the Necessary Tools and Materials
Before you begin caulking, gather all the tools and materials you’ll need. This includes a caulking gun, caulk, a putty knife, a utility knife, painter’s tape, a damp cloth, and a vacuum cleaner.
Caulking guns come in a variety of shapes and sizes. Choose one that feels comfortable to use and is large enough to hold the tube of caulk you’ll be using. Make sure the gun has a smooth trigger action and is designed to accommodate your type of caulk.
Method 2: Prepare the Area
Thoroughly clean the baseboards and the tile floor to remove any dust, debris, or existing caulk. Use a vacuum cleaner to ensure a clean surface. Wipe down the area with a damp cloth to remove any remaining residue.

Method 3: Apply Painter’s Tape
To protect the walls and the tile surface, apply painter’s tape along the edges of the baseboards and the floor. This will create a clean line and prevent any excess caulk from spreading onto unwanted areas. Make sure to press the tape down firmly so that it adheres well. However, be careful not to pull the tape too tight or it might leave an imprint in the caulk line.
Method 4: Choose the Right Caulk
Select a caulk that is suitable for the materials you are working with, such as a silicone or acrylic caulk. Ensure that the caulk is color-matched to the baseboards or the tile for a seamless finish. Read the instructions on the caulk tube to check if it is suitable for your tiles and baseboards.
However, for best results, opt for a caulk adhesive specially formulated for the bathroom. This will help ensure that your baseboards and tile floor are waterproof and sealed for protection against mildew and mold.
Method 5: Load the Caulking Gun
Insert the caulk tube into the caulking gun and cut the tip of the tube at a 45-degree angle using a utility knife. Make a small cut to ensure a controlled flow of caulk. Most caulk tubes have a sharp nozzle that allows for an easy cut.

Pull the trigger of the caulking gun until you feel resistance and the plunger rod is seated against the caulk tube. This prepares the gun for consistent application.
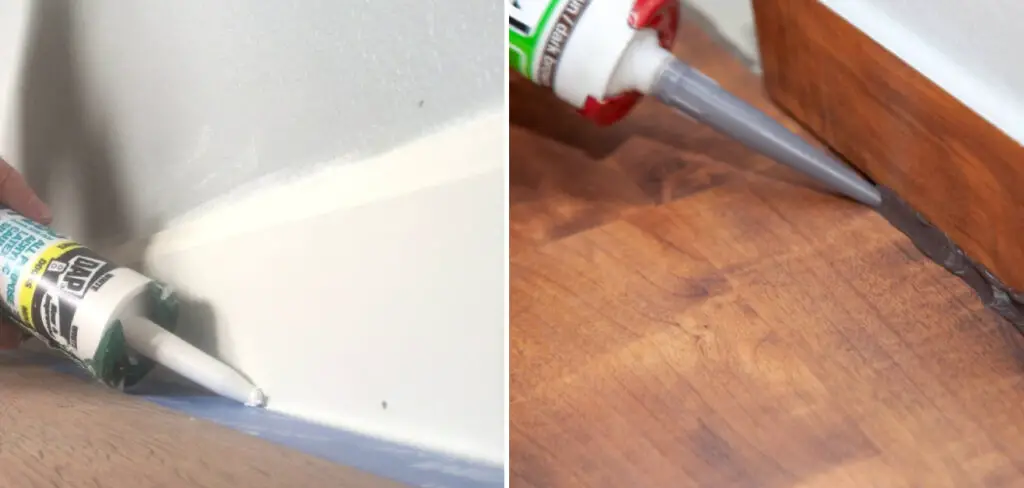
Method 6: Start Caulking
Hold the caulking gun at a 45-degree angle and apply a thin and consistent bead of caulk along the joint between the baseboard and the tile. Work in small sections to ensure the caulk doesn’t dry before smoothing it out. Use your finger and a damp cloth to smooth out the caulk. Start at one end of the joint and work your way down, pressing and wiping the caulk in one direction.
Method 7: Smooth the Caulk
After applying the caulk, use a putty knife or your finger to smooth and spread the caulk along the joint. Press firmly to ensure proper adhesion and create a neat finish. Wipe off any excess caulk with a damp cloth.
Method 8: Remove the Painter’s Tape
Before the caulk dries completely, carefully remove the painter’s tape at a 45-degree angle. This will help create a clean line and prevent the caulk from peeling off with the tape.
Method 9: Allow the Caulk to Dry
Caulk drying times can vary depending on the product and environmental conditions. Read the manufacturer’s instructions for the recommended drying time. Avoid touching or disturbing the caulk until it is fully dry.
Method 10: Inspect and Touch Up
Once the caulk is dry, inspect the joint between the baseboard and the tile. If any gaps or imperfections are present, reapply caulk as needed. Use a damp cloth to remove any smudges or residue from the tile.
Conclusion
Caulking baseboards to tile floor is an easy and cost-effective way to seal your floors and keep them looking great. The process requires patience, attention to detail, and a few tools but with these steps you should get the job done correctly in no time. Be sure to keep safety as a top priority when completing this project – always wear protective gear and use caution.
With just a bit of hard work, you can ensure that your home will retain its value and last for years to come. So why wait? Get started today on how to caulk baseboards to tile floor and reap the rewards of doing it right!
About
Angela is the chief editor of Indoorense. She began her career as an interior designer before applying her strategic and creative passion to lifestyle and home.
She has close to 15 years of experience in creative writing and online content strategy for housekeeping and cleaning,home decorations as well as other efforts.
She loves her job and has the privilege of working with an extraordinary team. She lives with her husband, two sons, and daughter in Petersburg. When she’s not busy working she spent time with her family.